¿Qué estás dibujando? or “What are you drawing?” is an information gap activity I developed to utilize Google Drawings in the World Language classroom. This activity would involve pairs of students creating images of various vocabulary words from a unit and having their partner guess what they are drawing. This activity could be used in any world language class as a fun way to engage students in vocabulary practice.
Instructions for Students:
1.) Students will be grouped into pairs.
2.) Students will receive a list of vocabulary words from their current unit.
3.) Student 1 will be using Google drawings to create a visual representation of the vocabulary word while Student 2 guesses what it is while they are drawing, Student 1 can provide details as they draw but all communication must be in Spanish!
4.) Once the vocabulary word is guessed students will trade roles and repeat.
Here is the worst drawing of a house ever seen:
The student would guess “una casa” and then switch roles for the next vocabulary word.
For my activity I created an art history activity for a European or World history class. This would be for high school students, depending on what year they study European or World history. This activity focus on a general overview of art history though 5 historical art period.
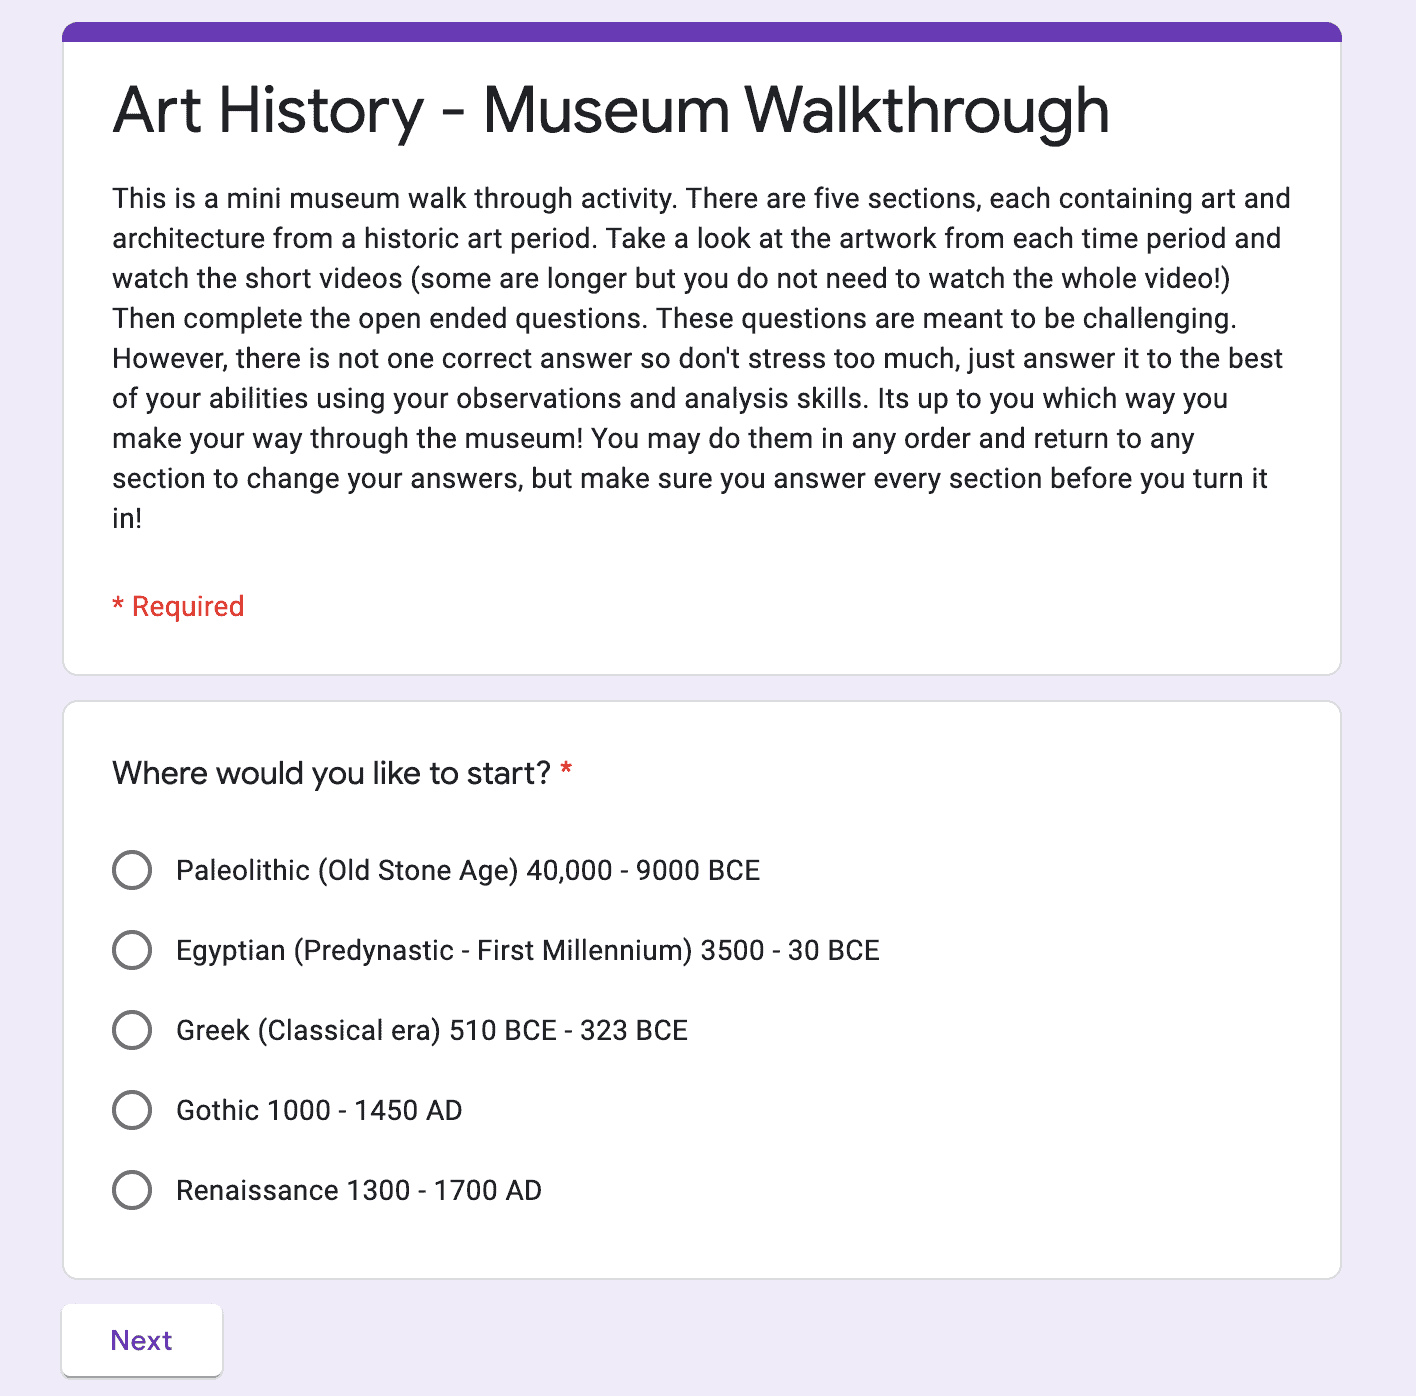
The activity is framed as a museum walk-through, where the students get to pick with the order they explore each of the time periods. It uses the feature that brings students to a specific section based on the answer they chose. Each section includes pictures of art from that time period as well as informational videos to introduce the students to that historical art period. Then the students must answer some open-ended questions that encourage higher-order thinking.
Image by Chantal Hummel from Google Forms
Instructions Listed on the Google Form
This is a mini-museum walk-through activity. There are five sections, each containing art and architecture from a historic art period. Take a look at the artwork from each time period and watch the short videos (some are longer but you do not need to watch the whole video!) Then complete the open-ended questions. These questions are meant to be challenging. However, there is no one correct answer so don’t stress too much, just answer it to the best of your abilities using your observations and analysis skills. Its up to you which way you make your way through the museum! You may do them in any order and return to any section to change your answers, but make sure you answer every section before you turn it in!
Goals
The goal of this activity is to give the students a general knowledge of some of the historical art periods to contextualize the historical events they are learning about. This activity challenged students to use higher-order thinking skills to answer the open-ended questions. It is not a graded quiz, but it allows for students to take differentiated paths as if they are walking through a museum. Students can return to their previous answers or sections at any time to take another look at the artwork and change their answers.
Art Of Our Ancestors: 10 Most Amazing Cave Paintings In The World (article) http://noisebreak.com/art-ancestors-10-amazing-cave-paintings-world/ (creative commons license)
Venus of Willendorf – https://www.piqsels.com/en/public-domain-photo-zbcfm (creative commons license)
Tomb of Nebamun and Ipuky – Metropolitan Museum of Art, CC0, via Wikimedia Commons
Abu Simbel – 10 Most Impressive Ancient Egyptian Temples https://www.touropia.com/ancient-egyptian-temples/ (Creative commons License)
Cologne Cathedral – Image by Thanks for your Like • donations welcome from Pixabay https://pixabay.com/photos/dom-gothic-cologne-cathedral-square-5216007/
Barcelona Gothic Cathedral – Image by sosinda from Pixabay https://pixabay.com/photos/barcelona-gothic-cathedral-building-3436967/
Christ Delivering the Keys of the Kingdom to Saint Peter by Pietro di Cristoforo Vannucci (1445?-1523), called Perugino. https://www.flickr.com/photos/20919058@N05/5849492515
For this lesson, we will be using a google drawings chart to decide whether things are living organisms or not. To do this, I’ve created a google drawing with each characteristic listed as well as what that characteristic means. Then as a class we will go through and add an X or a check mark to each characteristic and if they have all check marks then we will know!
I’ll include the pictures that we will go through, as well as the google drawing. And you can use the same google drawing over and over again, just removing the marks each time. Maybe you could have a table on a whiteboard where you write what qualifies and what does not as you go through them so that students remember. This would be a good lesson for 4th or 5th graders.
Direct Link: https://docs.google.com/drawings/d/1DEngBxcrS2LOdza8D3YZIQdf-mDyIKgyNIfvPZfj9Xs/edit?usp=sharing
This assignment would be for either kindergartners or first graders and this would be used for a math lesson on addition. I would use this google form after I introduce adding into their math lessons and this form would be used as a formative assessment so I can see if they are understanding the material at hand. The students will be tasked with watching the video link I put in the google form and then have them answer the questions I have. This google form would achieve this goal of seeing how they are understanding the material because I can see what they get wrong and base it off of that as well as at the end of the google form I have a question asking how they are feeling with adding, if they understand or not? Below you will find the form itself which you can fill out and just below that there is a link for you to view it as well!
Google Forms is a great way for students to self-assess their learning. The following is a self-assessment for students to either use as a study tool or for teachers to assess the progress of their students.
This self-quiz is designed for students who have already been introduced to “le subjonctif”. Thus, this activity is more for high school or even college-level students who are novice to advanced french learners.
Students simply have to follow the directions as provided. There are a variety of question types for students to answer. At the end of the quiz, students are asked to assess whether or not the quiz was helpful and then they are allowed to view graded answers (which excludes paragraph responses) to see where additional study may be helpful.
Another feature of this quiz is that it begins at different points depending on student confidence. If they feel less confident, then the quiz begins with the formation of “le subjonctif” after being given the chance to watch videos on the subject. If the student is comfortable with the formation, they are directed to the use of “le subjonctif”, which also has a video. If they feel like experts, they are asked to describe something important to them using 10 sentences with “le subjonctif” and 5 sentences that show when the “indicatif” is used instead.
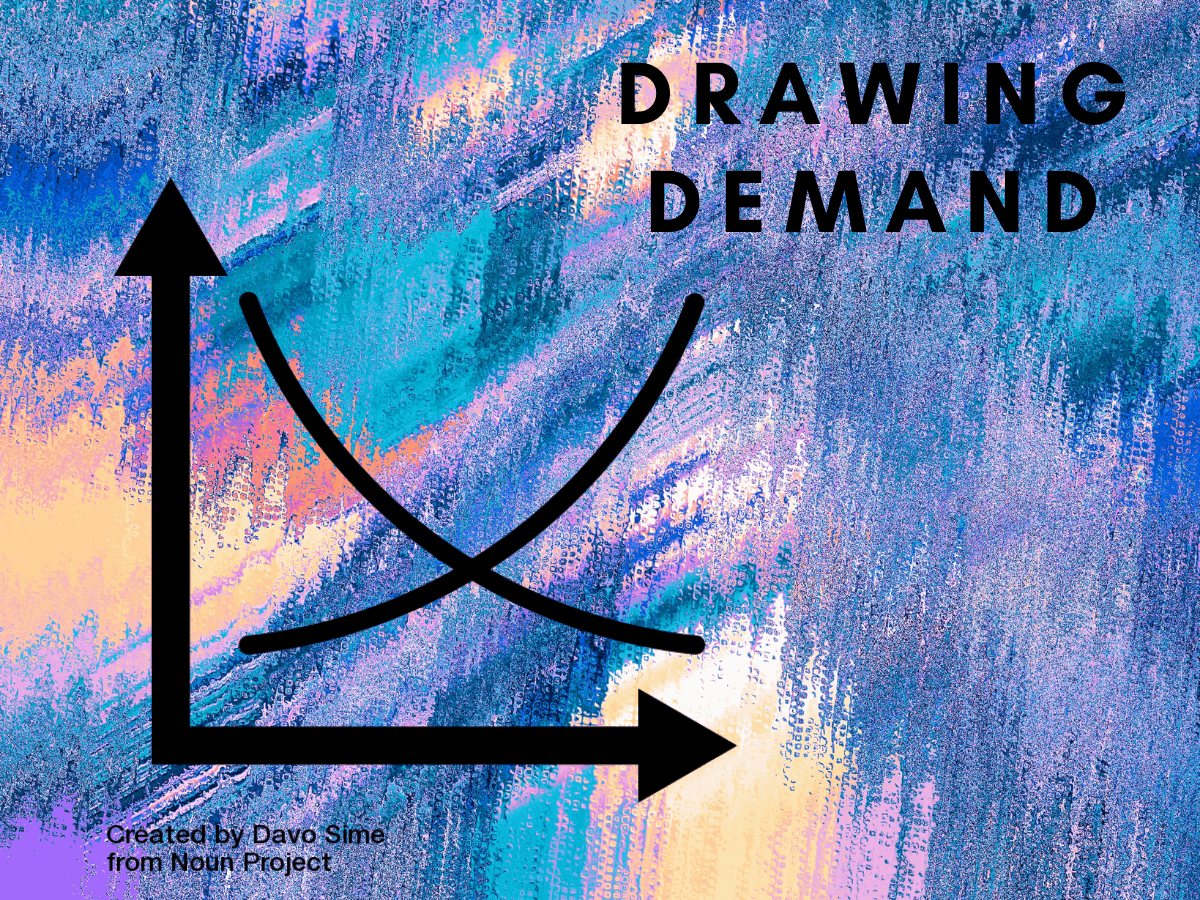
In small groups, you will practice graphing demand curves by using a demand schedule.
Work together and discuss with your group, but everyone will be working on their own separate document.
You will have 15 minutes to use the information from the graph to fill in the demand schedule on the first problem.
Then, you will do the opposite: use the demand schedule on the second problem to graph a demand curve. You should drag and drop the points onto the graph and then connect them with the lines provided.
After 15 minutes, we will come back together as a large group. Be prepared to explain how you drew your curve.
Goal for this Lesson:
My goal for this lesson is that my students will be able to see the relationship between demand schedules and curves by graphing demand information. Google Drawings will help me achieve this goal because my students can edit the text of the table and they can also drag and drop specific points onto a graph. In an in-person setting, it would be easy for my students to simply draw a graph with pen and paper, but in an online setting Google Drawings is vital to preserve those key graphing elements. In addition, I am able to easily add hyperlinks, images, and formatted text to the assignment, making it more suitable than Jamboard for this activity.
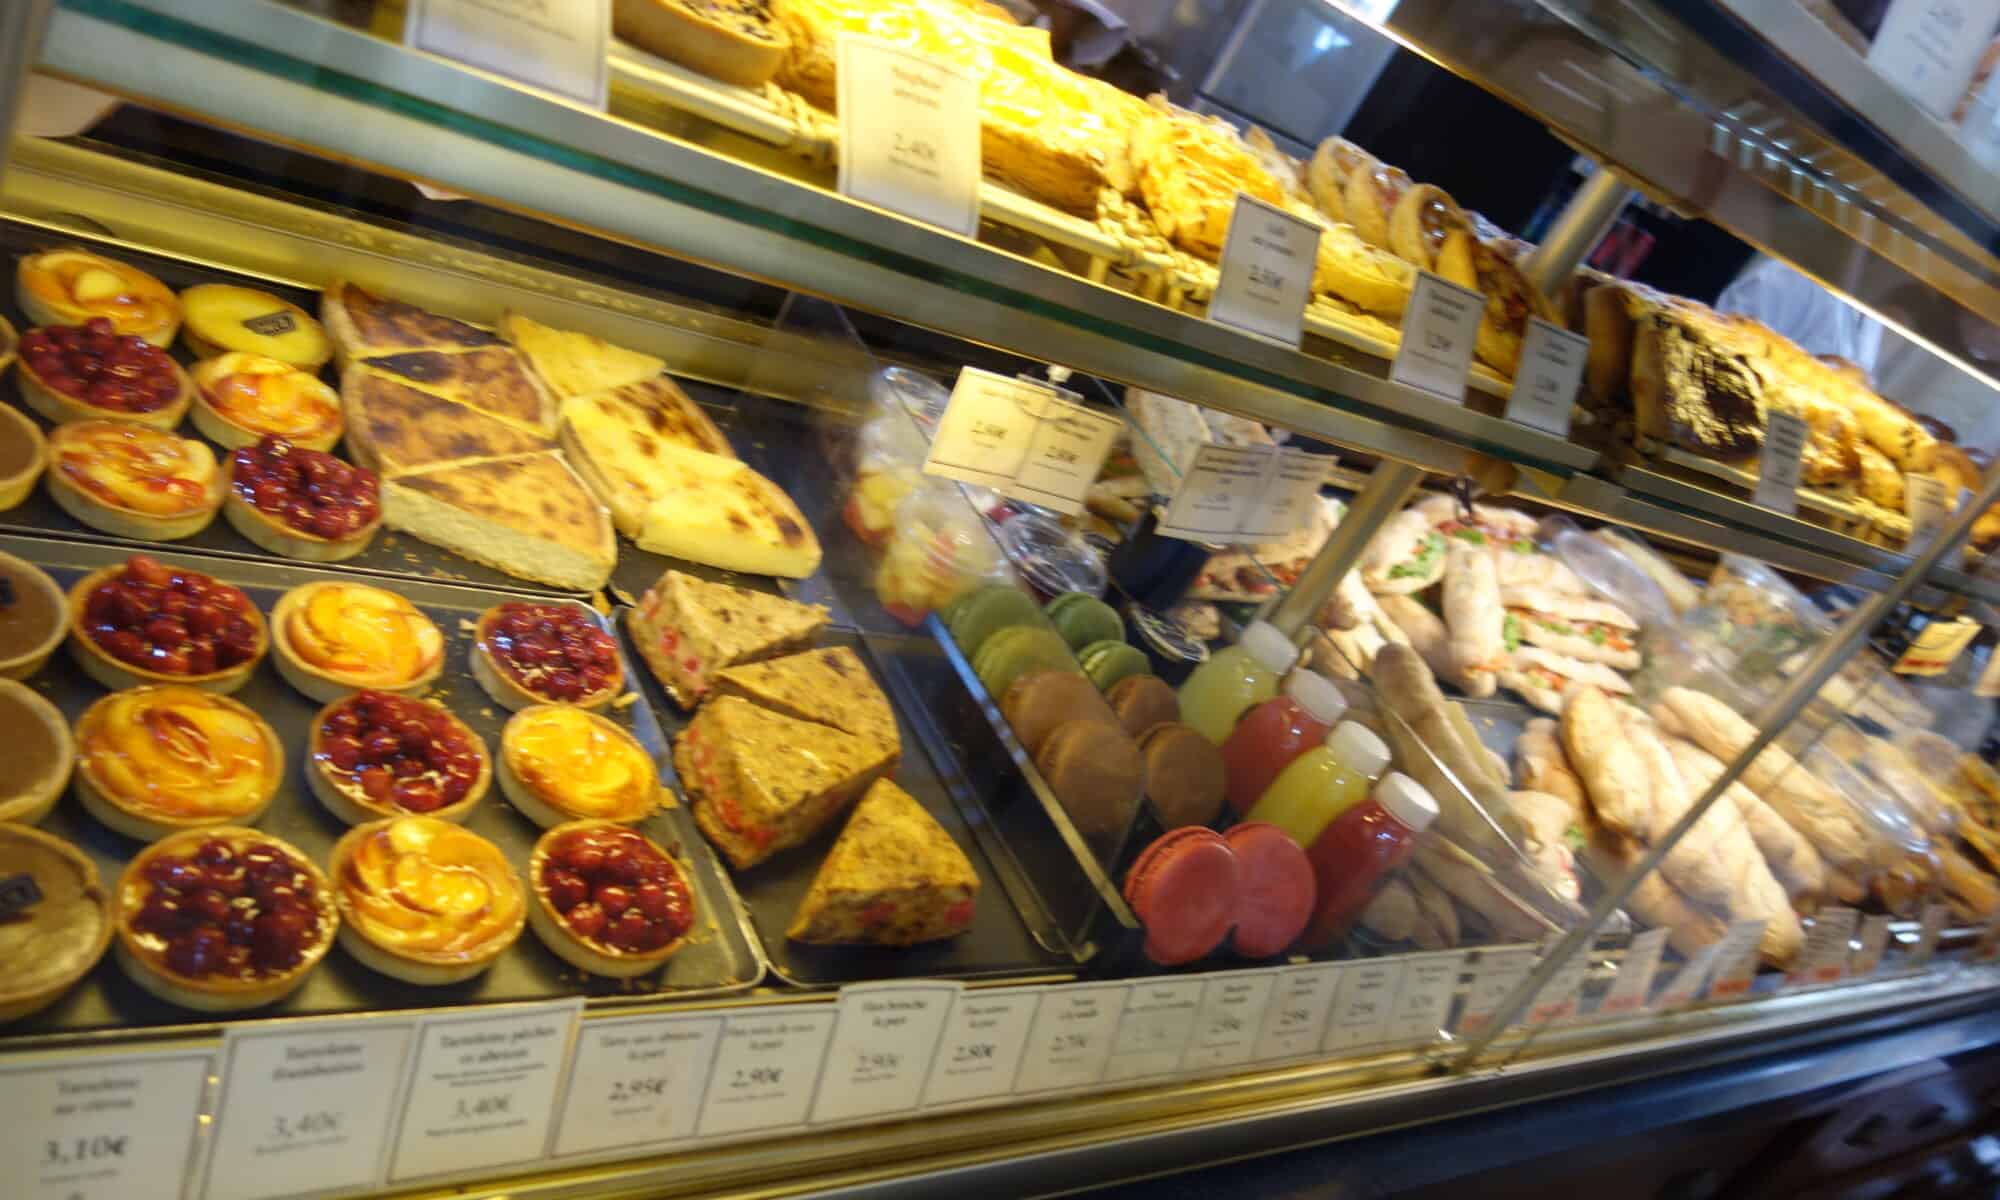
This form will be used as a formative quiz with my seventh grade class during our food unit “La nourriture”. This primarily has students focusing on elements of French cuisine and dining norms that may be unfamiliar or different to the US. These are all concepts and vocabulary students have seen before, but the form is a way for students to review what they have retained.
Instructions: this is a 10-question quiz about some of the aspects of French food culture we have discussed throughout our unit, such as ingredients in common French dishes, recognizing categories of food, and multi-meaning vocabulary. This quiz is not designed to be about the grade, but about reviewing your knowledge and learning more about French cuisine. After submitting the form, you will have the option to see your score: click here! Each question will be accompanied by the correct answer and feedback on your response to clarify. Many questions are also joined by a link to more information if you missed the question. Check these out and make sure you understand the concepts behind the terminology. (*Hint: some questions have more than one correct response!*) https://forms.gle/8ioeN73v23MydUnJ7
Featured image: French pastry case by Rachel Booth.
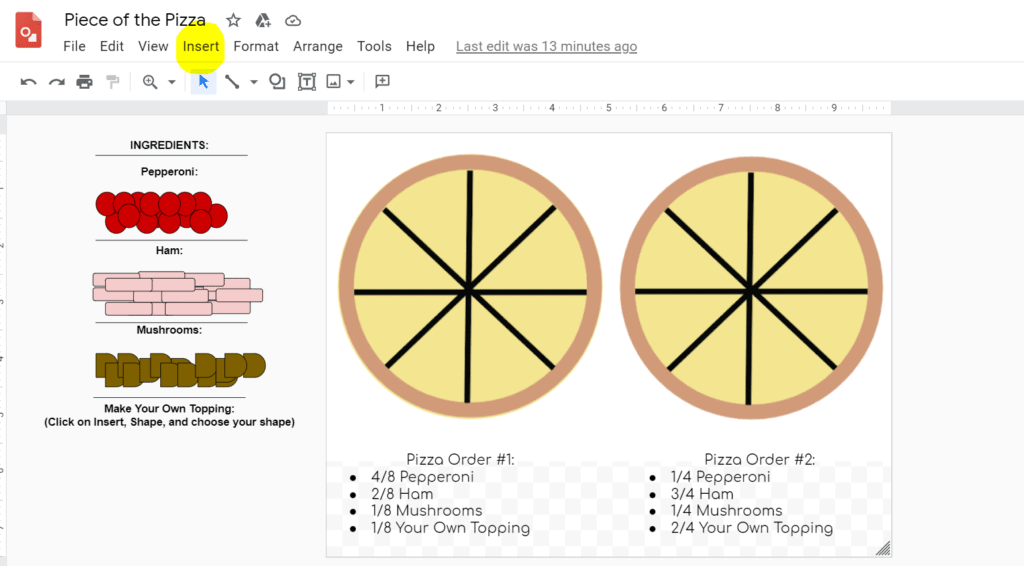
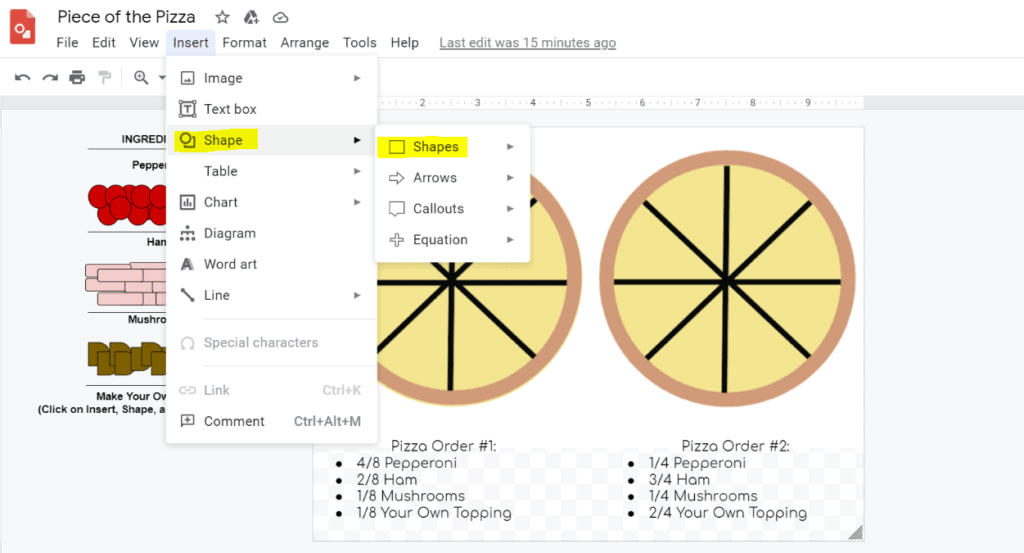
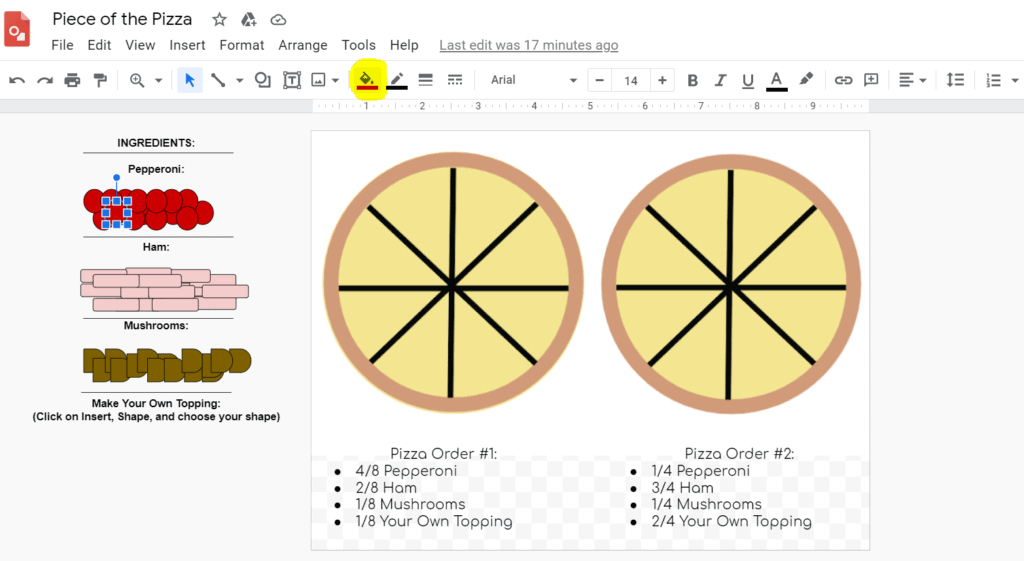
Hi, 5th graders! Since we’re starting our Math Fractions Unit very soon, I wanted to do an intro activity as a refresher. Today we’ll be making pizzas using fractions!
Directions: 1.) Please open the activity on Google Drawings here. 2.) The pizza ingredients are to the left of the page. Drag each one to match the fraction amounts for each of the pizza orders. 3.) For the “Make Your Own Topping,” follow the instructions in the Slideshow below. (Click Insert, Shape, Shapes, and pick a shape. To change a shape’s color, click on the shape, then paint bucket button. To change a shape’s size, click on the shape and drag the blue dots).
Ask for help if you need it! 🙂
Student Goals: – This activity can help students activate what they remember and don’t remember about fractions in a fun way through pizza-building by asking them to use the fractions provided in the Pizza Orders to make the correct pizzas. – It can be a way to check in with themselves before they start the fractions unit.
Teacher Goals: – Based on how students do, this data can guide the teacher’s instruction before they officially start teaching the new unit on fractions. – The activity can help the teacher see which students understand fractions (Pizza Order #1), and which students know how to simplify fractions (Pizza Order #2). This can help the teacher make decisions on ability grouping.
This lesson is designed for 8th grade social studies students.
The purpose of this lesson is for students to demonstrate that they know the differences between the Federalists and Anti-Federalists. This lesson also helps set up the two-party system that students will see grow in the following lessons.
Some Knowledge Students Should Have Before This Lesson:
>What the Articles of Confederation are.
> The different powers the Articles of the Confederation gave to states and the central government.
>The limitations of the Articles of Confederation.
>Some compromises that were done to create the new Constitution.
The LessonNotes:
This lesson can be presented by the teacher in any format or order the teacher sees fit for their classroom discussion.
The new Constitution faced different roadblocks to ratification. From the last lesson, we saw the the Great Compromise between to Virginia Plan and the New Jersey Plan which divided the Congress into two institutions: the House of Representatives and the Senate.
Now, we will look at the different camps that debated over the ratification of the Constitution with highlights of their beliefs.
Anti-Federalists: These were the small farmers, frontiersmen, debtors, shopkeepers, and state government officials; opposed the Constitution; wanted strong state governments and a central government with little power; feared that the executive branch (the President) would be too powerful and that the US would become a monarchy; supported a Bill of Rights to protect the individual rights of the people; some leaders of the Anti-Federalists were Thomas Jefferson, Patrick Henry, and George Mason.
Federalists: These were the property owners, creditors, and merchants; supported the Constitution; wanted to give more powers to the central government over the state governments; proposed a single person for the executive branch; proposed checks and balances system; believed the Bill of Rights was unnecessary; some leaders of the Federalists were Alexander Hamilton, James Madison, and John Jay.
Some Comprehension question to ask for discussion:
Why were the Anti-Federalists concerned about having a President?
Why do you think the Federalists wanted a strong central government?
The political factions that grew from this debate had a lasting impact on our nation, can you say what that impact was?
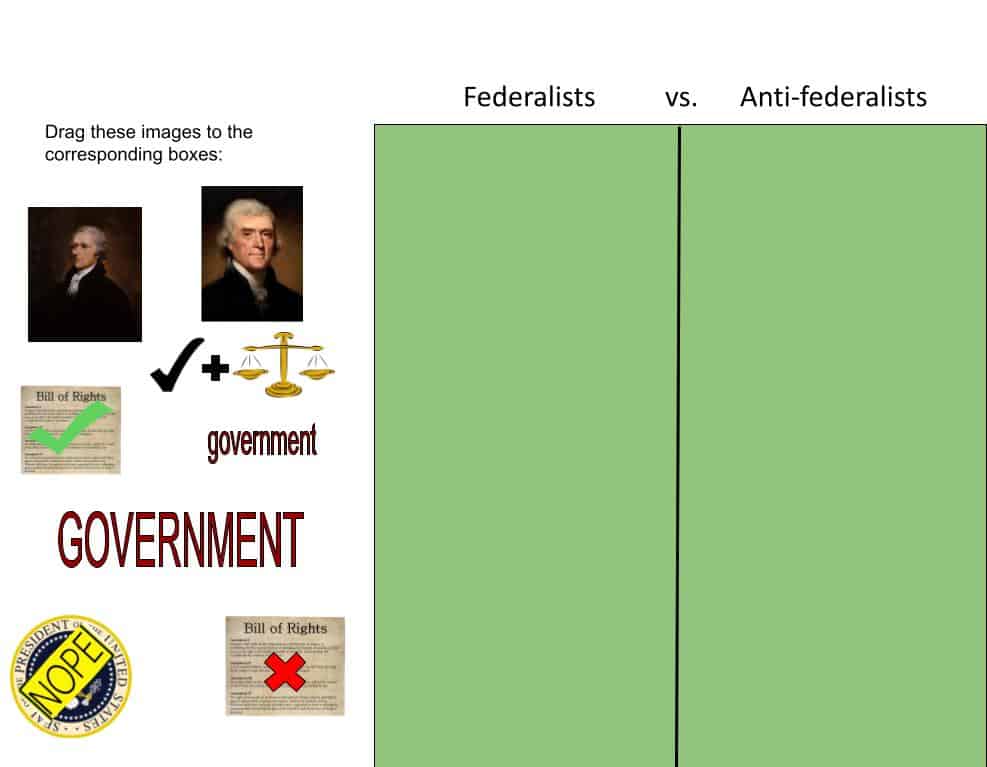
Activity Time!
This activity can be given to students as an in-class activity.
The goal for is for students to interpret the images on the Google Drawing as some different highlights between Anti-Federalists and Federalists which were discusses above.
Students drag the images to the corresponding box that they believe fits a belief of one of the two groups.
A great way to add to this activity and make it creative for students is to challenge students to create their own activity like this or to even add on to the existing activity with other differences between the Anti-Federalists and Federalists.
Good morning kindergartners! Do you wanna build a snowman? Today we are going to be working on Google drawing as a warm up.
Here is the link to click on: https://docs.google.com/drawings/d/1F6s80GxBrCRDP8yy4cJqeN02VDty2D7TIAO6VZRMZrQ/copy
Instructions:
Click and drag a face, a scarf, and a hat onto the snowman to complete him
What is the snowman saying? Type it into his text bubble!
Each person will have time to explain their snowman and what they’re saying as a whole class!
Goal:
The goal for this little activity is to provide a fun way students are able to use their creativity to make their own snowman. This will be used as an icebreaker activity, where students do this first thing they come to class to start on a good notes. This gets the students excited for the rest of the day, and it allows them to work on their computer skills. This activity is specialized for the winter time/ snow days.
Okay, third graders! Before we close out our class for the day, I want you all to complete this Exit Ticket for me. (here)
There are two steps:
Identify the 5 fractions provided. What portion of the shapes are colored in? Simplify when needed.
Place the fractions in order from smallest to largest on the number line below.
Goals:
Students will be able to look at a provided image and identify the fraction.
Students can determine when a fraction needs to be simplified, and simplify it correctly.
Google Drawings is an easy way for teachers to design worksheets or activities that require shapes. It is easy to navigate for educators and students alike.
It is fun, unique, and different! Students will love looking at all of the different shapes and colors on this Google Drawings.
Photo Credit
Background image on Google Drawing (https://unsplash.com/photos/N7EL6Imnarg)
Featured Image (https://unsplash.com/photos/iLScUZafBzc)
Screenshot of Google Drawing Exit Ticket (Rachel Carbay)
Google drawing is a great tool for drawing and labeling shapes. For my activity, I made a practice worksheet for a geometry class (grades 8-10).
This worksheet utilized a variety of tools that the students can use in google draw. The first box prompts students to use the drag feature to move the pre-drawn shapes to the appropriate categories. The second activity asks students to label the missing angle on the pre-drawn triangles. The students can do this by inserting a textbox and dragging it to the angles. The third activity asks students to use the shape tools to draw shapes and label the angles of those shapes. The fourth and final activity asks students to fill out the table with the corresponding angle measurements using the given angles.
The goal of activity is to use visual activities to help students apply what they have been learning to categorize shapes and finding the measurements of their angles.
This activity shows all the helpful features of using google draw to make geometry worksheets. The line drawing and shape tools have a wide range of options that allow students or teacher to customize their work.