Hi friends, today we’re going to be working on what’s called a bubble map!
A bubble map has one big circle in the middle with the words or picture of the main idea or topic you’ll be working on. From the big circle, there will be lines going outwards that connect to smaller circles. In the smaller circles there will be details about the main point.
On Jamboard, we’re going to work on our own bubble map with the animals that you all did for your science projects. I’ve included a picture of something you can use as an outline for your own bubble maps. In the big circle it says “Animal of your choice” where you can either write, draw, or print a picture of your animal. In the smaller circles, it says things like “diet? habitat? mammal? predators? etc” and these are the things you researched about your animals.
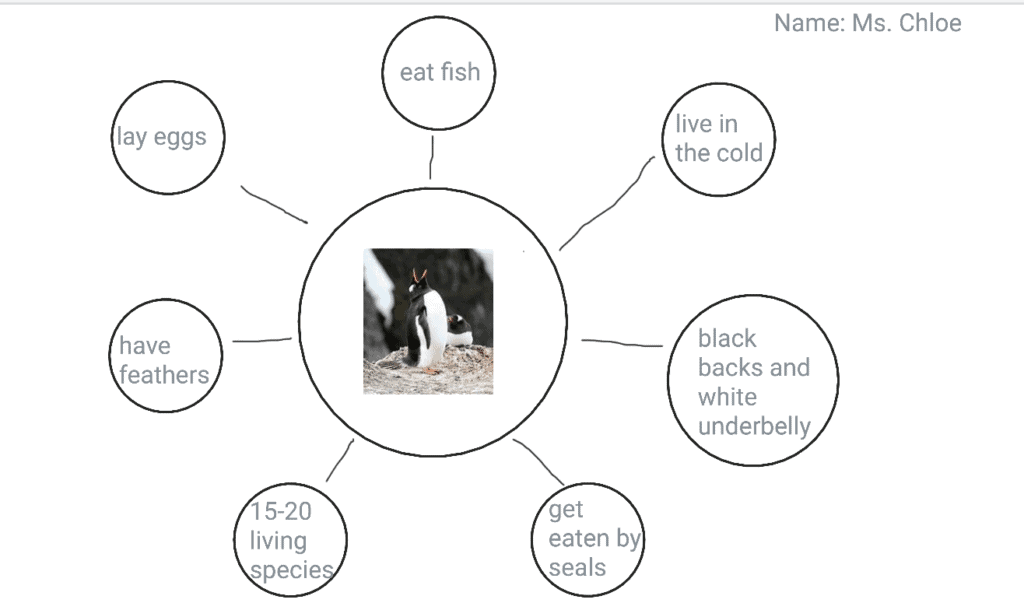
As a class we worked together on an animal, we chose the penguin.
*Now you can either show the next picture I’ve included or use it as a personal reference to guide you and your class through a bubble map on penguins.*
On each slide after this one, there is a blank bubble map that each of you need to fill out. Go to your number assigned page and start working on your assignment. Don’t forget to put your name on the top before you begin.
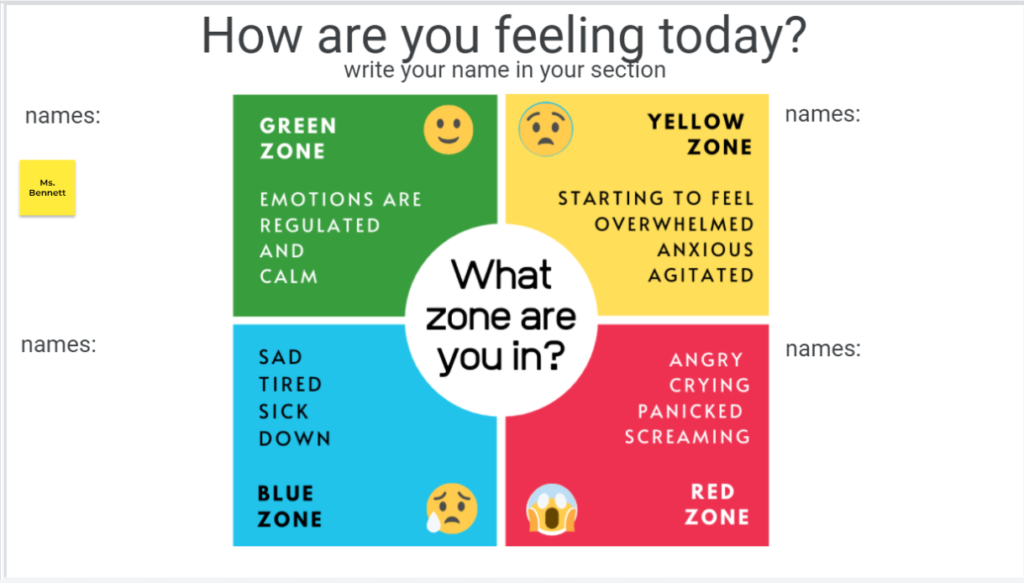
Okay Kindergarteners! It’s been a BIG day full of BIG emotions and before we get started on our reading, I want to check in quickly to see how everyone is feeling!
I want you to put your thinking caps on and think REALLY hard about how you’re feeling right now. Check in with your body, check in with your mind, check in with what’s been happening today, and think of a way to show how you’re feeling.
Once everyone has their image on the Jamboard, each friend is going to have a few seconds to share with the class if they want to and explain why they chose to show their feelings in that way.
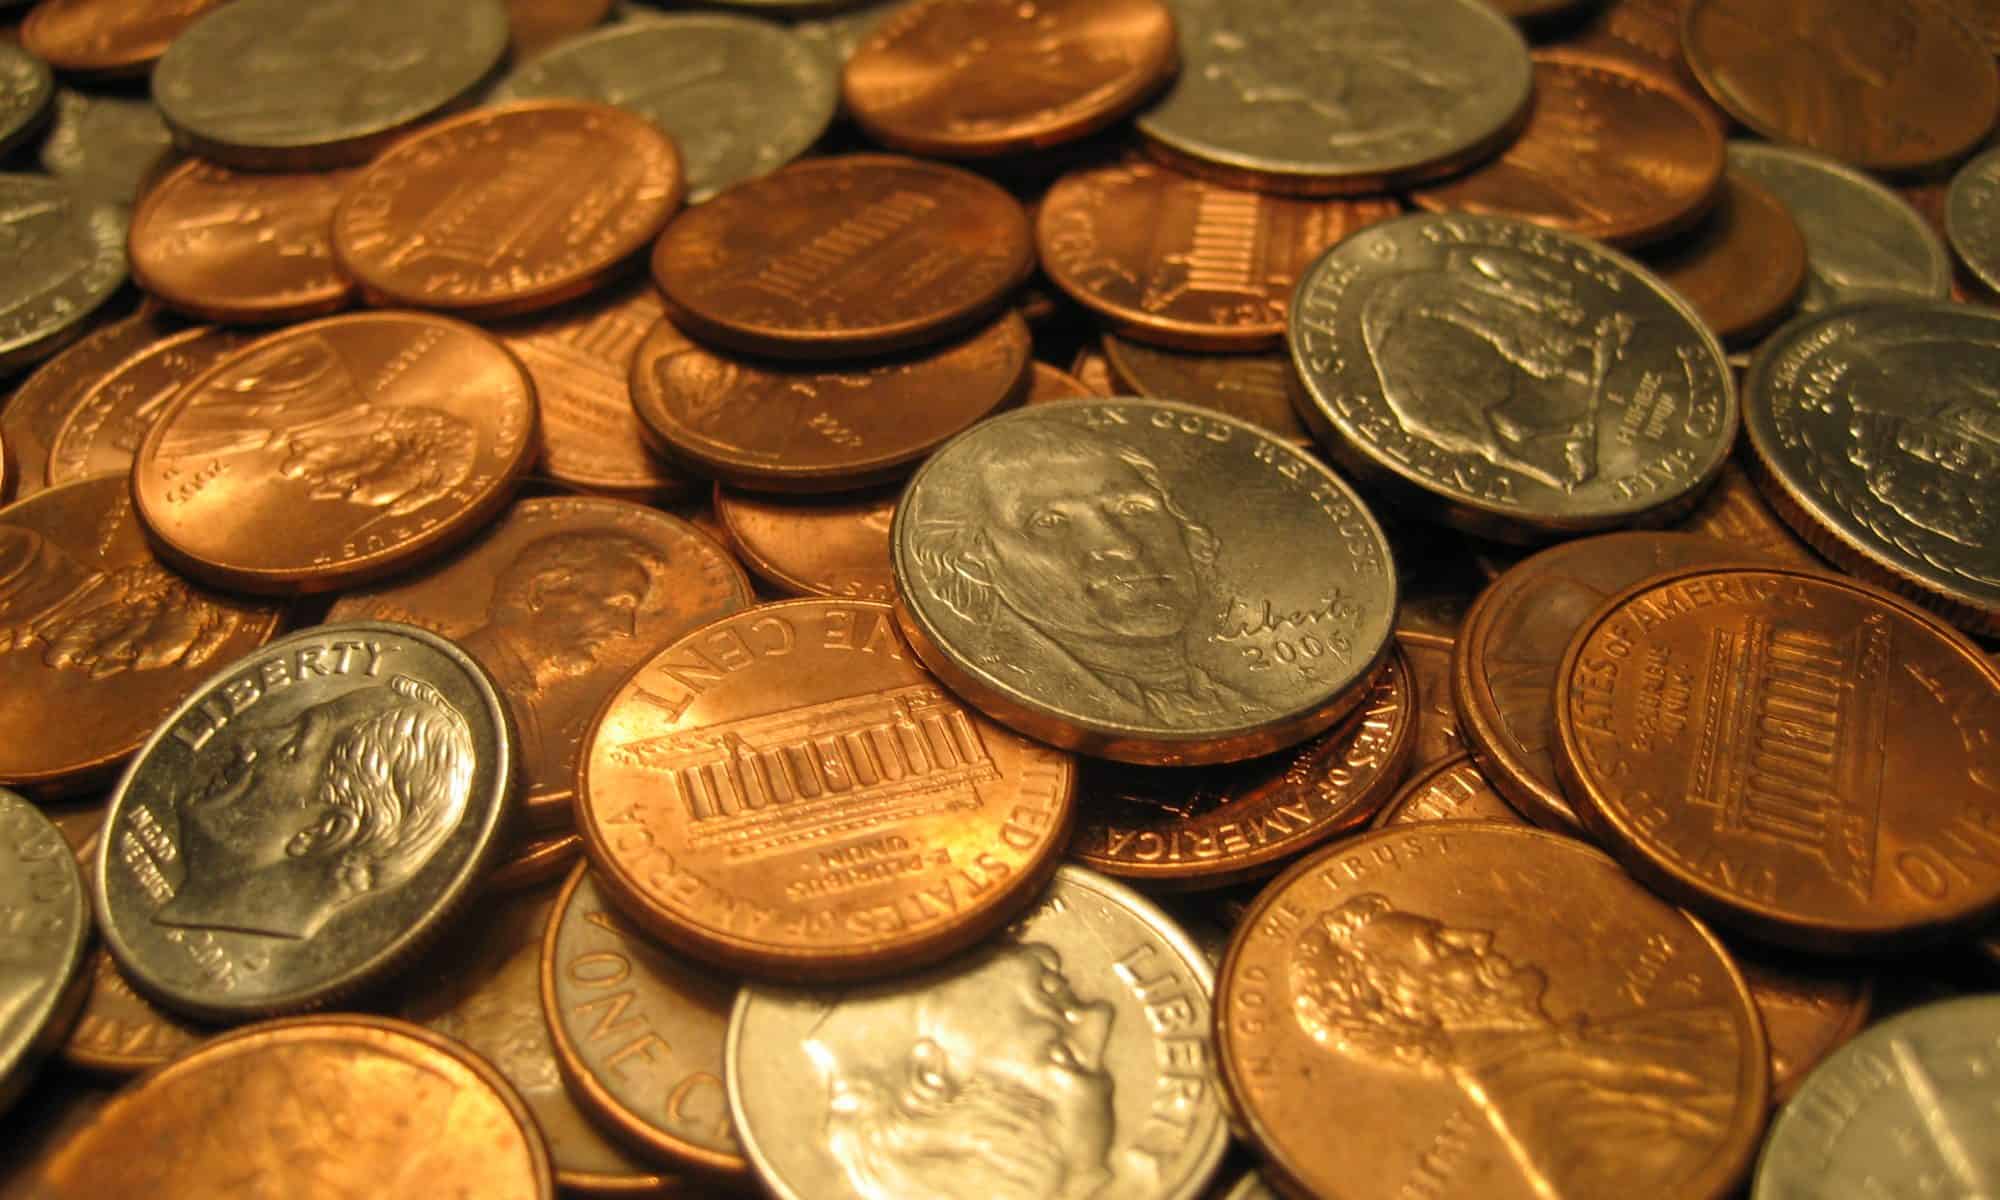
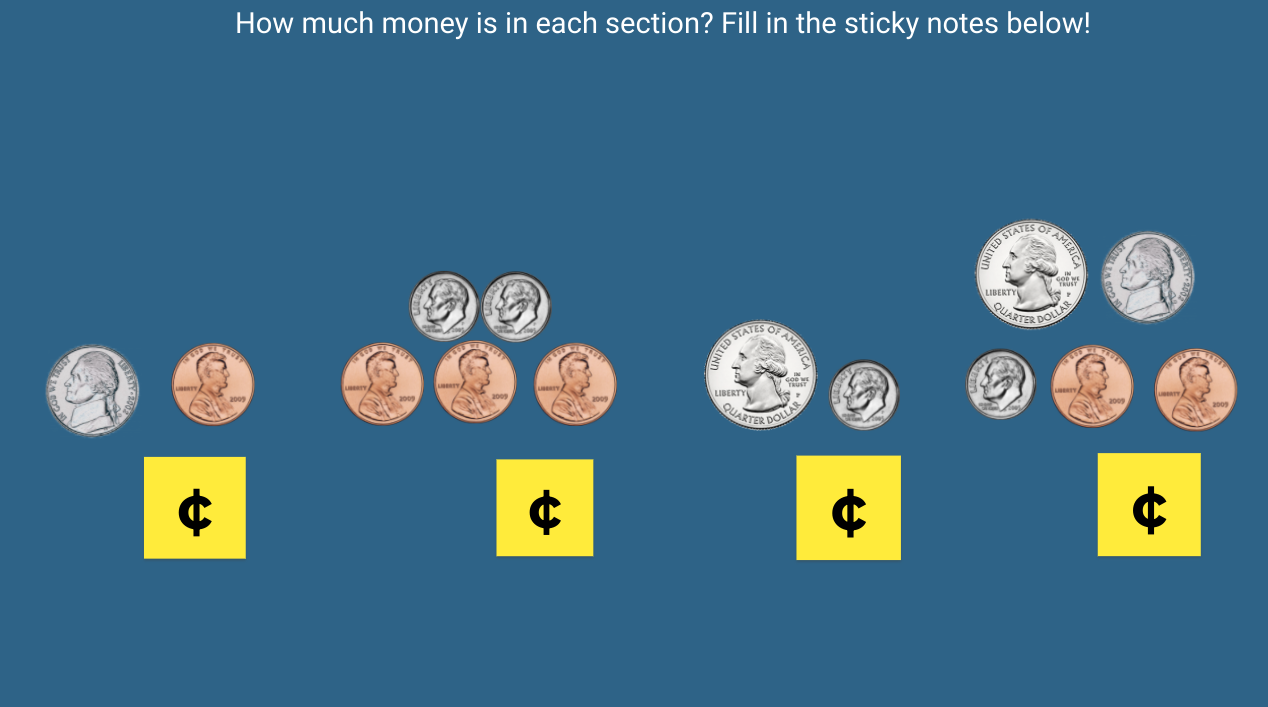
Alright 2nd graders, today we are going to be doing a collaborative assignment, where you will get to work with your table groups on Jamboard! As you know, we’ve been reviewing how to count coins, as it is really useful for when you need to buy something, or when you’re getting change back after a purchase. Remember from yesterday, pennies are worth 1 cent, nickels are worth 5 cents, dimes are worth 10 cents, and quarters are worth 25 cents. If you don’t remember which coin is which, be sure to ask your table group or myself. Now, let’s have everyone open up the Jamboard link that corresponds to your table number!
For this first slide, count up each of the four groups of coins, and write down that number in a new sticky note below each group, or just edit the existing sticky note under each group. Do this work individually, but if you get stuck, ask your table partners for help first.
Slide 2
For the second slide, you may now work with your group to figure out how many coins you can put into each of the four sections, to match the given price tag. Remember, there are many correct answers for each price tag! Feel free to duplicate the coins, but only if you have run out of coins to use.
Slide 3
This final slide is similar to the last slide you did, except this time, you will be finding three different ways to represent 39¢.
Teacher instructions: Make sure to have a backup copy! If something happens to one of the Jamboards that the students are editing, you can simply copy the original again and send them the link to it. If you notice that a student tends to only use the same 2 or 3 types of coins, encourage them to use all 4.
Goals: This second grade math lesson is intended for students who have already had practice identifying coins, and who have at least some experience using them to match certain prices. The Jamboard is a useful tool in this lesson as it allows the students to use an interactive, visual representation of the math concepts they’re using, in a collaborative environment where they can get feedback from their peers. Each of the three slides challenges them to think about this topic in different formats, without straying from the intended purpose of the lesson.
Turn to your neighbor and discuss these vocabulary words.
Runoff
Precipitation
Condensation
Accumulation
Transpiration
Percolation
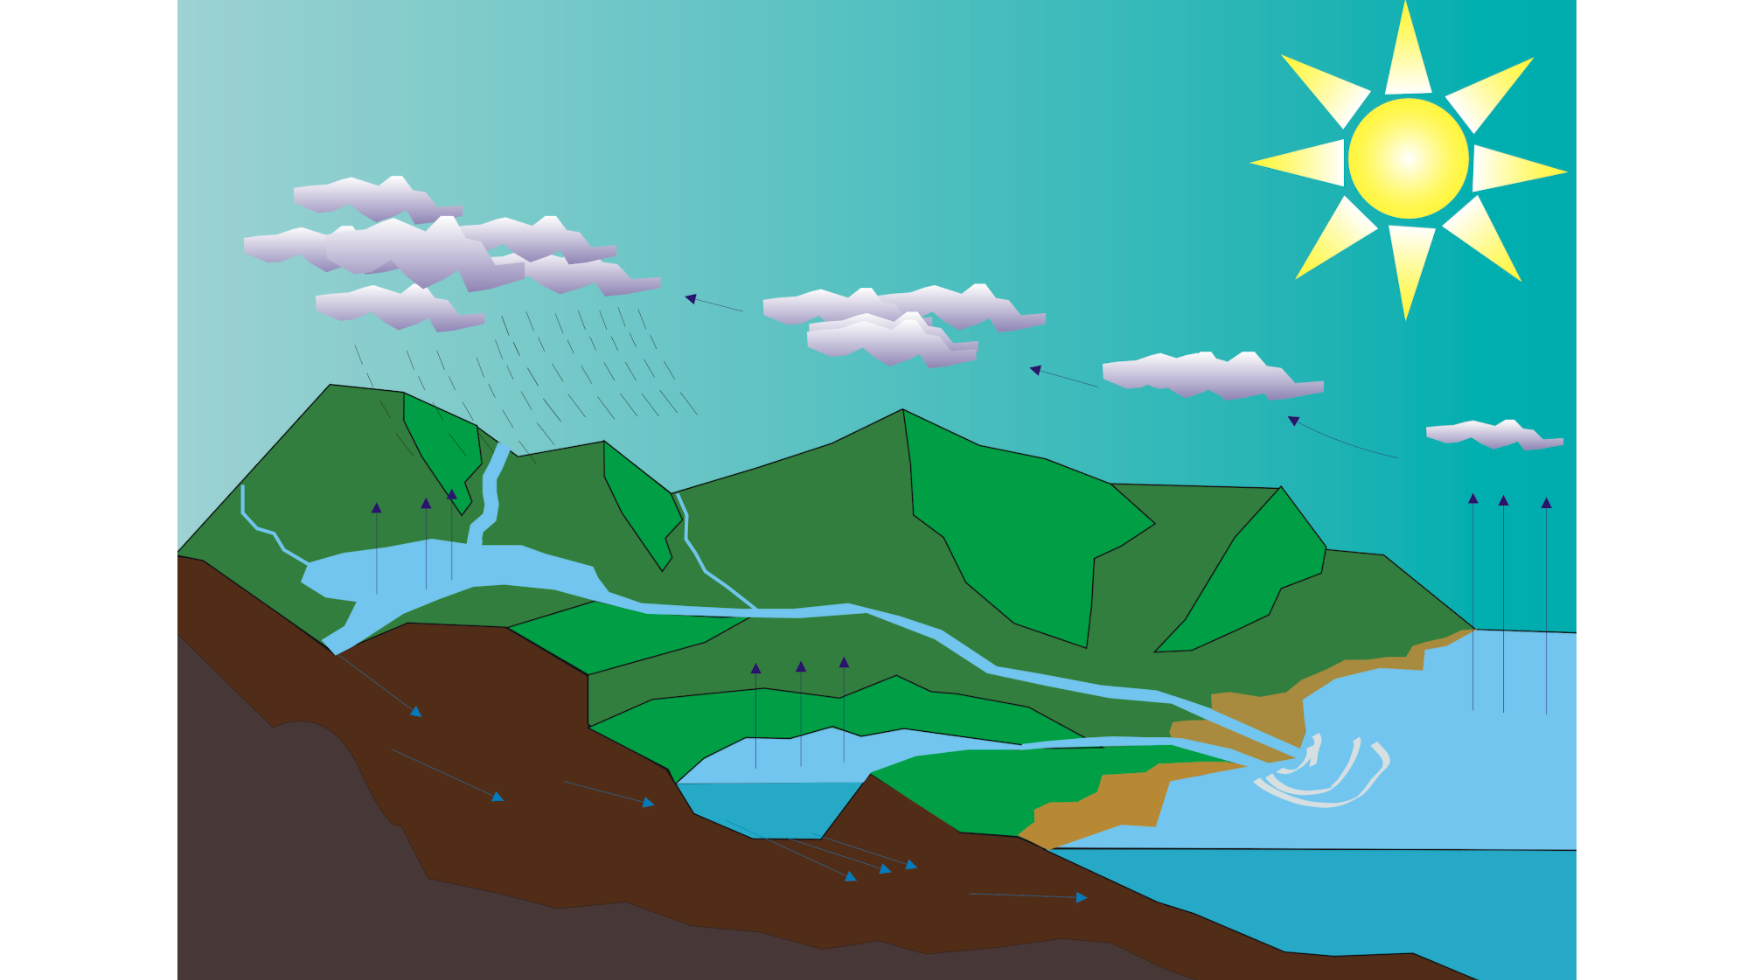
After you discuss these words with your table groups, you are going to head to Jamboard and create your own water cycle and label the different water cycle terms where they belong and add whatever else you think is missing. You are going to work together and try to make it as accurate as possible! Once you finish, you will be able to compare it to the version we learned from and saw yesterday! We will use this as a guide for when we make the physical models of the water cycle!
You are going to add your own labels to this water cycle! Add any other features you think are missing.
Goals: to familiarize students with scientific water cycle vocabulary and the processes of the water cycle. This will be helpful for our visual learners. This is a precursor to an activity where students are building a water cycle 3D model!
CCSS.ELA-LITERACY.W.3.3: Write narratives to develop real or imagined experiences or events using effective technique, descriptive details, and clear event sequences.
CCSS.ELA-LITERACY.W.3.3.A: Establish a situation and introduce a narrator and/or characters; organize an event sequence that unfolds naturally.
Good morning 3rd graders!
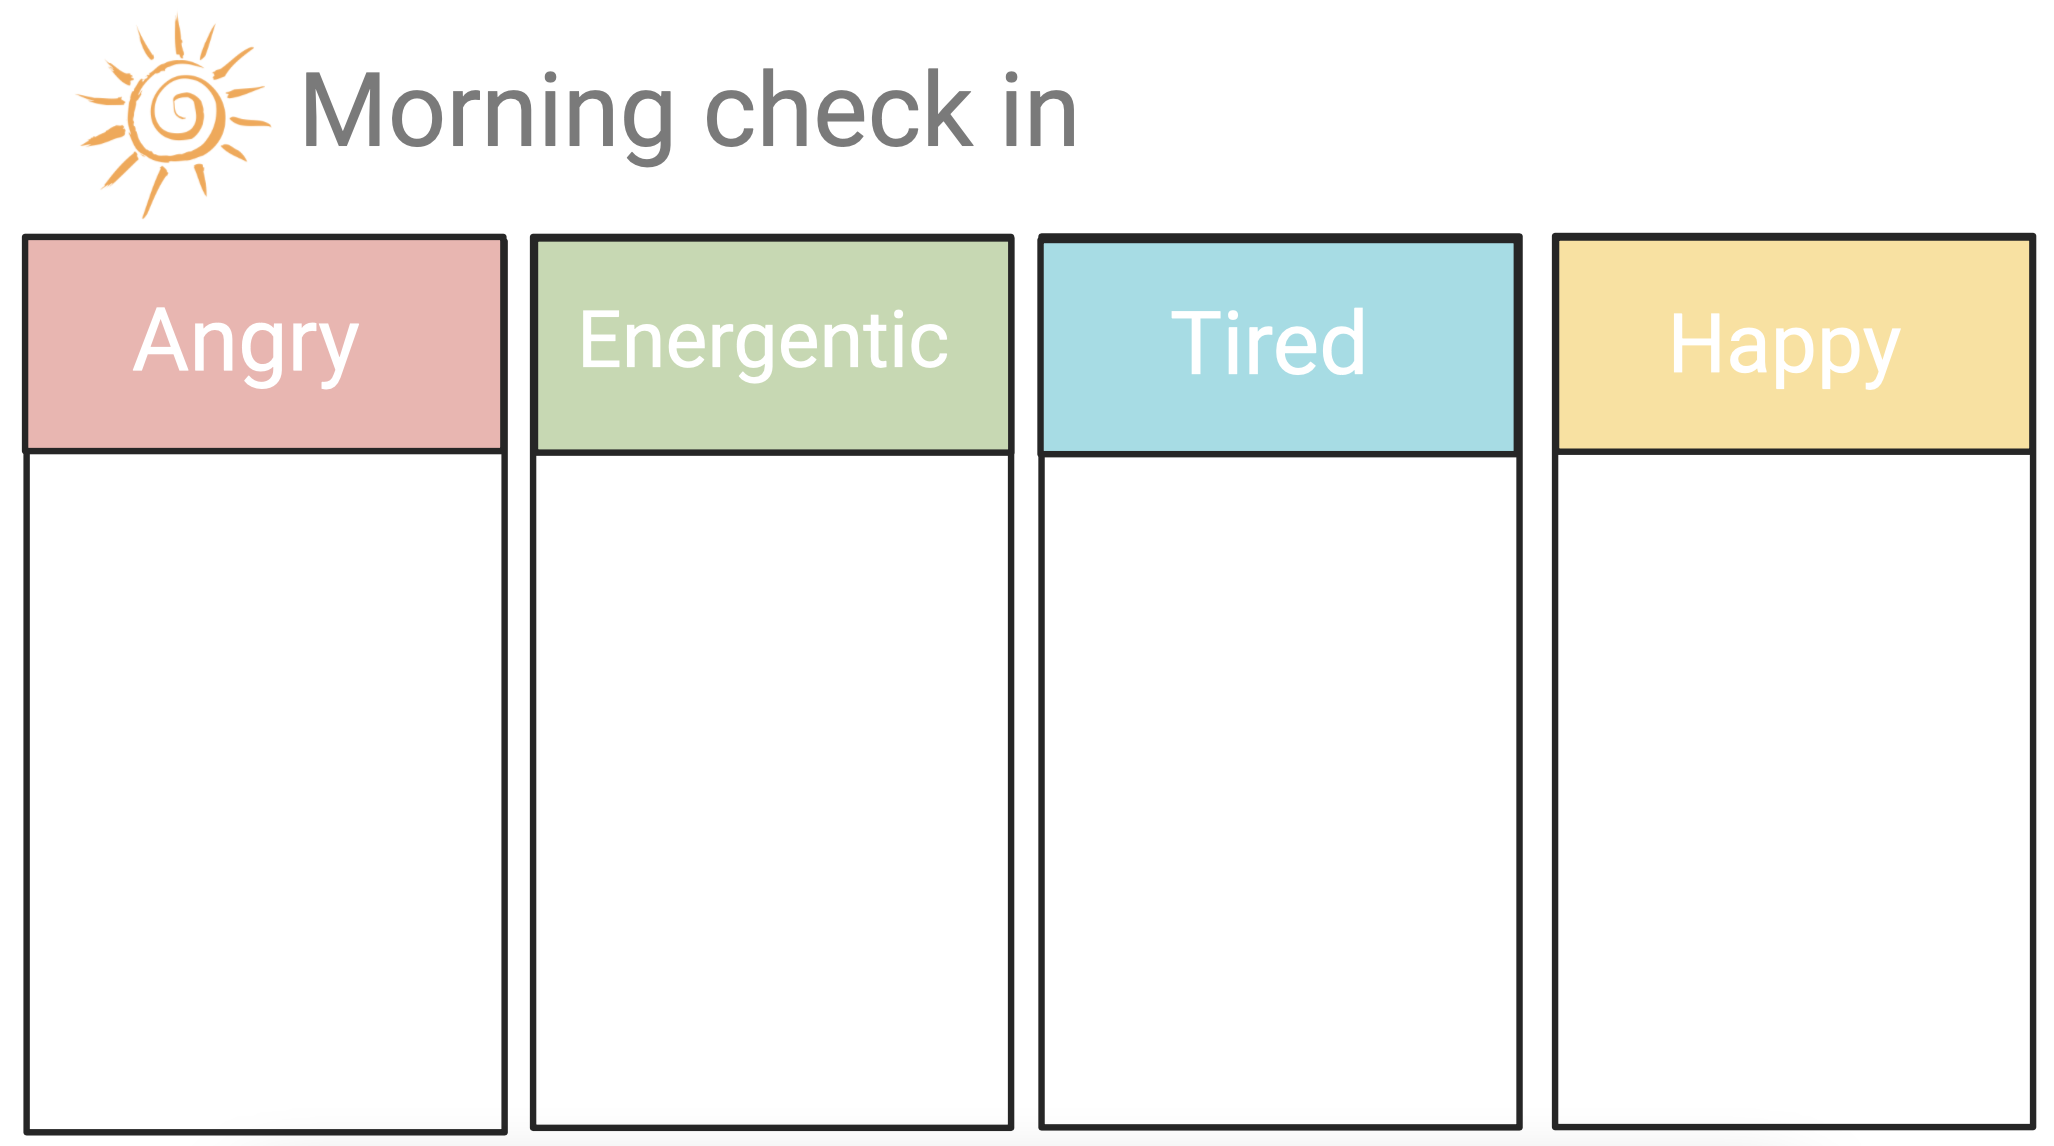
We are going to do a check-in on Jamboard to see how everyone is doing this morning. Put a post-it note on the box of how you’re feeling either saying why you feel that way or being more specific on the feeling you currently have.
Good morning first graders! Today in our morning circle we will be talking about the emotions we feel. Today, our main goal is for us to identify our different emotions. Sometimes we feel different things, but aren’t able to describe what exactly we are feeling. The reason why we are doing this at the start of the day in the first week of the semester is so that we can identify our emotions throughout the semester together. Everyday from here on out, I am going to check in with you and ask you what emotion you are feeling. For today’s lesson we will be using jamboard!
Instructions: The teacher will be displaying his/her IPad screen on the projector so that students are able to see what the question is and how to use jamboard correctly and appropriately. The teacher will explain to the students that they need to brainstorm their ideas on emotions that they might feel. Students must provide at least one example of when they feel this emotion along with a picture that represents the emotion they personally picked.
The goal for this lesson is that students will be able to see the different types of emotions their classmates experience and in a later lesson we would talk about how to manage emotions. Students will most likely have similar emotions that they feel and this will helps students to realize that they are not alone and have their peers to support them. After completing this lesson, students will then get four flashcards that they can draw on so that when the teacher asks how are we feeling today, they can hold up one of the cards they created. This will allow the teacher to see where the students are at and how they are feeling on that specific day!
Hello sixth graders! Thank you for working hard during yesterday’s class about figurative language. We learned many new terms together. Let’s review them here:
Simile: a comparison between two things using ‘like’ or ‘as’
“He ran like a cheetah.”
“After a day at the beach, my face was as red as a tomato.”
Metaphor: a comparison between two things without using ‘like’ or ‘as’
“He was a cheetah when he ran.”
“After a day at the beach, my face was a red tomato.”
Personification: Giving human qualities to non-human things
“The flowers danced in the wind.”
“The stars in the sky winked at me.”
There are many other types of figurative language, but these are the three we will be focusing on this week. For today’s homework assignment, you will create your own similes, metaphors, and personifications! First up, we have similes.
Similes
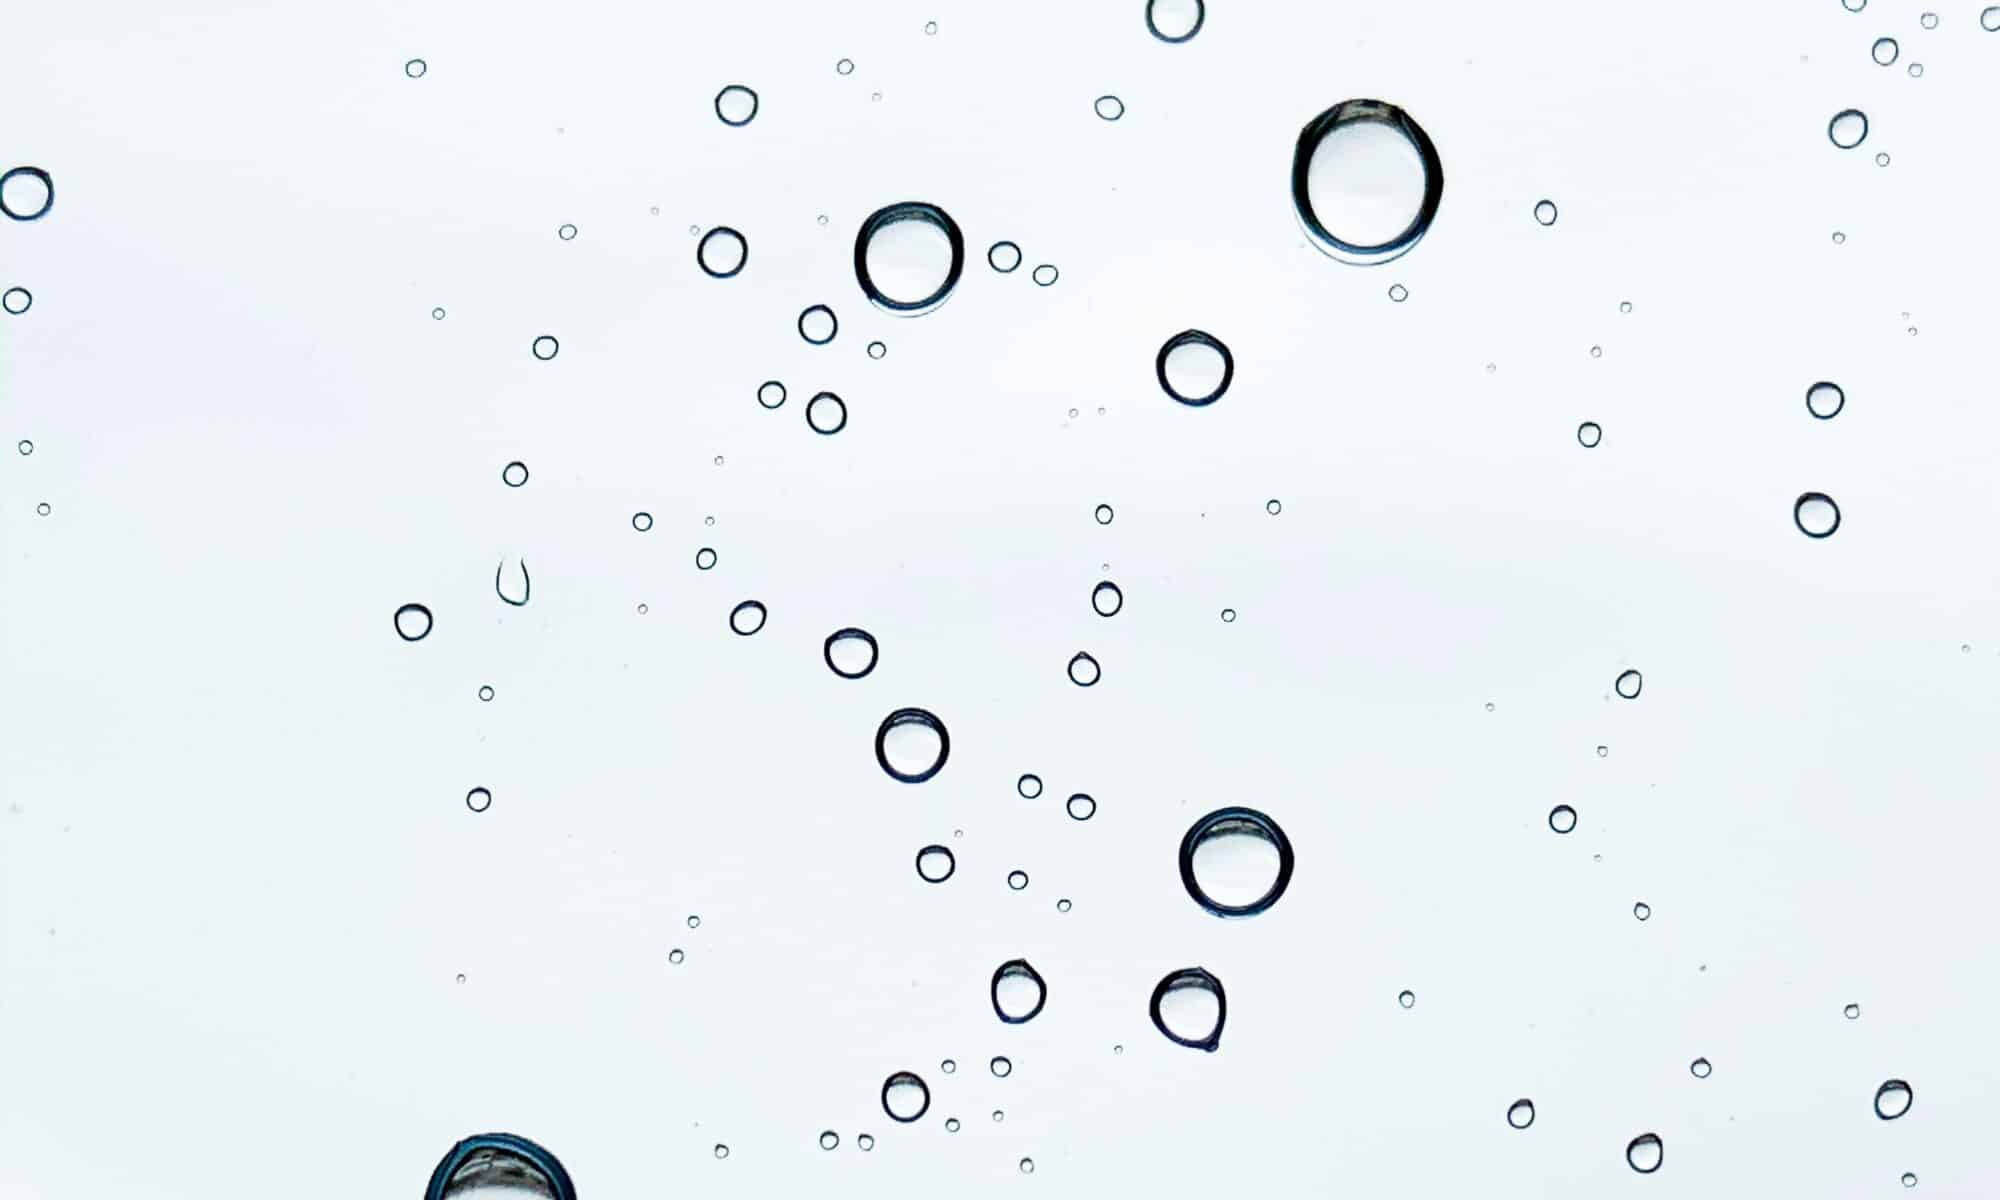
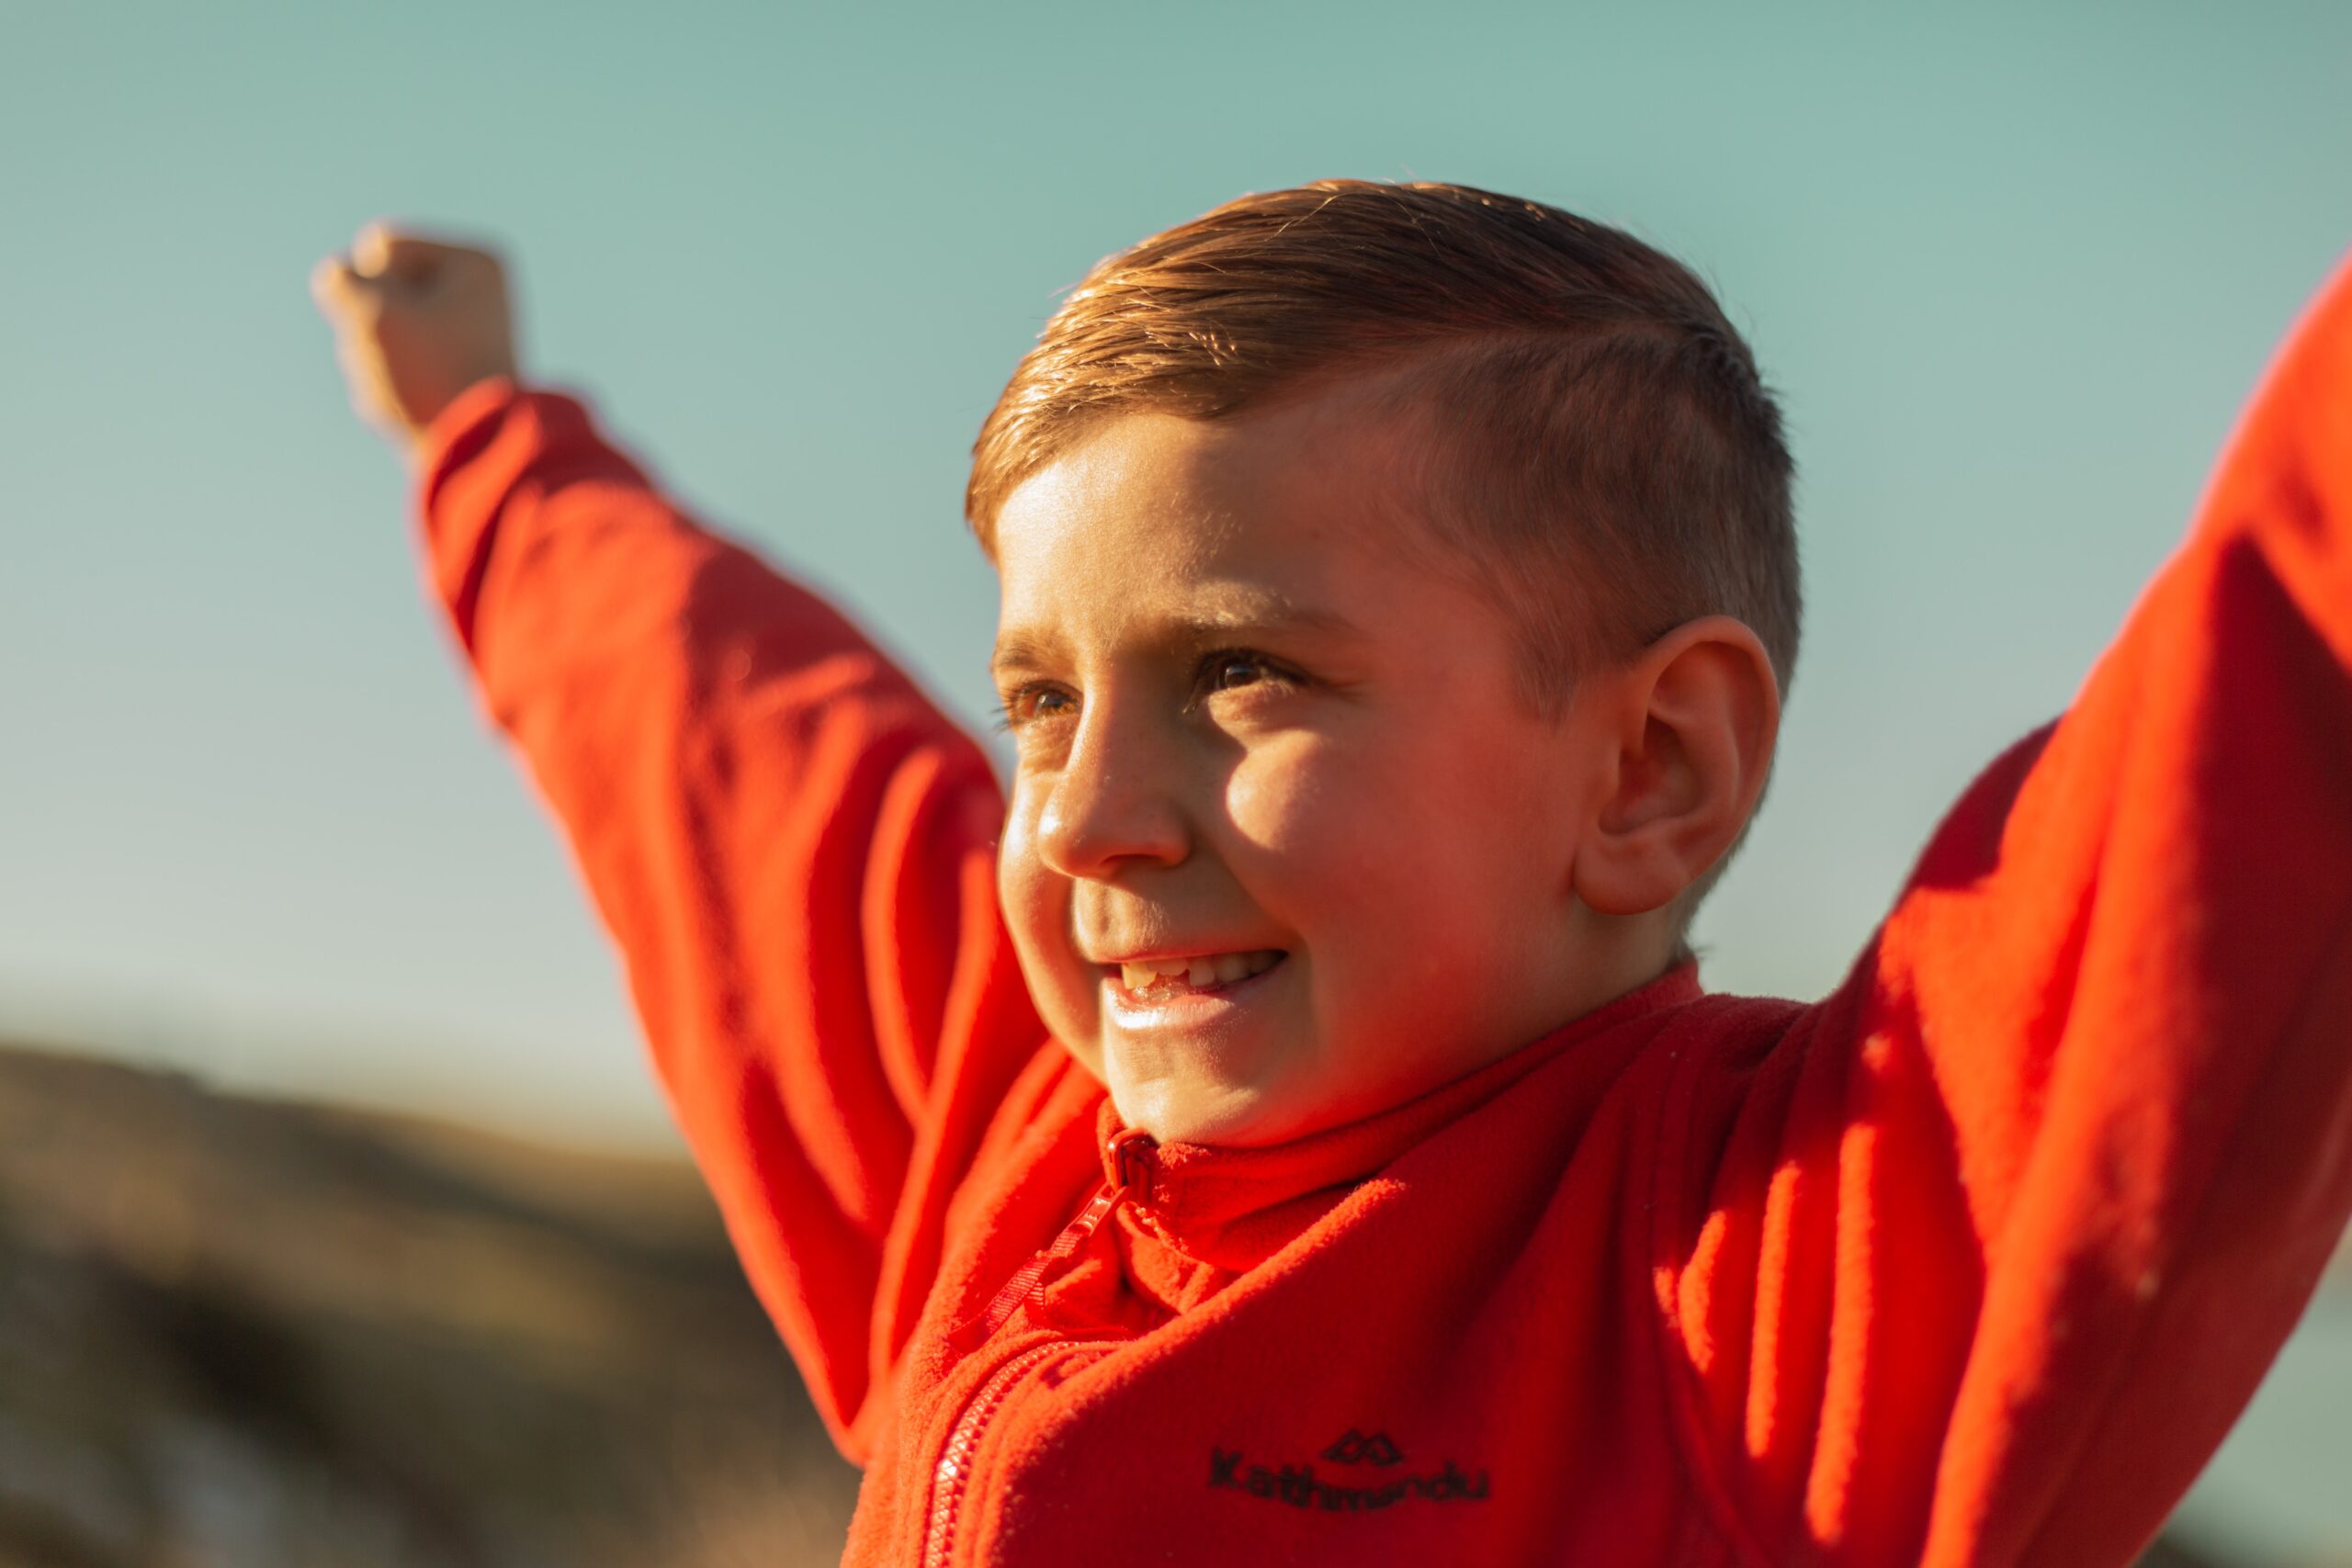
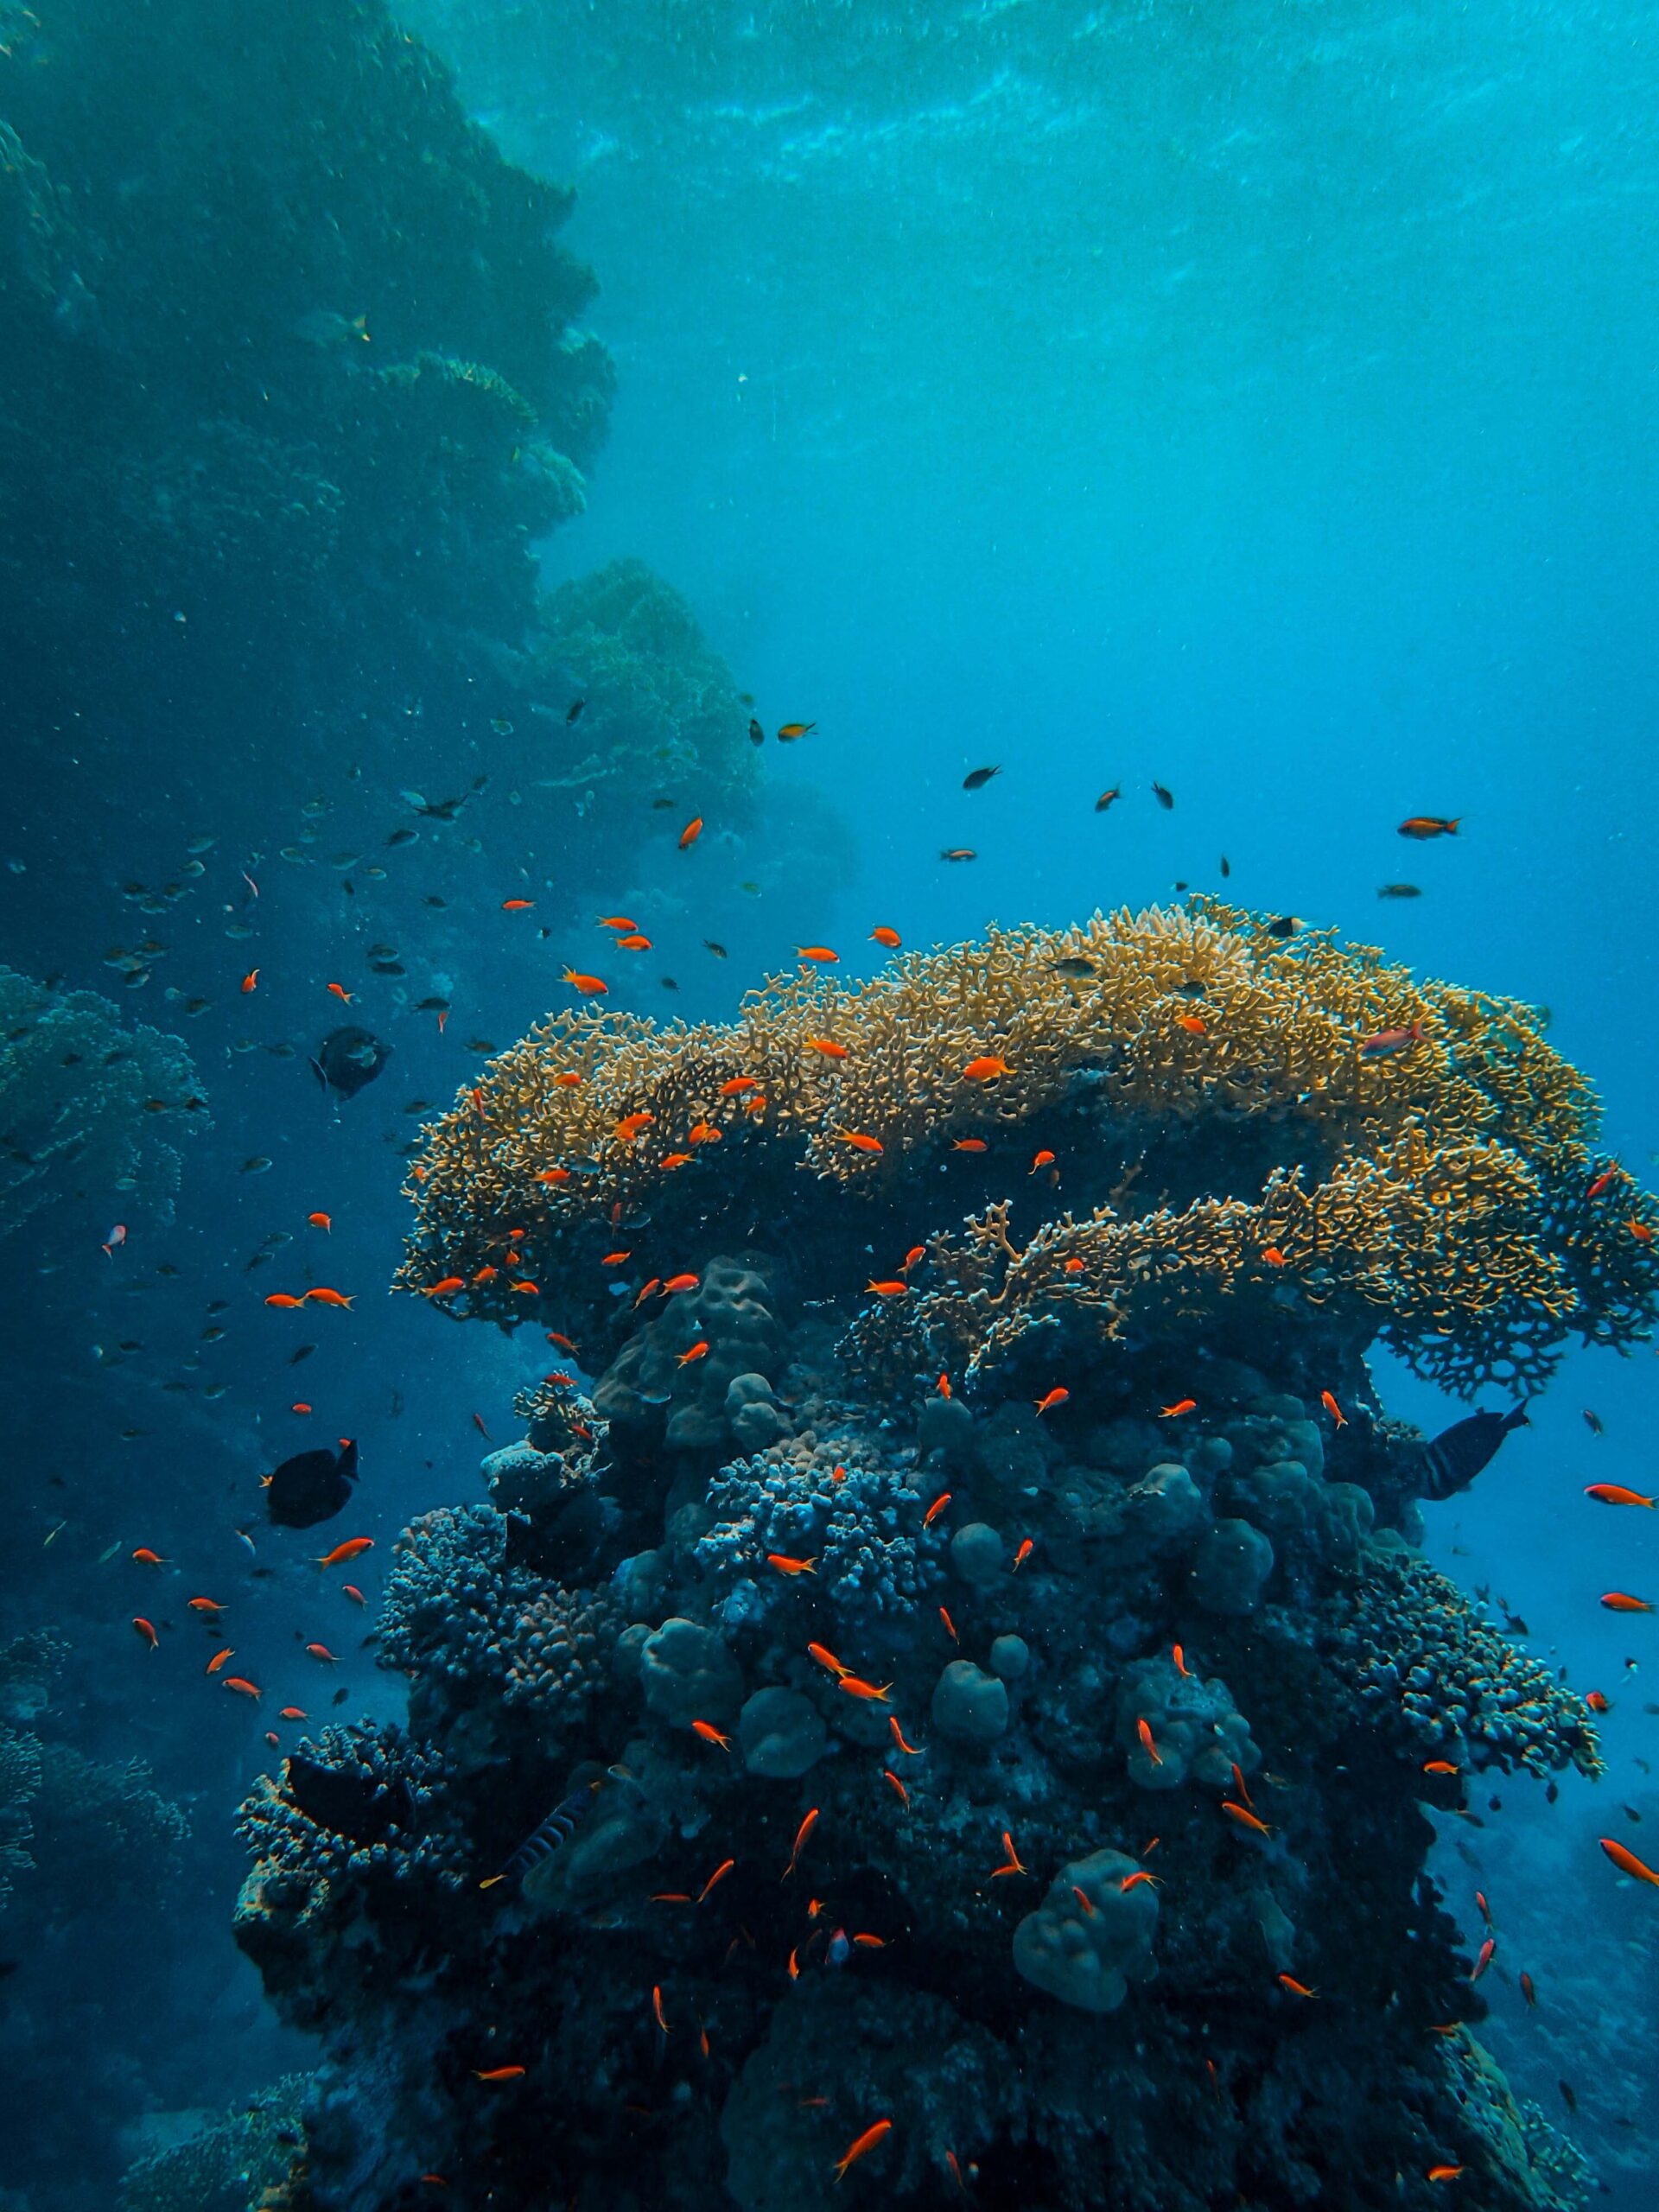
For our similes, we are going to take inspiration from the image below. Look carefully at the image and focus on any details that stand out to you. You can focus on colors, shapes, emotions, and anything else you notice!
Use this Jamboard (click here for the link!) to write down the simile you created on slide 1. Please be respectful of fellow your classmates’ responses! Here are some of the similes we have so far:
Metaphors
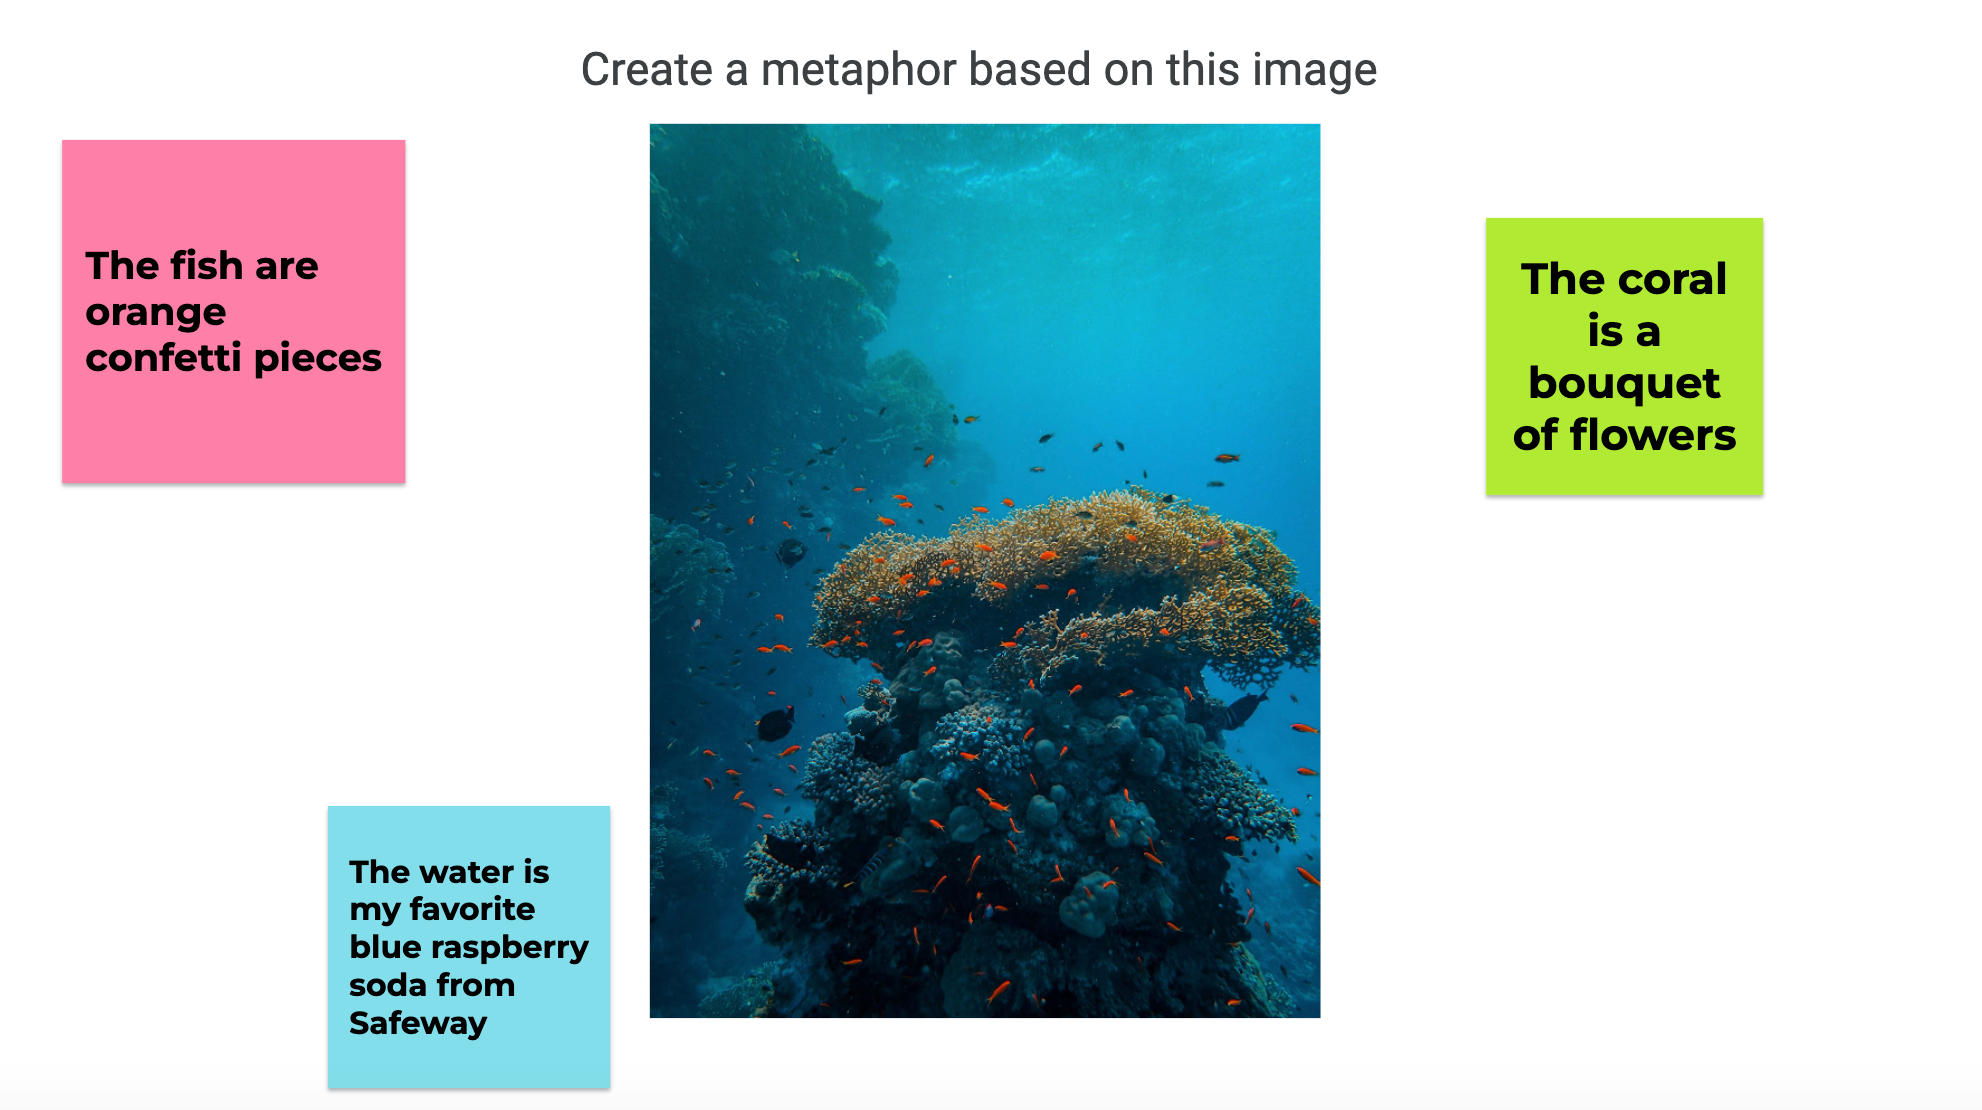
Next, we will create metaphors. Remember, metaphors are like similes because they both compare two things. However, metaphors do not use ‘like’ or ‘as’ because they are direct comparisons. Let’s use a new picture to spark some ideas for our own metaphors!
Use the next slide of our Jamboard to write down your metaphor. This will be on slide 2. Be creative and feel free to use the examples from your peers if you are having trouble making your own! Let’s look at some metaphors our friends wrote:
Personification
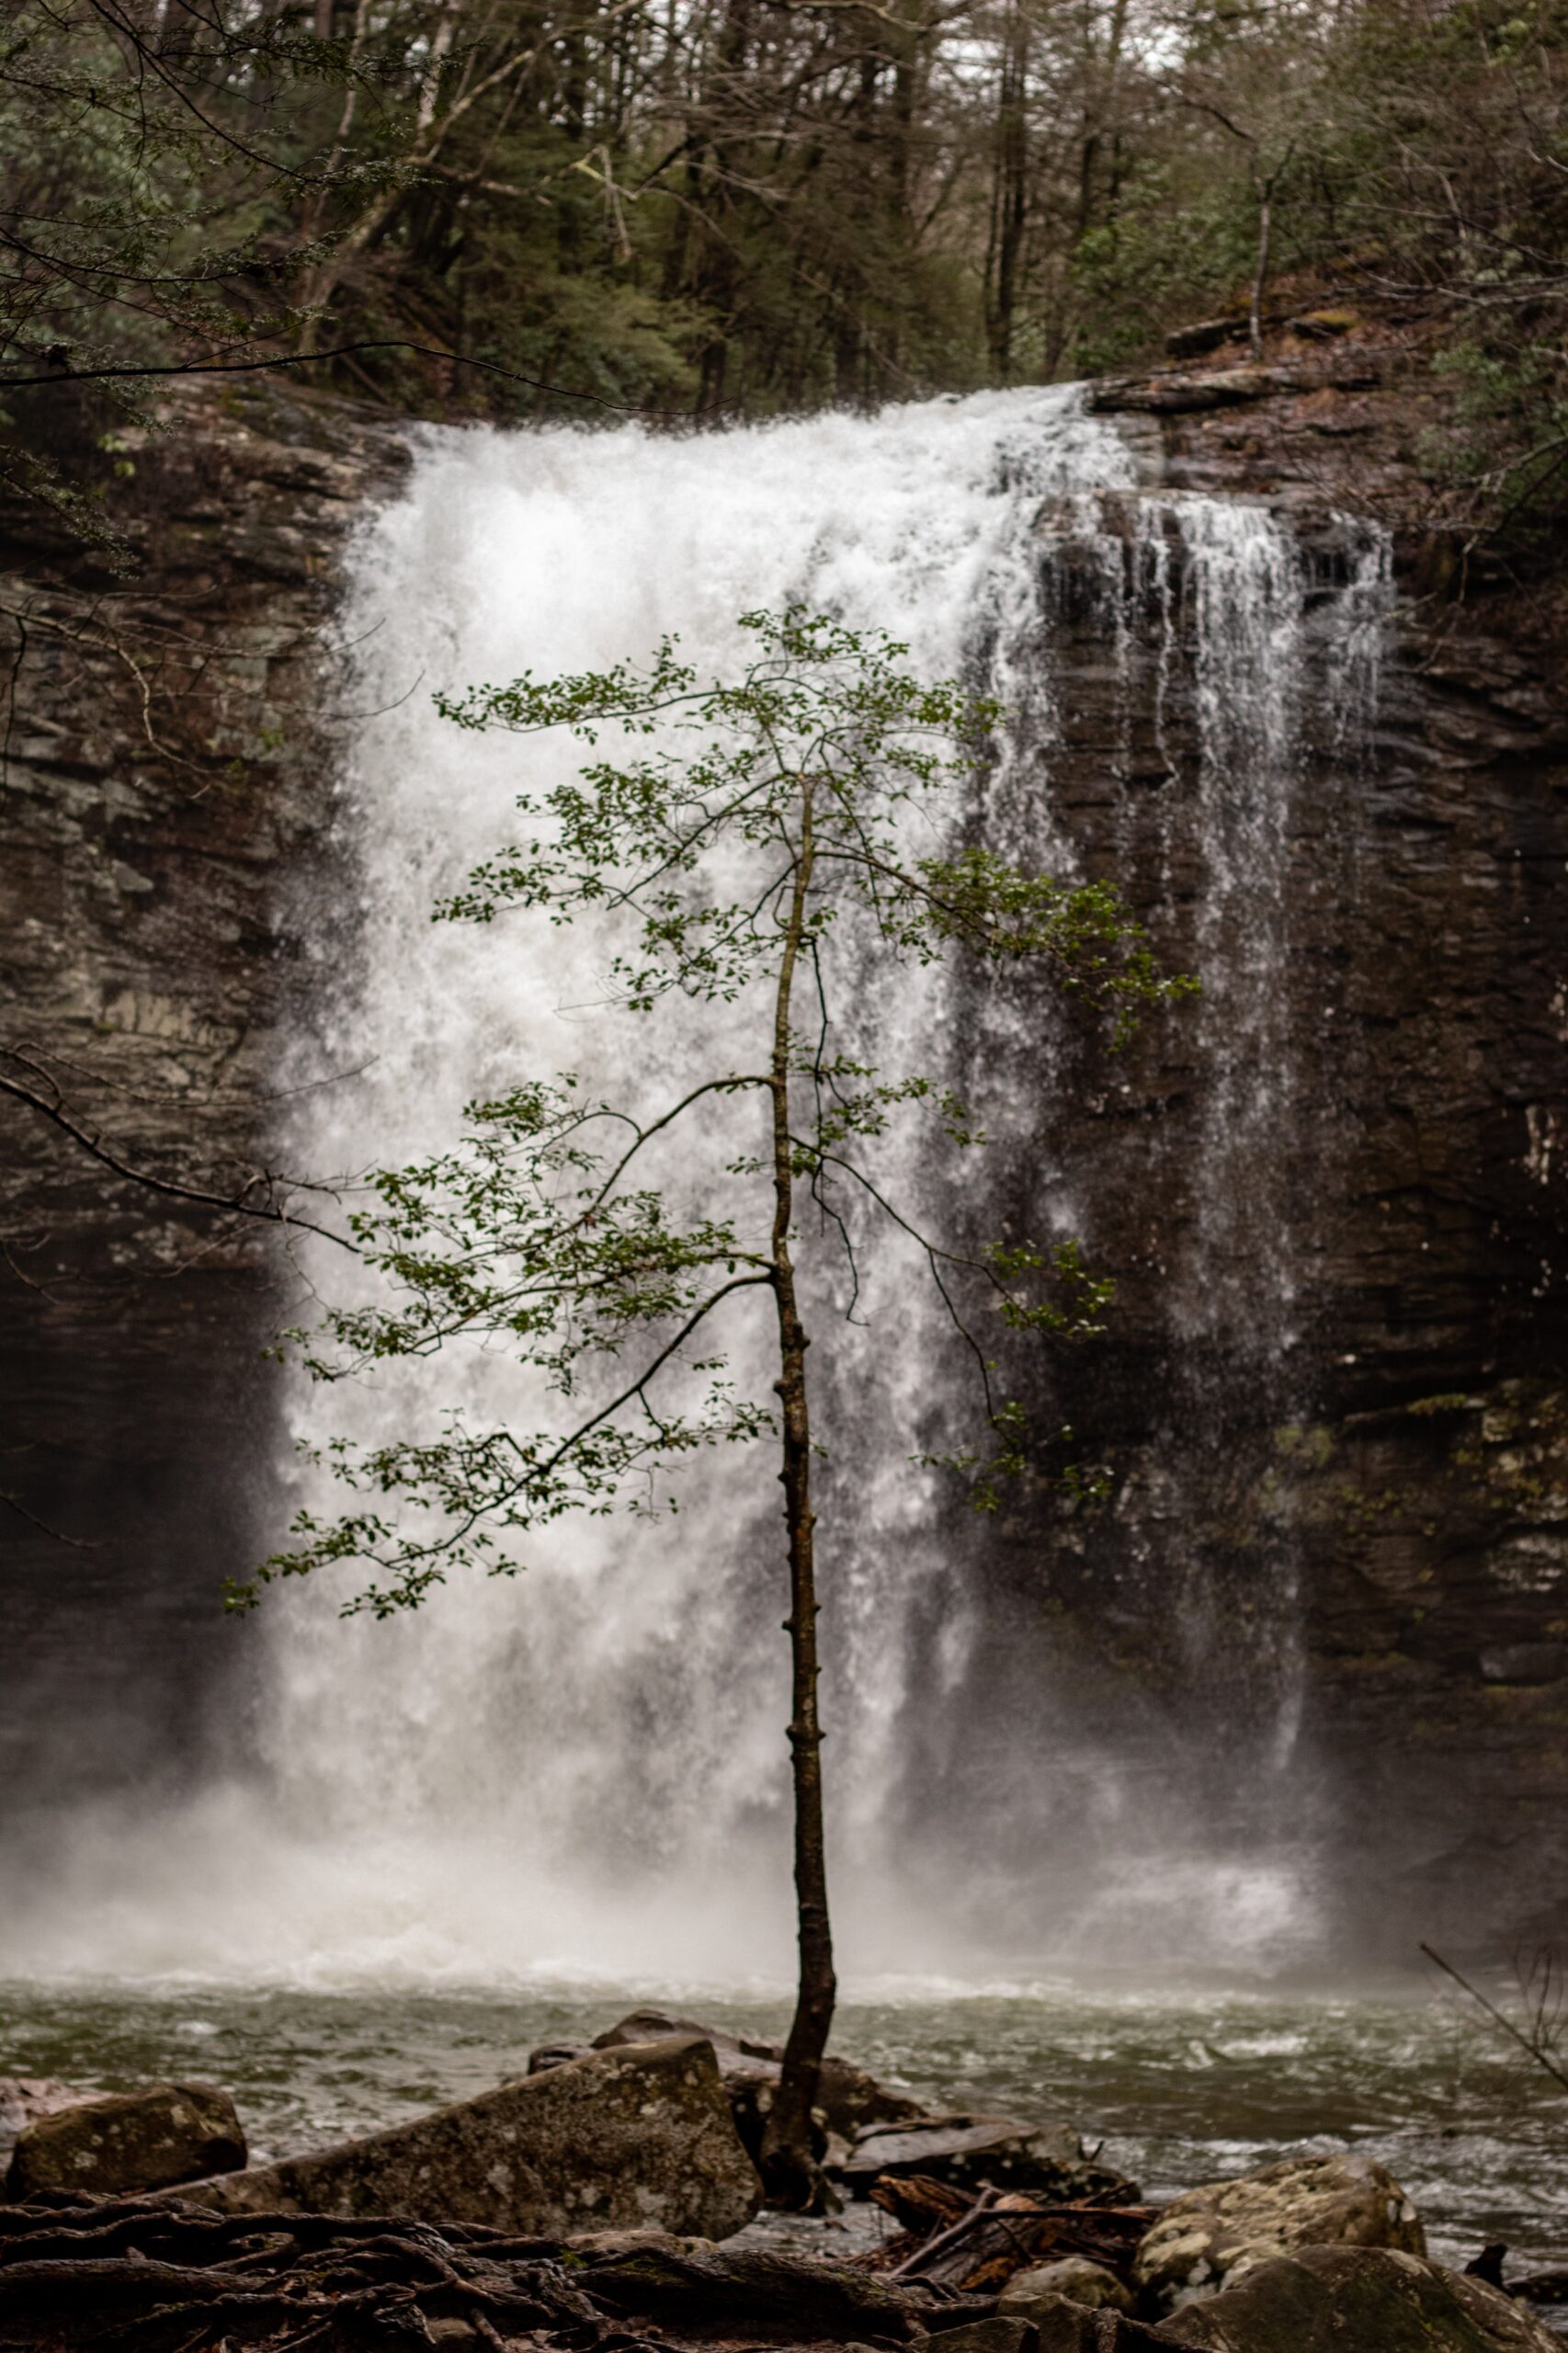
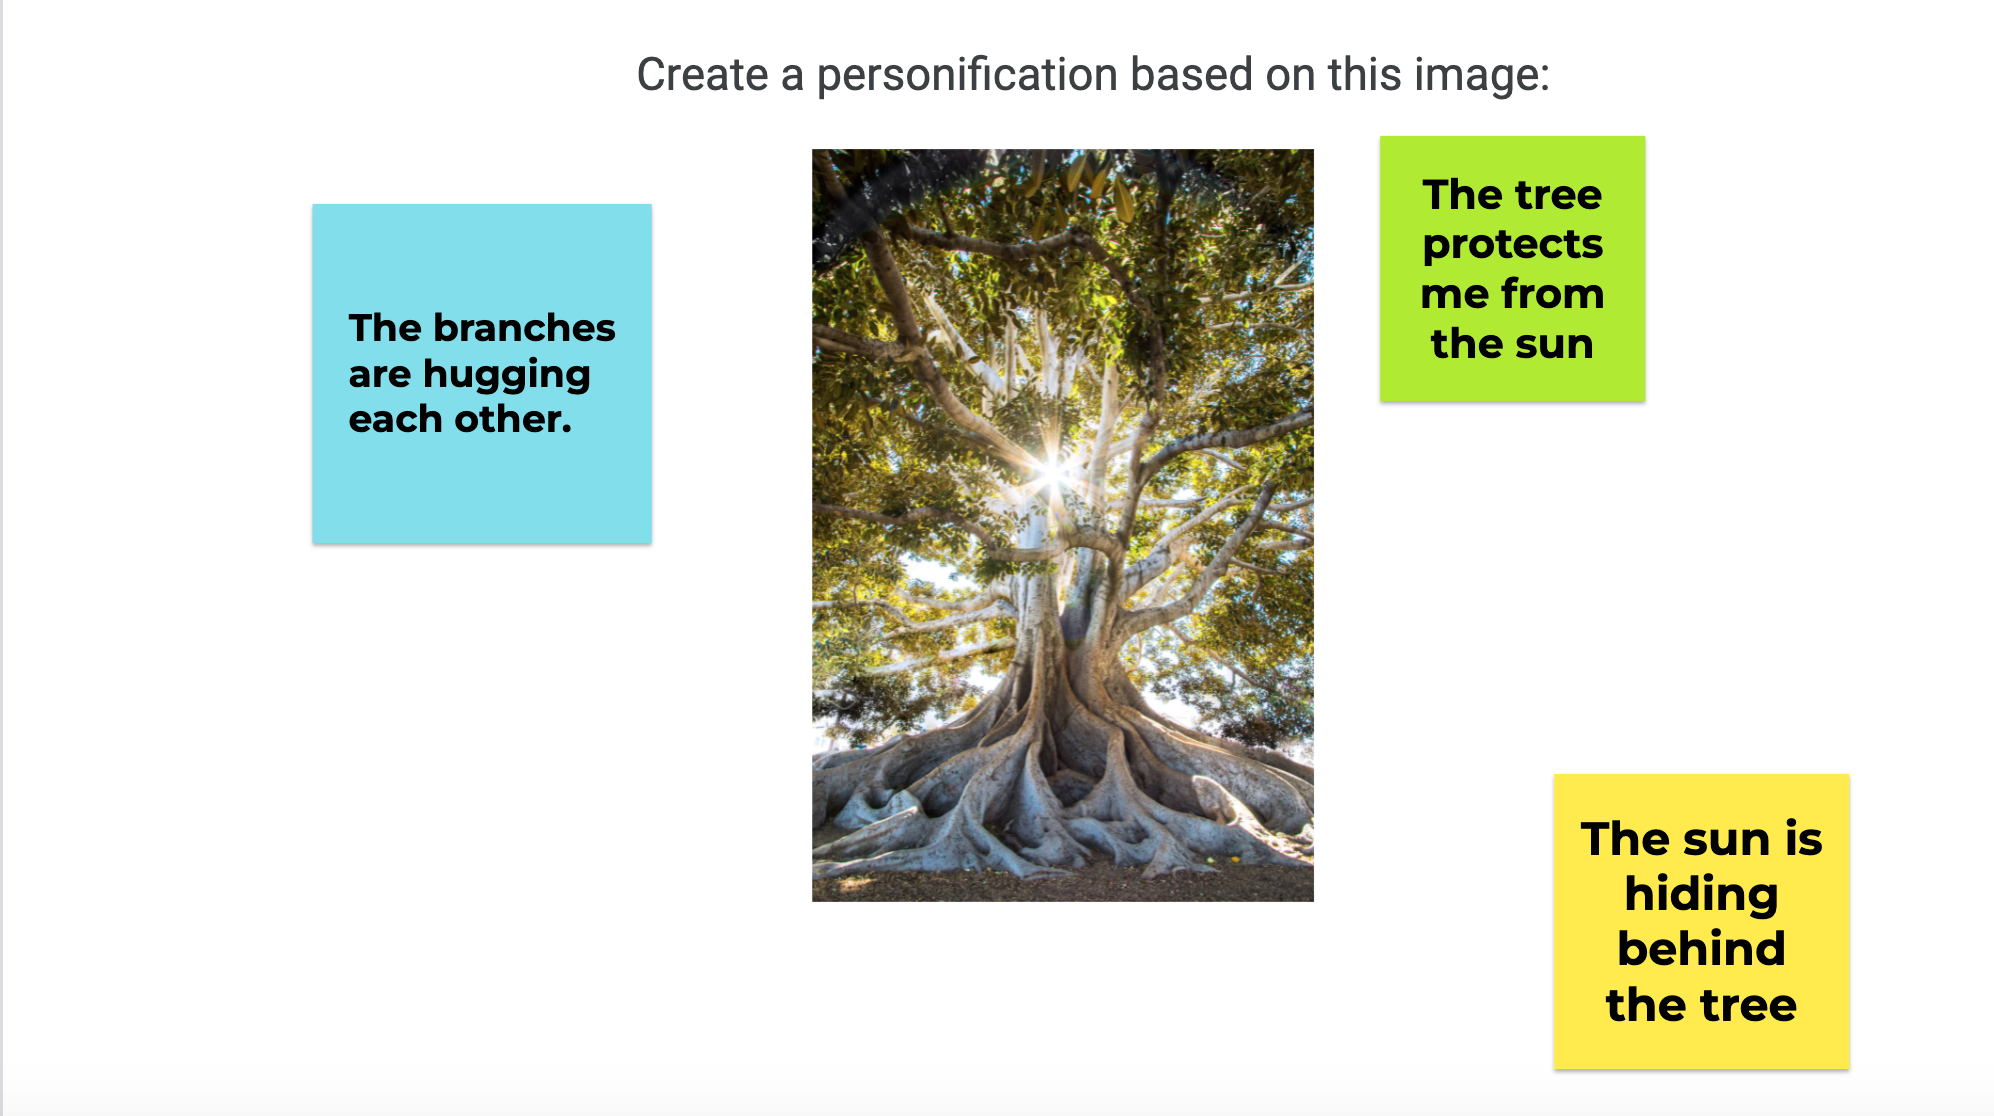
The last type of figurative language we learned about is personification. Use the image below to create one! Look for any part of the tree (this can be its branches, roots, and leaves) or the sun that looks like it is doing something that humans normally do.
Once you have your personification, add it to slide three of our Jamboard. Personifications can be difficult to make, so do not worry if you’re having trouble. Just try your best and have fun with it! Here are some examples of personifications we’ve written so far:
Conclusion
By the end of this activity, you should have created a simile, metaphor, and personification. Figurative language takes a lot of brainpower, huh? But it makes reading and writing way more interesting and fun! Tomorrow, we’ll continue reviewing figurative language, so don’t worry if you’re still a little confused about it. We’ll also look at the finished Jamboards to read all the awesome things we wrote! Great job, friends!
Subject: History Topic: Placing Events on a Timeline
Hello my third grade friends! Today we will be beginning a new history unit about comparing events that happened long ago versus events that have happened within the last few months. Timelines are a good way to show time passing and to show the order in which events have occurred! By the end of today, we will be able to place events on a timeline, in the order they occurred, through the use of a Jamboard, in order to show time passing.
Today, we will be using Jamboard to place events that happened earlier in the school year as well as events that happened today. By doing this, we will be able to show that we can organize events based on the order they happened. You will have access from your iPads to write your answers on a sticky note on the Jamboard. I want you to think back to something memorable that happened this year in school. What month did this happen in? Now, I want you to open Jamboard, write your answer on a sticky note, and place the event under/above the month that it happened
(The teacher will then allow the students to open up the Jamboard link. The students will write their event on the Jamboard under/above the month in which it happened. After allowing the students a few minutes to think of an event and write it on the Jamboard, the teacher will go through the timeline to double check all of the events to make sure they are in the correct order. If the school does not have access for all students to have their own device, they can either work with a partner or in groups. Similarly, if there is only technology offered for the teacher, the teacher can call on students and place the events on the timeline for the students on the Jamboard.)
A few minutes go by and edits stop on the Jamboard.
Alright my friends, we are going to go through the timeline together to remember the events that took place over the year! (Teacher goes through the Jamboard to make sure all the events are in the correct order and so students can reflect on their work) Great work today, historians! Next time, we will be looking at different events from the past and we will be able to place the events on a timeline so that we can remember when events took place and order them from long ago to today!
Link to Jamboard: https://jamboard.google.com/d/1ZcKsjSgbiLGomDGi0KrIMAS4T24ZanWmTYKAhvsbggU/edit?usp=sharing
This lesson is designed for kindergarteners to practice using the SEL emotional regulation colors.
It follows the Oregon Standard 4: Students will demonstrate the ability to use interpersonal communication skills to enhance health and avoid or reduce health risks. Specifically the kindergarten standard: HE.4.K.1Identify healthy ways to express needs, wants, and feelings.
This lesson assumes kids already have previous knowledge of the four emotion zones and allows them to practice through a read-aloud, drawing, partner sharing, and generating a class list. Click on any of the images to access the Jamboard. Jamboard allows students to have ownership of their own slides and creation in a virtual setting. It also allows for easy sharing because anyone with the link can access the information.
First, watch or read the book ‘The Bad Seed’ by Jory John
Then pull up the Jamboard on the teacher’s screen (without sharing the link to the students) to review the four core emotions and some strategies that people can use to move back to green.
Ask the students what color they think the bad seed felt at the beginning and end of the book. Generate some ideas about what the bad seed did to move to green on the whiteboard.
Then, share the Jamboard link with the students and have them identify what color they are currently feeling on slide #2.
SEL emotion student check-in
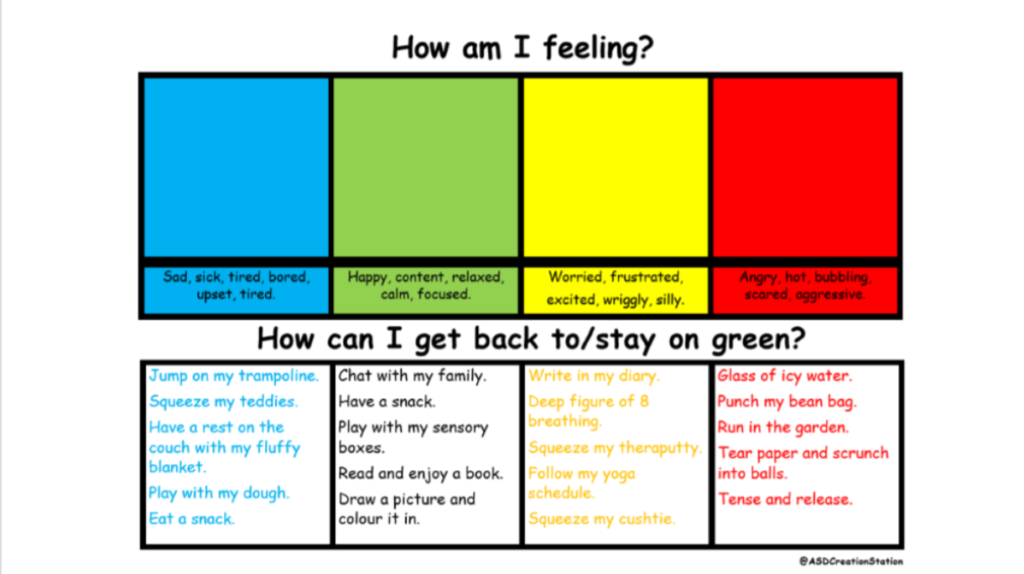
When finished, have them each find their slide (the teacher should put students’ names at the top of each slide before the lesson) and draw themselves as the bad seed and some strategies they would use to move back to green. Students can reference slide #1, the whiteboard, or the example slide on #3 for examples.
examples of emotional regulation to get to green. Teacher example of a bad seed self-portrait and personal strategies
Once finished drawing, have students share their images with a partner and explain their strategies. The teacher will then gather students’ ideas on the last slide.
Gather class emotional regulation strategies here to have something to reference back to in the future.
“Persuasive Brainstorming” is a lesson using Jamboard directed towards upper-elementary students, for example, 3rd-5th grade. Outside of grade level, this Jamboard could be of great use to teaching your students different types of writing. In this case, we could introduce or develop students’ abilities to draft and create a persuasive paper. The process would include asking students to log into Google Jamboard and access the shared file called “Brainstorming Persuasive Essays.” From there, students will be able to add their ideas to their specific Jamboard slide.
Instructions:
Teacher: Okay students! Today we are going to start BRAINSTORMING for our persuasive papers! Can someone remind us what it means to be persuasive in our writing? Raise your hands to give me the answer.
Student: It means we are trying to convince someone that our point is correct.
Teacher: Correct! We are wanting to convince someone with a different opinion why our idea is better. What are some strategies we can use to strengthen our argument?
Student: Providing evidence!
Teacher: Yes, great answer! Now before we start writing let me explain BRAINSTORMING. BRAINSTORMING is when you all start to think of ideas that you want to persuade someone else to agree with you on. So here is an example of today’s Jamboard Brainstorming activity. First, you will log in, then once on the Jamboard look for your name, and finally, start writing down ideas. Here is mine:
Teacher: Now, it is your turn!
Goal:
It gets students to be creative and learn how to use collaborative technological tools.
The lesson overall can help students work and better their writing ability.
It pushes students to find evidence when backing up their opinion.
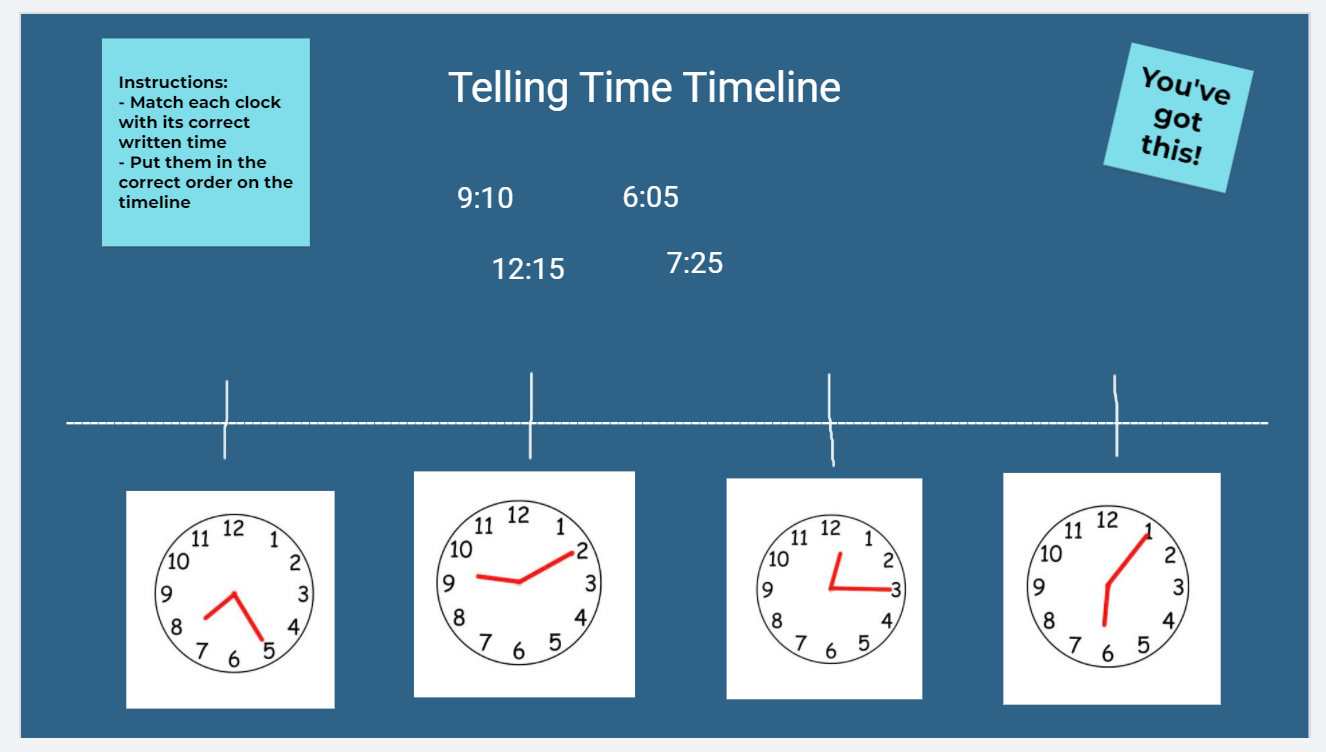
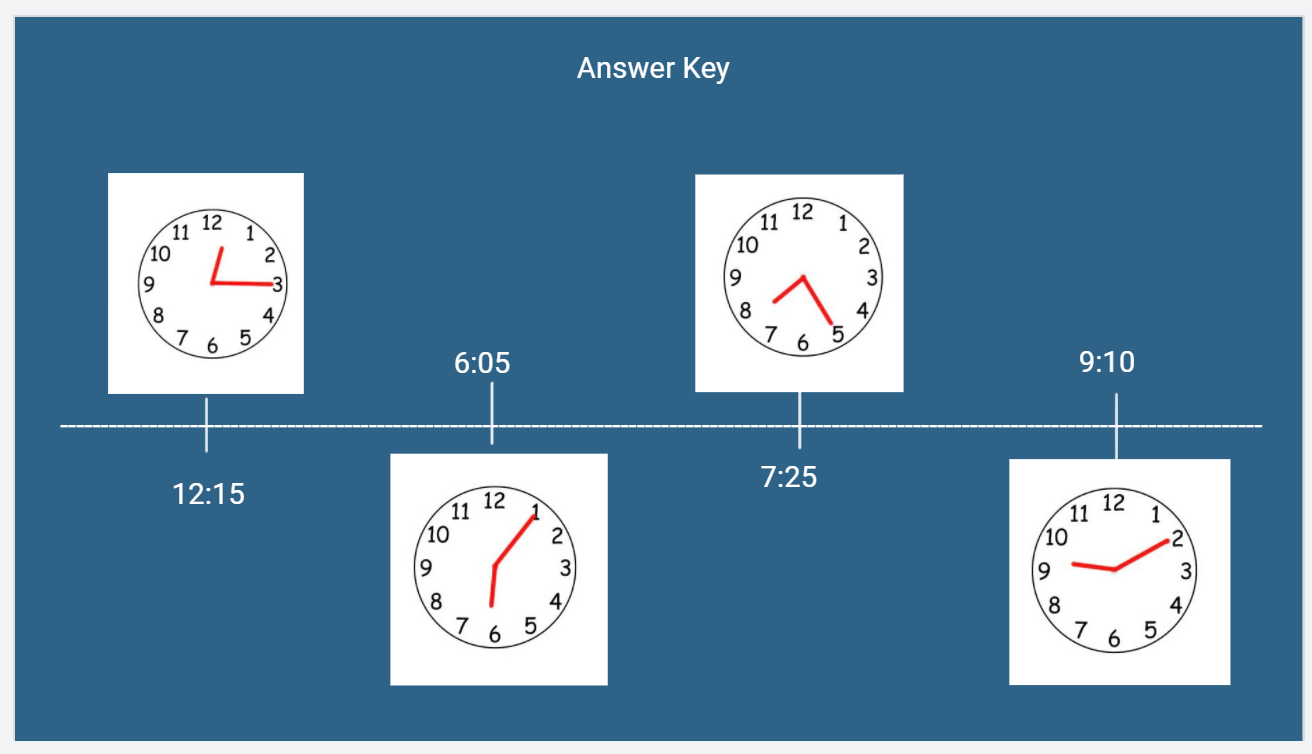
Instructions: Hello 2nd graders! Today, we will continue practicing how to tell time with Jamboard. First, you will be matching each clock to its written time. After you do that, use the timeline to organize the times into the correct order (earliest time to latest time). When you are done, you can take look at the second slide of the Jamboard to double check your answers. No peeking!
Goal: Students will display understanding of how to read a clock, what a clocks time looks like in a written/digital form, and in what order the times are displayed (earliest to latest). The Jamboard will allow students to easily move the clocks and times around the timeline/screen so they may arrange them in whatever way makes the most sense to them.
Instructions for students: Hi class! Today we are going to do some Jamboard word sorts with the sounds we’ve been learning. For the first sort, look at the picture and place it in the appropriate column. For example, if it is a picture of a dog, put the photo in the -og category. For the second sort, categorize the words with the long o sound into the -oi or -oy columns based on their spelling. For the final sort, look at the pictures and place them in the appropriate columns based on their spelling.
Goal for the Lesson: To help students practice phonics. It will help them connect the sounds in common words they know to the spelling of those words. The Jamboard helps meet this goal because students can move around the pictures and stickies to categorize them appropriately and practice their phonics knowledge.