Adobe Spark Video Review

Last week in class we had the opportunity to use three different apps to create videos within the classroom. We were split into different groups, which reviewed and played with a different app each. I was able to test out and try Adobe Spark Video app. The app proved to be a success within in my group, but also had a few setbacks.

To begin,  the Spark app can be used on most any device, which is handy for teachers. It will work on iPads and computers depending on what is used in a particular classroom. The making of a video is pretty simple. You can either use a template made or start from scratch, both seem to be student and teacher friendly. my group agreed that any grade third and up would easily be able to maneuver the app. It is a simple app, which for students, can be considered a good thing so it doesn’t become too complicated.

A few downsides were found as well. You could not record a video on the app, you had to upload from what you already have. The font size, and placement of text only had one to two options which was sometimes frustrating.

I enjoyed using this app, and I would use this in the classroom.

Clips Vs. Toontastic

In last Wednesday’s class we took a look at Adobe Spark Video, Toontastic, and Clips. I didn’t really mess around with the former, so I’m going to compare the classroom compatibility of the other two.

Clips is a fairly simple app that allows you to take and edit short videos. It features camera filters as well as animated stickers that can be inserted that can be applied your videos. In addition, the app sports a number of pre-recorded intros, text of varying fonts can be pasted over footage, and there are some minor film cutting tools… But that seems to be about it. It lacks a lot of more in-depth features such as sound editing, cutting clips in half, or even allowing for landscape videos. Additionally, I feel like the software of Clips was a little clunky in of itself. Buttons had oddly placed hitboxes or were slow to respond. All in all it’s an ok app for taking short videos, but I wouldn’t recommend it for much educational use.

Toontastic, on the other hand, seems like a great pick for an app to let younger students express their creativity in a constructive manner. Essentially Toontastic provides visual resources such as animated characters and settings, project structuring, and themed music to help students create their own movies. The app has a wide array of interesting features, like the ability to 3d render your own drawings or the ability to interact with certain parts of the scenery. Furthermore the app sports an intuitive GUI  and utilizes your tablet’s microphone to record users’ dialogue. Toontastic seems to be a very well put together app geared towards younger audiences with plenty of opportunities for classroom use.

All in all I’d definitely recommend Toontastic and would suggest against using Clips. They cover different things and seem to appeal to different audiences so I can’t really compare them for use in the same classroom, but Toontastic has many more features and seems much more refined while clips seems almost like a project someone made and then forgot about.

Review on Clips

This week I tried Apple’s fairly new video App “Clips.” This video editing app is available on iPads, iPhones and iPods’ that have undergone the recent software update. This was my first disappointment with this application but certainly not the last. After going through the 30 minute update process, I then was able to download Clips and begin exploring. Upon opening the app I became extremely excited by the promo video, though I soon realized that executing these effects was not so easy.

Clips, in my opinion, is not a very intuitive app and it takes a lot of tapping and experimenting to figure out how it works. Even a Google and YouTube search on “how to use Clips” was not very helpful. Another problem I found with Clips, is that the App appears to freeze. Although I’m not sure if this is an actual problem for all users, I did experience these moments of unresponsiveness on both an iPhone and an iPad. The final downside to Clips, is that it is only available on the Apple products stated in the beginning of this review. Many schools use other types of computers and tablets and will, unfortunately, not have access to this resource.

Although there are certainly cons to Clips, there are also quite a few positives that may tip the scale in this Apps’ favor. First of all teachers can use Clips to edit quick videos, tutorials, or messages to their class and can also upload class videos to their website or classroom social media applications like Seesaw. Videos created on Clips are designed to be easily viewed on social media platforms which is a huge bonus in the convenient department. Teachers are also able to add and edit videos from their library as well as film and take picture directly on the app. There are also several effects and stickers to choose from and users can turn on “speech to text” which can make content material presented in a video lesson more accessible to all students. Finally, this application is free and the download process goes smoothly if you already have the updated software.

Overall, with all of its problems aside, Clips can still be a great tool for teachers in the classroom and I expect it will be easier to find tech advice online as this application becomes more popular. I would recommend giving Clips a try if you are looking to try a new video editing App but, suggest setting aside a good chunk of time to explore and research before committing yourself to any video editing projects. Best of luck and happy editing!
Make Your Stories Come to Life

Adobe Spark Video was one of my favorite apps to use because the lesson plans are endless for  an application such as this! This free platform allows students to go wild with their creativity and use the resources they have to make something great! We learned in our ed tech class, that with many options, it leaves students spending too much time on the customization rather than their original intention. For this reason, Adobe Spark video gives students limited “free media” allowing them to focus on the main purpose of their activity.

If I were to create a lesson using Adobe Spark Video, I would turn it into a creativity writing lesson. I would begin by introducing a prompt such as write a story about “a city where everyone only eats dessert”. You have 15-20 minutes to write this story. After students create their story, they will be able to use Adobe Spark Video to make their stories come to life. Students can add music, video, and images to bring excitement into their creative writing. Every student’s mind is unique and how they choose to address this prompt is completely up to them. Below, you will see a sample of what I am asking of my students and examples of what key components they could add. Teachers can also use this application for narrative writing, poetry, expository, and so much more!

Resources:

  • https://www.journalbuddies.com/journal_prompts__journal_topics/story-writing-prompts-for-kids/ (prompt idea)
  • https://videos.pexels.com (free videos)
  • all images are found on free adobe spark video application

The Lorax Lesson

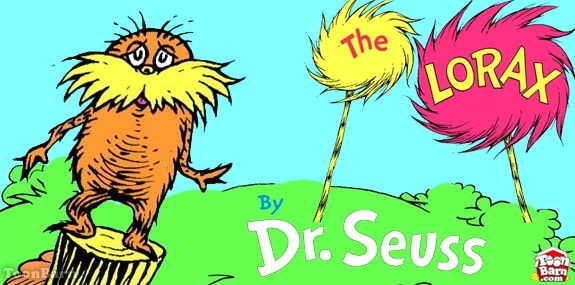
I have embedded an example of one of my favorite books as a kid, “The Lorax,” by Dr. Seuss. My video would be targeted towards a second grade audience.

My goal would be for students to fulfill the common core state standard, ” CCSS.ELA-LITERACY.RL.2.2:
Recount stories, including fables and folktales from diverse cultures, and determine their central message, lesson, or moral.”

I like the idea of using this video as a resource, where I play the video out loud, and students follow along in their own books. The video would be a good introduction to the kids about what imovie looks like in a classroom.  As the students are reading the book out loud and listening to the imovie version, I will periodically pause the video and ask them to retell the story in order to check for understanding. What was “The Lorax about?” After we have a class discussion about the video’s summary, I would ask the students to share what they thought the central message of the story was. My objective would be for students to share about how “The Lorax” is connected to the issue of environmentalism in the world.

At the end of the lesson, I would ask students to brainstorm topics that they care about. Every day, I will begin class with a lesson about a topic with a lesson or moral. At the end of the unit, I will ask students to look for books with a distinct lesson or moral in the class library. After presenting students with a tutorial on how to create an imovie, they will be put in groups and create their own imovie where they read the book of their choice out loud and explain why they picked it, what it is about, and what the central message or lesson is.

Video: Changing History

It is impossible to write about using video to teach high school social studies without mentioning CrashCourse. CrashCourse is a collaborate educational platform spearheaded by brothers John and Hank Green. Their videos cover virtually everything one might expect to learn in school, from English to physics and computer science to psychology. I find that their history content is especially well done. Teachers can use CrashCourse videos to supplement lesson plans, offer students review material, or even flip the classroom to allow for more in-class discussion time. Here is a description of CrashCourse from the creators themselves:

Their videos are engaging, quick, and informative – a perfect combination for teachers and students alike.  As access to information online become more readily available, I wonder what changes we will see in the functions of classrooms, schools, and curriculum.

How would you use CrashCourse videos in your class?

How has the availability of online educational content influenced how you teach and learn?

Video from: YouTube/CrashCourse

Creating Multimedia Books with iMovie

In my search of ways to use iMovie in elementary-age classrooms, I came across the suggestion of using it to create multimedia books. To do this a teacher would ask students to read their story aloud (record it) and draw pictures to go with them (illustrate). Another idea would be to take pictures of students acting out their story and insert them into iMovie. To start the students in their writing, you could use themes or ideas that you are teaching such as letters, shapes, biomes, plants, opposites, etc. or ask that they write an about me book similar to the ones in the example video I found. Students write stories all the time, why not turn them into a multimedia experience!

All About Me Multimedia Books from Title IID – Queens, NYCDOE! on Vimeo.

iMovie in the Classroom

This embedded video is an example I found on youtube of a student made trailer using imovie based on the topic they are currently studying in that class.  Often students have a lot of fun using Imovie to make a trailer to showcase what they learn and this is a win-win situation because it allows you as the teacher to assess what the students have learned while also giving the students a chance to engage with and share their knowledge in a fun way. Imovie and video can be such a beneficial tool in the classroom allow students an active and creative way to express the knowledge they have learned to the teacher or to create a fun classwide project for the parents. Using video in the classroom also allows students the opportunity to bring in clips from things they experience outside of the classroom and yet relate back to what they are learning, for example if they are learning about the weather students could include actual clips of the weather outside. Another use for video in the classroom is teachers using it to introduce a topic to students or explain important concepts they are learning about in a way that is more likely to capture the students attention.

I think overall video can be a very useful and engaging tool in the classroom. I think that it can also be very fun as the teacher to look at how your students learn differently and what they choose to highlight as important in their videos, and it is also interesting to see how their videos are the same or different even if they are on the same topic.

The Great Escape: Writing Prompt

This week we learned how to use iMovie and then were given the task of creating a learning resource. I have used iMovie to create a, hopefully, more engaging writing prompt to show to students before they begin their brainstorming and writing process . This was inspired by our previous post about classroom’s of the future. I envisioned more visual methods of instruction being incorporated via technology and believe that iMovie writing prompts would be a great start. Although I would also provide students with this prompt in written form, showing students an iMovie writing prompt would likely be more interesting and exciting for most students. At times it can be difficult as a student to visualize what the prompt is asking of them when there are no images that go with it. This is a way to add both text and images to a prompt in a unique way. I can definitely foresee myself creating more iMovie writing prompts for future students as a way to make free writes fun!

iMovie How to – Ideas for the Classroom

When experimenting with iMovie in class, I realized how easy and accessible it is not only for me as a teacher, but also for students. All that is needed is an idea, videos, and creativity. I had this idea and it really could be used for any subject of school. I thought that students could use iMovie to either reenact scenes from a book they are reading in class, reenact a history lesson, or even perform science experiments.

Through not only reading about these occurrences but actually reenacting will offer students to be more hands on.  This will give them extra insight on what they are learning. Since students will be recording themselves, they can also present their movies in front of the class which will give insight to the other students findings and interpretations of the lesson. This will spike students creativity which I think is very important in the classroom.

I was having trouble finding an example for this, but  I really do think this was be a beneficial way of learning.

Student Interest Project Using iMovie

In ED Tech class this last week, we learned how to use iMovie in the Digital Lab at University of Portland. Not only was this a particularly exciting application for me to learn how to use because I have always wanted to work with iMovie, but I had recently traveled to California to visit my younger brother at his college and see his life–so I had footage to use and was ready to create! I loved taking the small videos that I had and blending them together, cropping them, adding music, adjusting the sound levels, and replaying my video over and over again until I had it all just right! It was a creative process for me to eliminate unnecessary clips, pick the perfect song, and ultimately produce my very first short film using iMovie!

As a future educator, I also look at iMovie with excitement for how it can be used in the classroom! I am using my video as an example for what I would consider a “Student Interest Project.” A Student Interest Project could be created using any type of medium the student chose (but video would be encouraged), and students would be given access to the application (iMovie/Movie-Maker) if they do not have it at home. The goal for this assignment would be for students to pick some aspect of their life, something they love, something that describes them, and try to show it artistically using video and music. Like my video, it could be about a trip, family members or friends, a sport or other activity, or anything the student hoped to share with the class! A step up from the “Student of the Week” poster projects, using iMovie or another movie-making application can give students a chance to share part of their life with the class, build community, and utilize their own creativity with technology and imagination!

iMovie in the Classroom

Learning to use iMovie is a really great tool to know for my future classroom, especially since it is so simple for students to learn how to use as well. We saw a few examples of what it could be used for in class such as a trailer or a short video including pictures and videos. From this, I thought a really interesting way you could have your students use iMovie is for a book report. Movie trailers for a book that they have read to discuss the main ideas and favorite parts of the book.  One to two minutes long, and have a day or week that all students get to share their book reports. This may be easiest to do as a group project, for different books from book groups, or maybe an individual project that each reader had a different story to read.

From this idea, I found a few examples of this that had already been used in other classrooms.

I think this would be a really awesome way to get students involved in movie making and learning how to use the basics of iMovie while also teaching others about what they read!