Capitals of Spanish Speaking Countries

This activity using Google MyMaps is focused on the capitals of Spanish speaking countries. This is ideally for an upper level Spanish class as they will be making observations about the countries capital and reporting to the class about their “day” in the city.

Instructions for Students:

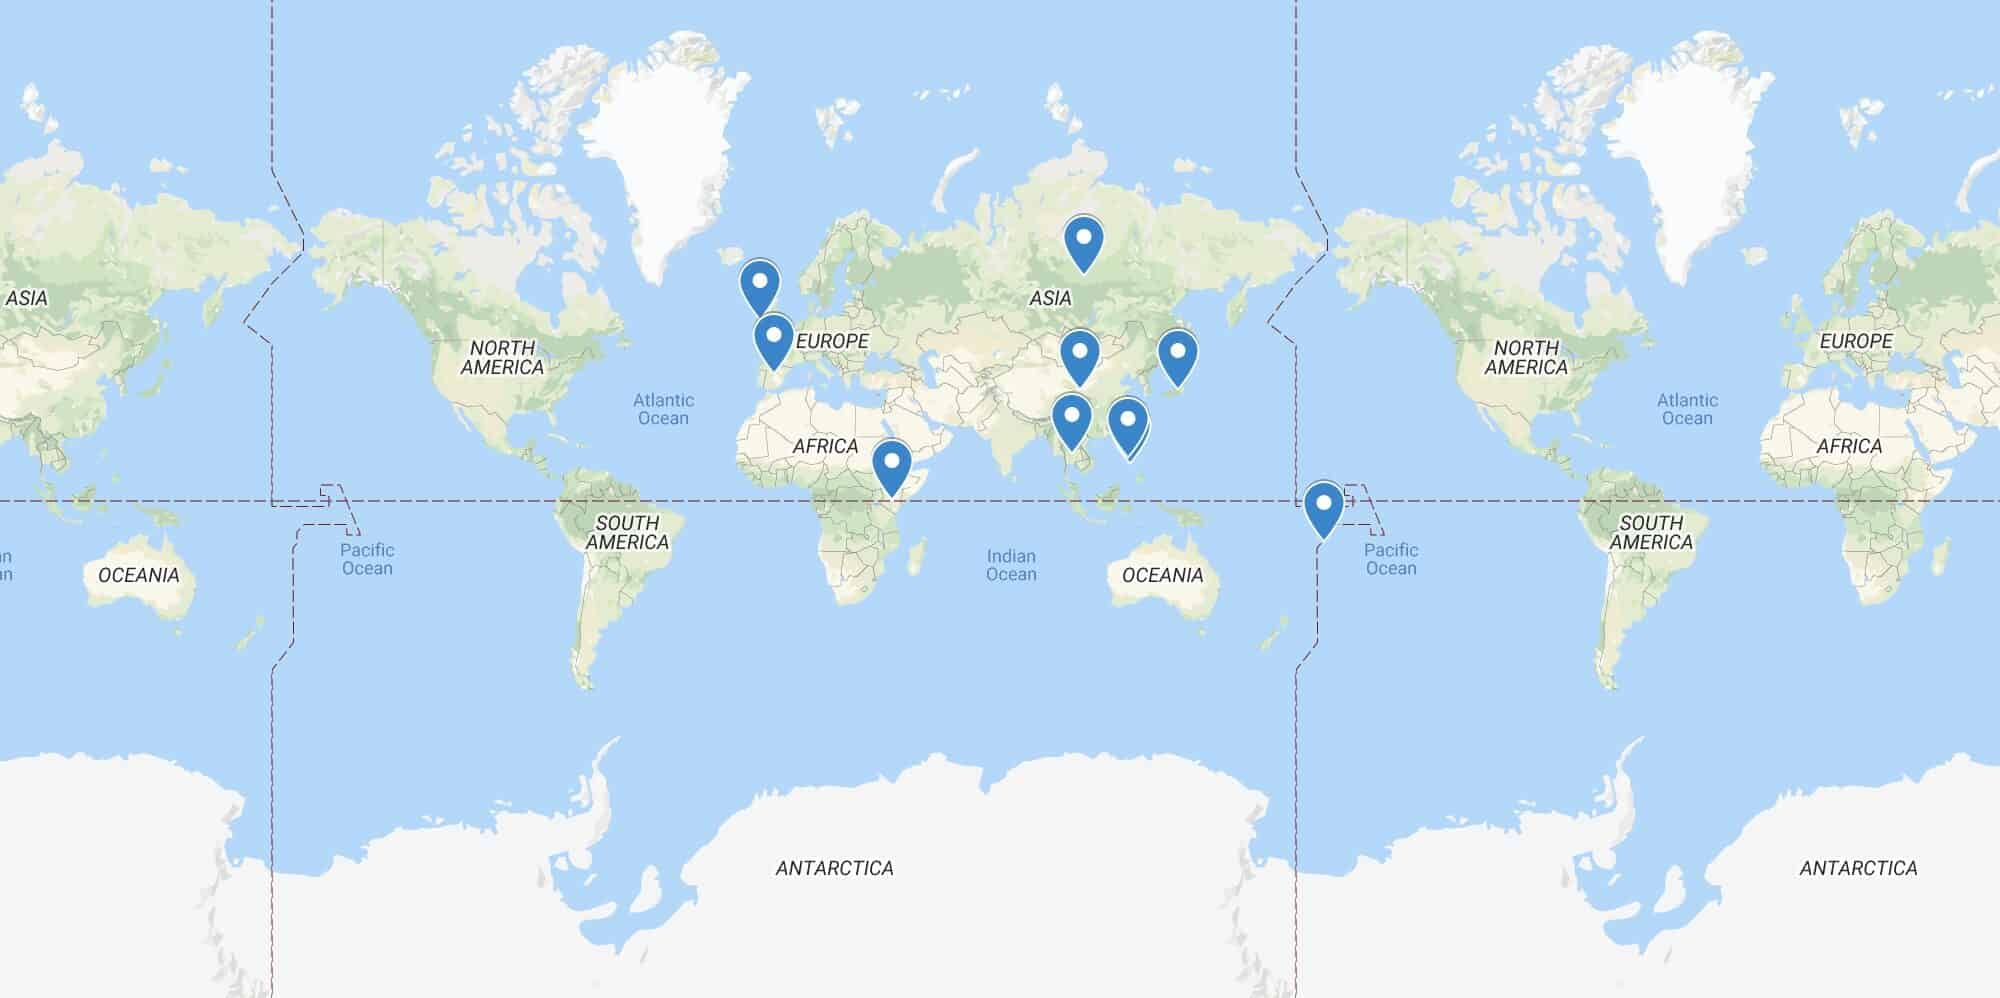
Students will be asked to select the capital of a Spanish speaking country where they will be spending their ideal day. They will use Google MyMaps to report on what they saw in their capital and show us exactly where they went. They will report on historical landmarks, architecture, art, and whatever else they find key to experiencing a day in the life in their capital by using MyMaps to take us on their virtual tour.

Goals:

The goal of this unit is to immerse students in Spanish speaking countries in the most authentic way possible. Student will be able to explore the differences in architecture and historic sites compared to the United States by using MyMaps to take them on a tour for a day. They will be able to add photos of their landmarks and show us where they went and what they learned in an interactive way and could explore others work by using a map for the whole class.

The Lewis and Clark Expedition in Our Own Backyard

Featured Photo by Dan Meyers on Unsplash

This lesson could be for either a grade 4 or 5 class depending on your state’s curriculum. The goal of this lesson is to explore the important locations of the Lewis and Clark Expedition. Student will get to use a google form to learn about some of the key points on their own and then as a class we will look at the the expedition and how they trekked through our own backyard!

Instructions:

Students should grab a computer from the cart and login. The teacher will have a google form linked on their class website that they can click on. Students are welcome to put headphones in and listen to music as long as they have it at a volume that doesn’t disrupt other students around them. We will work independently for 10 minutes, students should use the time to try to make it through at least two choices on the google form. Then will talk with partners about one interesting thing they learned or a question that came up. Then we will have another 10 minutes to work before we go over the map as a class! None of the important points included on the map from the Lewis and Clark expedition will be on the form since we will be focusing on those as a class.

Direct Link: https://forms.gle/Q5fc6MndB1kv6TQm7

Exhausting, Exciting Expeditions!

Target Student Group:
5th Grade | Social Studies/History


Instructions:
1.) The teacher will give students the MyMaps link marking some of the points throughout Lewis and Clark’s expedition. They should remind them that each marker is numbered, so they need to go in numerical order from 1 to 15.
2.) Let students know they will need to explore, read, and take notes on what they learn from the Map so that they can complete Google Forms Quiz at the end.
3.) Give students the link to the Google Form and let them know they can look back at the Map and work with others to fill it out.
For Groups: Give students autonomy – let them decide whether they want to work together or with a partner(s). Preferably no more than three.


After you’re finished exploring, reading, and taking notes, please work on the Google Form Quiz below! Please let me know if you have any questions! 🙂


Lesson Goals:
– As 5th graders wrap up the Native Americans Unit, they will be able to add on to their knowledge about them by learning more about Lewis and Clark’s expeditions and interactions.
– By exploring and reading the markers on the Map, students can learn more about the struggles Lewis and Clark faced, along with the impact they had on our knowledge of various animal and plant specimens and geographical areas (Louisiana, Mississippi River, and the Pacific Ocean).


Featured Image by Kalen Emsley on Unsplash
Information Source: https://www.history.com/topics/westward-expansion/lewis-and-clark

Helping Maya! Part 2

Welcome again 3rd graders! Maya was very impressed with the knowledge about parrots that you all know! She is starting to find her place in the world, and again needs our help!


Habitat

Parrots live all over the world thanks to them being wonderful pets.

In the wild most parrots are found in the warmer areas of the Southern Hemisphere in places like Australia, South America and Africa.

Maya was born in Vancouver, Washington, and lives in Portland, Oregon. But where did her ancestors come from originally? Let us find out:

The green area shows where Quakers in the wild came from. You can see they are a South American species of parrot. Maya’s ancestors traveled very far for her to end up in Oregon.

But what about the red?

In some states in the United States, Quakers are banned from being pets. This is because Quakers are very hearty parrots and are seen as an invasive species, one that disrupts the natural environment. Because of this there are states that keep Quakers out. That is sad for Maya, because she likes to travel.


Other Parrots

Now that we know where Maya comes from, she would like to know about other parrots. Think about, and even look up information on other parrot species. Where do they come from? Are other parrots banned in the United States? Be sure to let Maya know what you find out next time!


All pictures of Maya taken by Adamm Creel

Visualizing A Holocaust Survivor’s Journey

Target Student Group:

This lesson is designed for a 9th Grade Modern World History classroom. Students have just finished a unit on international relations and politics in WWII and are starting a unit on Genocide and the Holocaust. This lesson would be taught in the middle of the unit so that students have some background knowledge on the Holocaust before examining this story.

Instructions for Students

  1. Individually follow Jakob Blankitny’s experience of the Holocaust by clicking through the locations that Jakob was sent to.
  2. Read the accompanying text in which Jakob describes his experiences. Then, examine the different images for each location.
  3. Lastly, answer these 5 question about Jakob’s experience and record your response in a Google Doc to turn in.
    • Summarize Jakob’s experience in the Holocaust. What happens to him? How does he remember these events?
    • What are some key words you would use to describe the emotions Jakob experienced? Support your answers by including at least 3 quotations from the text.
    • How does Jakob’s account connect to the wider historical context of WWII? (Aka what events does he mention have you heard about before?)
    • Examine all the locations on the map. What do you observe about the geographical locations Jakob is sent to?
    • Why is Jakob’s account significant? How does it relate to how we remember the Holocaust?
  4. I will provide feedback and comments to your answers after you turn in your Google Doc to Canvas.

Lesson Goal:

Jakob Blankitny was a Polish Jew who survived the Holocaust, and his story was recorded by the United States Holocuast Memorial Museum. The USHMM’s project entitled Behind Every Name A Story is intended to “give voice to the experiences of survivors during the Holocaust.” Similarly, I believe that naming the victims and acknowledging each personal story provides real and emotional insight into a horrific instance in history. My goal for this lesson is as follows:

Students will be able to connect the personal story of Jakob Blankitny to its wider historical context to understand the overall inhumane imprisonment, abuse, and dislocation of Holocaust victims and survivors.

Google MyMaps helps me achieve this goal because it provides a visual demonstration of Jakob’s journey and all the places he was moved by the Germans. When discussing history (especially World History) it is often difficult for student to connect abstract concepts or facts to the actual, concrete places they took place. Additionally, this platform also shows students that these place and their dark histories still exist today. Google MyMaps grounds historical fact and primary sources in reality so students can make clear connections between the past and the present.

The Story of Jakob Blankitny

Direct link to Google MyMaps: The Story of Jakob Blankitny

This Land is Your Land, But Now It’s My Land

This lesson is made for middle school or high school history students. This lesson can be included in discussions of Westward Expansion.

In this lesson, students will look at a map and explore how the United States pushed west over the course of about fifty years.

Question to Ask Students Before the Lesson:

What were some reasons that the United States expanded west?

This discussion can include the concept of Manifest Destiny, the California Gold Rush, the railroads, etc. This discussion is important because it engages students in questioning the reasons for westward expansion.

This also is an opportunity to discuss the effects the push west had on native populations. After all, the land was not uninhabited when America pushed west. This allows students to engage in critical reflection of certain actions taken by America while also acknowledging a history that is often ignored.

The Map

The map below has different areas that the United States gained as the nation expanded west.

Students can click through the different layers of the map to see the land America gained along with a small explanation on how the land was acquired. This activity can be done individually or as a class with discussion happening on each layer of the map. As a possible group activity, the teacher could have students examine the different lands gained and have students research and add more information to the map as class collaboration.

To see the different layers, click on the icon in the top left corner below:

Here is the link to the map: https://www.google.com/maps/d/u/0/edit?mid=11iH7VUlZuRAkUQFY2UJBEAH53O6OtajL&usp=sharing

Image Citation

Featured Photo by Joey Csunyo on Unsplash

Where Are You From?

Target Group: 3-5th Grade

Instructions:

  1. The teacher will first pose a survey that students can fill out right away or take home as homework that says the following: Where in the world are your parent(s)/ guardian(s) from?
  2. The teacher will then input all the data into the Google Maps
  3. Once all the data is complied, the students will get to see the map of the world that shows the diversity in the classroom by seeing all the different ethnic groups throughout the students
  4. Once we finish looking at a world view, the teacher will then assign a follow up activity that allows students to elaborate more on their ethnic group and culture

* Some students may have more than 1 country to input and explain about*

* This lesson is to be paired with another lesson to be more in depth*

Goals:

  • This activity allows students to see how diverse their fellow classmates are
  • Students learn more about other student’s culture in order to be more accepting
  • Students will learn more about their own culture and where their family is rooted
  • Students will get a mini geography lesson on countries and continents

Illustrated Math Problems Using Google My Maps

Google My Maps can be used as a tool for illustrating math word problems. The target grade level for this lesson would be sixth grade. It is a great tool for students who are learning about distance and rates.

Instructions

Emily has has 3 things she has to do today. She lives in a dorm (Residence Hall Unit 1). She needs to go to CVS, a Art Store, and her favorite restaurant, Angeline’s Louisiana Kitchen.

She can either take Pathway 1 or Pathway 2. Use the link to access the Google My Maps to answer questions 1-7. Click here to Access The Google My Maps for this problem.

Pathway 1:

From her Dorm  to CVS, then to the  Art Store, then to Angeline’s Louisiana Kitchen, and then back to her Dorm.

Pathway 2: 

From her Dorm to the Art Store, then to Angeline’s Louisiana Kitchen, then to CVS, and then back to her  Dorm.

1. Just using the map, which pathway seems longer? 

For questions 2-7 use the table below:

2. How fast does Emily walk? Find your answer in miles per hour.

3. Using your answer from above, how many minutes does it take Emily to walk from the dorm to the Arts and Crafts Store? Fill this in on the table above.

4. It takes Emily 52 minutes to walk pathway 1. Use this information to fill in the blanks in the table above. 

5. How many miles is pathway 1?

6. How long does it take her to walk pathway 2? How many miles is pathway 2?

7. Is there a faster pathway than pathway 1 and 2? Justify your answer.

Goals

The goal would be for the students to be able to make visual observations about distance. Also that they would be able to be creative and think of different pathways. The Map allows the students to visualize each pathway and explore different combinations of directions.

Furthermore, the questions for this problem have several different ways to go about getting the solution. Each student may find the technique that they understand or recognize from the given problem.

Digging Up the Periodic Table

Featured image: “shovelling dirt” by ☻☺ is licensed under CC BY-SA 2.0

A previous post gave a glimpse into the range of information found on the periodic table. One may wonder what these abstract elements look like physically and where we find them. The following activity involves both examining a Google My Map and then completing a Google Forms. The MyMap is intended to give students a glimpse into some of the sources of lithium and aluminum (bauxite) , elements with a link to our daily lives. The Forms allows for student assessment but permits a bit of freedom through a choice of which element to focus on.

This activity is designed for students with a general understanding of the periodic table and geography. Knowledge of mining operations is recommended but not necessary.

Students:

  1. View the Google MyMap on Lithium and Aluminum producers, either by interacting with the map on this page or by clicking HERE. Click on each location for a bit of information and some photos.

2. Complete the Google Forms activity/quiz on Lithium and Aluminum by clicking HERE. Start by choosing which element you would like to start with. You may do one or the other or both if you wish by the end of the Form. There will be resources provided for you to explore and learn from. After viewing these, answer the questions associated with your chosen element.

For teachers:

The Google MyMaps and the Google Forms both draw from a variety of online resources (which are listed below). You may want to double check them before doing the Forms with your students. The Forms requires students read a variety of source material, which may take a long time, maybe even the entire period or more, so keep that in mind.

Also, you can click Here to view the entire Google Forms.

The resources used:

On lithium mining (in China): http://www.lithiummine.com/lithium-mining-in-china

More on lithium mining in China: https://news.metal.com/newscontent/100911546/decryption-of-chinas-four-major-salt-lakes-five-major-refining-technical-routes-everything-about-lithium-extraction-from-the-salt-lake-is-here/

Lithium Mining (in the USA) (1955): https://pubs.usgs.gov/bul/1027g/report.pdf

News article on lithium mining in Nevada: https://www.hcn.org/issues/53.3/indigenous-affairs-mining-nevada-lithium-mine-kicks-off-a-new-era-of-western-extraction

On lithium in Portugal: https://www.savannahresources.com/assets/mina-do-barroso/

Some general information on lithium mining: https://www.volkswagenag.com/en/news/stories/2020/03/lithium-mining-what-you-should-know-about-the-contentious-issue.html

Some general information + a physics aspect: http://large.stanford.edu/courses/2010/ph240/eason2/

Top lithium producing countries: https://www.nsenergybusiness.com/features/top-lithium-producing-countries/

On Spodumene: https://www.mindat.org/min-3733.html

On Petalite: https://www.mindat.org/min-3733.html

On Lepidolite: https://www.mindat.org/min-2380.html

More on Lepidolite: https://geology.com/minerals/lepidolite.shtml

General overview of aluminum: https://www.aluminum.org/aluminum-advantage/aluminum-101

General information on Aluminum: https://www.rsc.org/periodic-table/element/13/aluminium

Where bauxite is mined: https://www.mining-technology.com/features/featurebauxite-behemoths-the-worlds-biggest-bauxite-producers-4274090/

On bauxite: https://geology.com/minerals/bauxite.shtml

On bauxite and alumina: https://www.usgs.gov/centers/nmic/bauxite-and-alumina-statistics-and-information?qt-science_support_page_related_con=0#qt-science_support_page_related_con

For fun:

On the economic impact of lithium: https://www.wired.co.uk/article/lithium-batteries-environment-impact

Visual Mathematics in the City

Hello Students! Today we will be using our math skills to determine various facts and information that will be particularly useful on our next quest… an exploration of Portland!!! After we have finished packing we will pair up with our classmates to embark on our journey and don’t forget your calculators and some scratch paper!

Instructions:

  1. Students will group with their exploration buddies and get access to the Google Maps here. Once access is made, students will make a copy of this map to their own Drive, as edits are required.
  2. Students will be required to answer a variety questions regarding their specific path through the city that are visible below.

Goals:

This will help our students mesh their mathematical skills with a city that they are familiar with. By creating this exercise for students to “travel” throughout a familiar city while applying mathematical knowledge they have accumulated is crucial for students because of several reasons:

-Students will be able to draw personal connection from the beginning, which will only be strengthened the more mathematical knowledge they apply and gain from the city

-Students will be able to apply their math toolbox to real world scenarios that are relevant in their lives

-Students will be able to show creativity and make this project their own through individual knowledge of the city, furthered by our math understanding

Student Questions and Guide:

  1. Our starting point is… the Convention Center! We need to do our part and get tested for COVID-19 before we venture into the rest of the city. Once done there, one of our group members has the hankering for some food. Decide as a group which of our food options available is most interesting, and calculate how long it would take to get there by driving, and on foot using Google Maps.
  2. We have arrived at our food destination! Make a decision with your group as to what sounds tasty, and calculate how much you owe said eatery before and after a 20% tip.
  3. As you finish up your meal the sun starts to peek out from behind the clouds. You and your group mates agree that it would be a great time to visit a park, or a wooded area. The only requirement is that you must cross at least one bridge to get to your next destination. Once you have picked this destination, calculate how many miles away it is from where you are. If you want to get there in 15 minutes, what average MPH must you travel at? 10 minutes? 20 minutes?
  4. You have been thoroughly enjoying your outside adventure when it starts to rain! Because people are starting to get hungry again. You and your group gather up and decide where to eat. Calculate the milage from this destination to your chosen eatery.
  5. Once at the eatery, you and your friends are required to a total of 5 items off the menu. Calculate how much you owe this restaurant after a 25% tip. Enjoy your meal!
  6. After our food has been gobbled down, we have to decide what the nights entertainment will be. Portland is running a unique night life program where it costs $20 to get into any event happening in the city, per person. Once you have chosen from our list if entertainment on the map, calculate the milage between your previous food stop, and chosen nightlife destination.
  7. Once your show/game has finished you are all done! Be sure to answer the reflection questions below.

Reflection Questions:

  1. What was the total milage driven throughout the day? If gas was $3.00 a gallon, and you averaged 20 miles to the gallon, how much would each group member owe in gas money?
  2. What was your favorite stop, and why?
  3. How much money did you owe in food expenses, before and after tip?
  4. How much do you tip on average when you go out to eat, and why?
  5. Overall how much money was spent in the day, including gas and tips? How much does each of your group members owe?

Image Credit:

Photo by laze.life on Unsplash

Let’s Explore Different Habitats!

I used google earth for this lesson and would use it for first graders. The google earth would be used to allow students see and learn about different habitats and the different animals in each. This would help them visualize and be able to look at the habitats without leaving the classroom, enjoy! Below I have Images of each habitat pinpointed on the map as well as I have the link so everyone can use this google earth lesson.

Grassland Habitat

Polar Habitat

Desert Habitat

Rainforest Habitat

Forest Habitat

Mountain Habitat

Link For Google Earth:

https://earth.google.com/earth/d/1klGFtDZxkJxr2QowlNkw_o0OfJJ6rYpF?usp=sharing

Featured Image: Photo by Ali Kazal on Unsplash

Let’s Go the Distance!

Hey 8th graders! Today we are going to use Google Maps to practice using the distance formula. You will use the map and the slides linked below to complete 6 practice problems. Here are your directions:

  1. Open the Google Map in a separate tab. Become familiar with the points that are plotted on the map. We have fun locations in the PNW like Mt. St. Helens, Cannon Beach and much more!

2. Click the link below to create your individual copy the slides. This is where you will complete all of your work. You may do so by writing on the slides, linking a Jamboard or uploaded a picture of written work.

CLICK HERE TO MAKE YOUR COPY

3. Find the distance between the points written on the Google slide. In order to find the coordinates of each place, click the blue marker and the coordinates will be written below. Portland’s coordinates are 0,0.

4. Once you have completed all 6 of the practice problems. Make 2 of your own new locations on the map and find the distance between them. Take a screenshot of your two locations and use the distance formula again to solve.

Goal:

The goal of this activity is to have students practice using distance formula with coordinates in a fun and interactive way. This allows for the students to gain a conceptual understanding of what it means when we use the distance formula to find the length between two points. This activity also asks the students to practice with their procedural knowledge. I wanted to base the map in Portland that way my students have a better understanding of where the places are.