

Be sure to leave a comment below
as proof of “attendance” during regular class time.
A lot of a teacher’s time is spent explaining things to students – typically by talking to them. But teachers can create short videos to explain things that otherwise would need to be repeated. In this class, we’ll look at a few ways to “automate” explanations with video.
Edtech guru, Kathy Schrock defines screencasting as “the capture of the action on a computer screen while you are narrating. Screencasts can be made with many tools and are often used to create a tutorial or showcase student content mastery.” A related practice is sketching out a lesson with drawings and make a video using your smartphone.
HERE’S A FEW TIPS FOR VIDEO CREATION:
- Keep it simple. Think of audience and purpose.
- Keep it short. Why make students sit through a long how-to?
- If you can, use a plug in mic (just a standard smartphone earbud mic works well). Do a quick test to check the volume level and mic position first to get sound level right.
- Practice a few times to find efficient ways to demonstrate and describe what you’re doing.
- If you will be entering much text as part of the task, I create a text document first so I can copy/paste text into what you’re demonstrating ( I hate watching videos of people typing.).
Two OPTIONS FOR CREATING VIDEOS – THERE ARE MANY MORE
Option 1: Use an app to capture a video screencast of what is on your screen.
There are many apps that can do this. Most of you have Macs. So I’ll go into detail on Quicktime Player, which is built into the Mac OS. It’s easy to use and quickly uploads to your YouTube account.
Another screen capture option is Loom – a free Chrome browser plug in. To get Loom open your Chrome browser and get the Loom extension here. Or you could turn a PowerPoint or Apple Keynote presentation into a video with narration. How to here.
This video shows an older Mac running Quicktime Player.
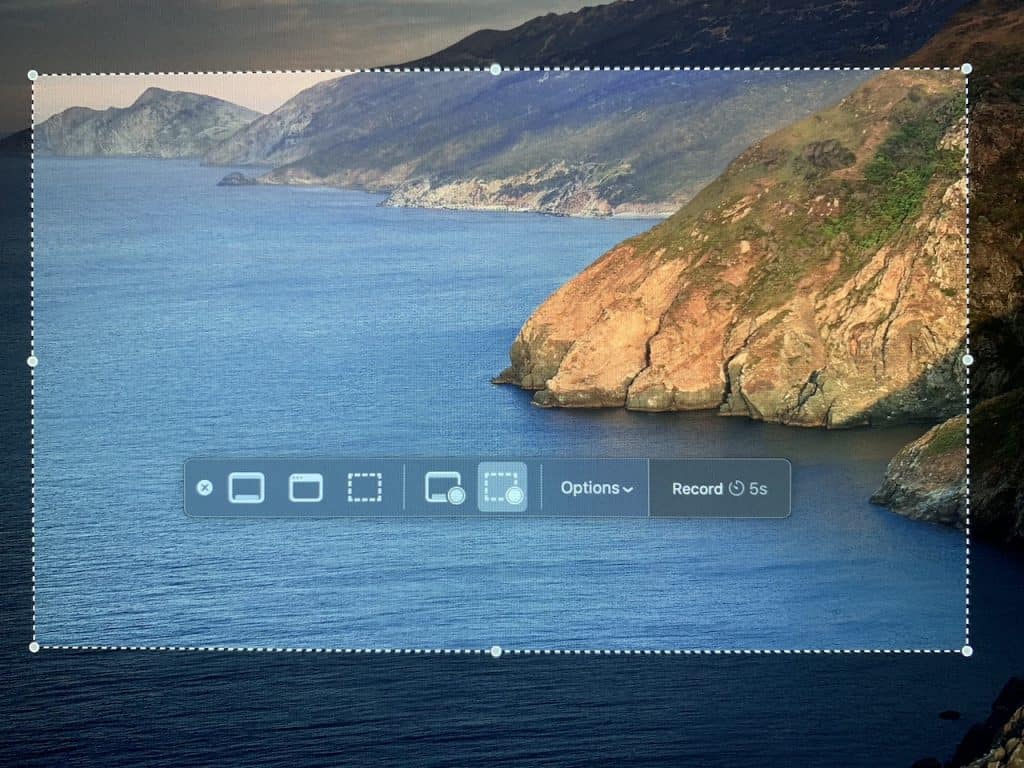
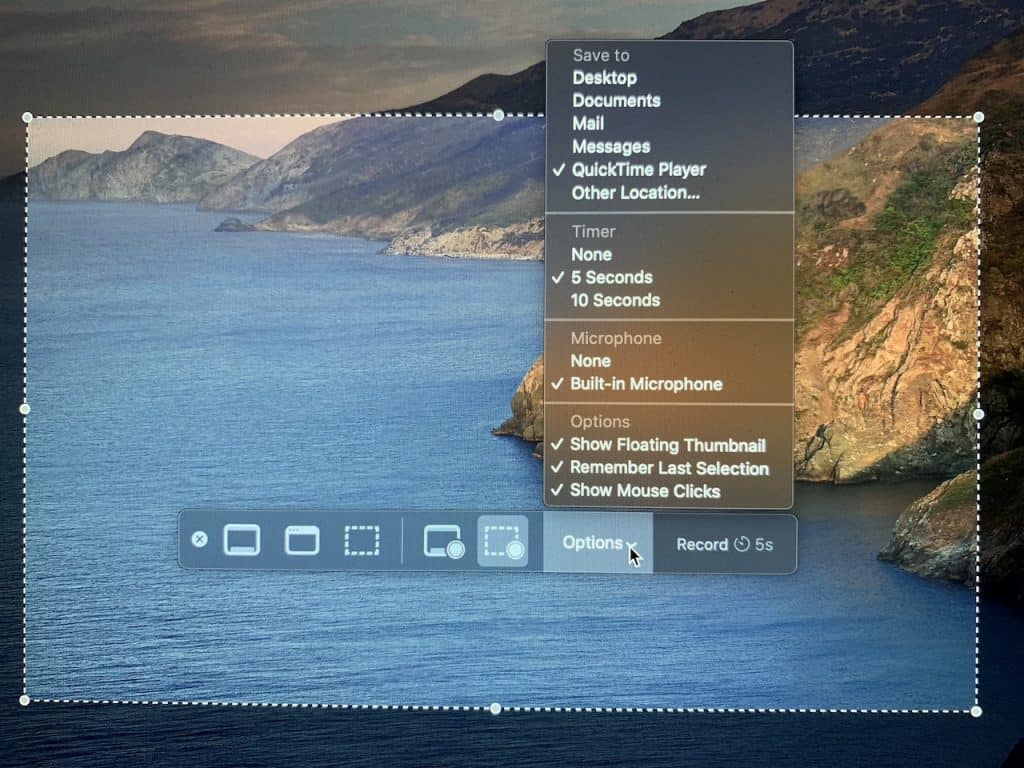
This is how the Quicktime Player record controls look on latest version of Mac OS Catalina. The process is the same as the video above – just slightly different controls.
Scroll through two images.
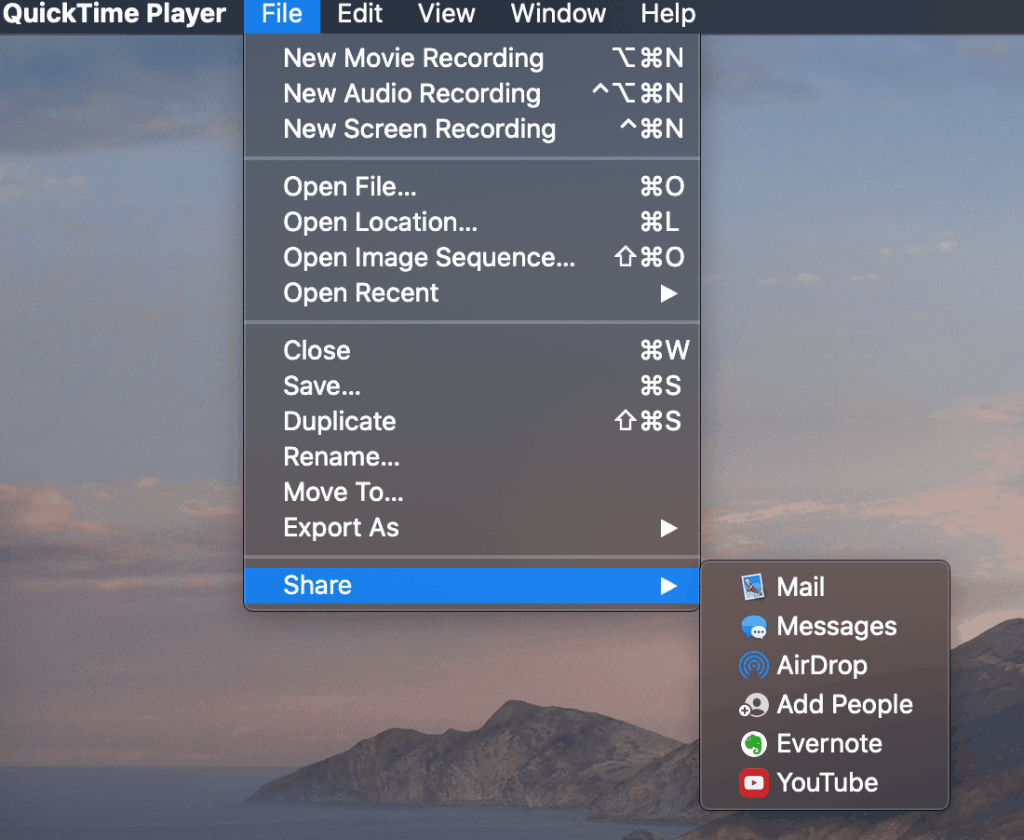
Once you have finished your screen recording. You can upload to YouTube directly from QuickTime using “Share”

Once your video is on YouTube get your YouTube video’s URL and paste it into YouTube Block in WordPress
Here’s two QuickTime Screencasts
from last spring’s class
Option 2 – Sketch out a lesson and video tape it
Shoot a video using your smartphone. You can use little slips of paper or you could draw. If you’re not an artist, you could also shoot a video of you reading a picture book. Here’s a collection of picture book read alouds to inspire you.
Note: You’ll need an extra pair of hands or tripod rig to hold the phone.
Here’s TWo Sketch lessons from last spring’s class
ASSIGNMENT: Teach with A Screencast or Sketches | Screencasts 20-A9
Students will design and record a lesson. They will embed the video into a blog post and briefly describe lesson context, audience and purpose: For example, is this to help parents with homework? Or to provide students background for a new unit
If you use Quicktime Player, they should plan to load it up to your YouTube account and embed using the YouTube block built into WordPress.
If you shoot a sketch video on your phone, you can transfer it to a computer and then upload to YouTube from there. Embed using the YouTube block built into WordPress.

