An art lesson on the rule of thirds an intermediate elementary class.
First of all, what is the rule of thirds?
Also known as the “Golden Ratio”, the rule of thirds is a mathematical relationship of proportion that can found in our natural world. Mathematicians have studied this unique ratio for centuries, and artists and architects such as Salvador Dali, Le Corbusier, and Leonardo da Vinci have used it.
Imagine you’re playing tic tac toe with a friend. You draw the board as shown below. Two sets of parallel lines that intersect each other.
But instead of playing the X and O’s game, notice how the lines intersect one another at a third of the other line. Both the horizontal and vertical sections are split into three sections due to this intersecting. This is the grid that you can imagine upon for works that use the rule of thirds. Many photographers live by this rule, painters and other artists favor it as well.
Whyis the rule of thirds important?
The rule of thirds, when used properly, has the ability to guide the viewer’s eyes to the best parts of the photograph. It is like an invisible highlighter. It also creates a sense of unbalance that makes the picture interesting to look at.
Personal Photograph from author taken in 2020 at Zion National Park
Welcome, 5th graders! Today we’ll be taking a look at volume~ Lesson 1: – What is it? – What types of things have it? – Scavenger Hunt! Lesson 2: – How do we measure it? – Practice counting!
Lesson 1: Introduction to Volume
Learning Objectives: 1.) I can define volume. 2.) I can list and explain examples of things that have volume.
What is Volume? Volume is how loud or quiet a sound is: – Example: Hearing your alarm clock at max volume (and not wanting to get out of bed).
But volume is ALSO the amount of space inside a three-dimensional object. This is the definition we’ll be using in Math. Let’s break this definition down! 🙂
Reviewing Dimensions: Think of one-dimensional (1D) as lines! – It’s 1D because only one dimension is being measured (Length)
Think of two-dimensional (2D) as flat shapes! – It’s 2D because two dimensions are being measured (Length, Height)
Think of three-dimensional (3D) as thicker shapes! – It’s 3D because three dimensions are being measured (Length, Height, Width)
Let’s look at the pictures below for some examples 🙂
1D – these lines can only be measured via Length
2D – these flat shapes (triangles) can be measured via Length and Height
3D – these thicker shapes (pyramids) can be measured via Length, Height, and Width
Lines (1D) are just that! Lines! Flat shapes (2D) include squares and rectangles. Can you think of any other 2D shapes? Thicker shapes (3D) include cubes and rectangular prisms. Can you think of any others?
Let’s go back to our definition of volume, now that we’ve reviewed dimensions. Volume: the amount of space inside a three-dimensional object.
So, what are some examples of things that have volume?
Let’s look at this Coca Cola 🙂 Is the picture on the left an example of volume? What about the one on the right? Go back to our definition of volume in green. Think about it for a little bit BEFORE scrolling down.
Volume: the amount of space inside a three-dimensional object.
The empty glass on the left… IS an example of volume! It’s 3D (has Length, Height, and Width), and has space inside of it. In this case, the air is the space/volume.
The Coca Cola on the right… IS ALSO an example of volume! It’s 3D (has Length, Height, and Width), and has space inside of it. In this case, the Coca Cola liquid and the air at the top are the space/volume.
Now it’s your turn! 🙂 Find some objects around your home that have volume. Comment WHAT objects you found, and WHY they’re an example of volume.
Review Lesson 1 Learning Objectives: 1.) I can define volume. 2.) I can list and explain examples of things that have volume.
How successful do you feel with these objectives? Leave a comment with any questions before moving on to lesson 2 🙂
Lesson 2: Measuring Volume
Let’s review what we learned in Lesson 1 🙂 Volume: the amount of space inside a three-dimensional object.
So if we’re measuring the space inside of three-dimensional objects to find the volume, our next question is… How do we measure that space?
Learning Objectives: 1.) I can explain what unit cubes are. 2.) I can count volume using unit cubes.
A unit cube helps us measure volume. It looks like a cube! By counting how many unit cubes are in a 3D object, that will tell us what the volume is. Let’s practice counting 🙂 How many unit cubes are in each picture?
Image 1: One unit cube Image 2: Four unit cubes Image 3: Four unit cubes (don’t forget the pink cube in the back!)
Now imagine filling these unit cubes into a container. Depending on how many fit in one, that will tell us the volume of that container!
Can you try to solve how many unit cubes make up this Rubix Cube? 🙂 (Hint: Remember our Length x Height x Width formula?)
Review Lesson 2 Learning Objectives: 1.) I can explain what unit cubes are. 2.) I can count volume using unit cubes.
How successful do you feel with these objectives? Leave a comment with any questions 🙂
Reading is a fun way to learn new things, expand your vocabulary and maybe most importantly to exercise your imagination! There are times that you have to read for school, and they may not be the most fun but they don’t have to be negative experiences! You can still have fun with a book report.
Start off by reading the book
Read the book in a comfortable place
Take notes on things that surprise you
Imagine you are the hero of the story
Remember how you feel as you read the story
Now that you have read the book, time to write your report.
When you begin writing refer to any notes you took, and try to remember how the book made you feel. Were you bored? Excited? With those memories of the book in your mind start to write:
What was the main plot of the book?
Who are the main characters?
What did you like about the book?
What did you dislike about the book?
Would you recommend the book to your friends?
Finishing touches
Now that you have written out your thoughts on the book, take some time to be creative! Draw a picture of your favorite scene in the book, or maybe make a collage from magazines that remind you of a character, or scene and add that to the report as a cover!
You have read other people’s stories, some you liked, others you may not have liked. So now it is time to write your own story! Will there be dragons? Maybe car races! Your story can be anything that you find fun and exciting!
Come up with an idea
Think about other stories you have read, or maybe have done book reports on. What about them was interesting? You can use those ideas to begin your own story! Did you read a book about super heroes, and you think it would be fun to write about being a super hero? Great, write about super heroes!
Layout your story
Every story starts with a beginning, how does yours start? After that there is a middle, where all the action takes place. What do you want in a story, is there a superhero battle with a super villain? Finally your story needs an ending! Did the hero win? Did the princess slay the dragon?
Illustrations
What better way to finish off a story than with a good illustration! Pick a part in your story that you think is the best part, and draw how you see it. Maybe you want to just draw the main character, that’s ok too. Think of all of the books you have read, and how the covers looked, how the illustrations inside looked as well. Do any inspire you?
This activity is something I do with my students every week. This is called a picture talk. It is a methodology of CI (Comprehensible Input) language teaching and revolves around students looking at images and coming up with stories using the vocabulary from that lesson/week/unit.
Students use their Spanish to craft stories from the images they are seeing as a class. These images are ones that would be used from a lesson including: adjectives, clothing, etc. The students look at these images while the teacher facilitates the story asking students questions about what they are seeing and circling important vocabulary. For example:
Teacher: ¿El perro de esta foto lleva gafas? ¿Sí o no?
Students: Si, el perro lleva gafas.
T: ¿Y por qué lleva gafas el perro?
S: Las necesita para hacer su tarea.
And so on and so forth until they have created a story for each dog. This also allows the teacher to compare the photos and receive student feedback.
Students decide the names, plots, settings etc. of the stories and then participate in a “Write and Discuss” where they write out the story in their own Spanish.
Lesson #2: Los paises hispanohablantes
Mexican Food VS. Peruvian Food
Understanding the cultural differences between Spanish-speaking countries is a key part of cultural competency. Cultural competency is one of the standards for Spanish language classes and a great way to showcase different cultures is to compare and contrast common aspects of the cultures. This example shows two classic plate of food- 1 from Peru and 1 from Mexico. This activity can be done with any aspect of two different Spanish speaking countries and is easy to embed into the vocabulary they are already using.
Students discuss with partners the similarities and differences they see between the two pictures shown. They use vocabulary such as comparatives and food related words.
They then share with the class, in Spanish, the differences and similarities they had noticed.
For this lesson, students will be presented with a one, or a variety of pictures to choose from (teacher’s choice). These pictures should be random, fun, and something students could write a story about. Students can be prompted to write a sentence, a paragraph, or a paper. It all depends on teacher preference and students ability. An example of a student view is below. This is a great writing warm up that allows students to express themselves.
Writers get ready!
Grab your pencils, grab a piece a paper, and fire up your creative minds!
Take a look at these pictures here, choose and tell us the story the picture tells you.
To help you get started here is a sentence prompt:
A year like this, it is important for us teachers and our students to recognize and acknowledge our feelings. This lesson builds upon our students social emotional skills and allows them to compare how body language can be affected when we are feeling a certain way such as happy or sad. This lesson is relevant for all students as we all have feelings. The students view is presented below. Any questions may be answer via. discussion or writing.
Finding our Feelings
Hello, students! Today, we will be looking at two photos of two women.
What do you notice and what do you wonder?
Look at their body language. What are they doing with their hands? What are they doing with their eyes? What else do you see their face or their body doing?
Today we are going to dive into a couple lessons involving how we can use triangles features and characteristics to learn more about them and the world around us. This lesson will be directed for any traditional geometry class, which occurs anywhere from 8th-10th grade. Triangles specifically are a major milestone for students to understand and contextualize, due to their usefulness in other higher order mathematics.
Lesson 1: Recognizing Triangles
In this lesson students will get the chance to view various images, and identify triangles based of of their characteristics. Students will be asked to copy triangle examples down in their notebooks, and make educated guesses regarding how the specific shapes will be named.
Student Tasks:
View all of these triangle images in the slide show. Once done, copy these into your notebook paying close attention to your shapes, making sure that each side length is of correct proportion. After this, I would like you to follow a series of tasks:
Organize your triangles however you please! This could be with regard to angle measure, side length, or general look/feel of the triangle
If you had to name these triangles, what would you name them? Keep in mind the side lengths and angle measures and use them to justify your naming protocol
Take a closer look at all 4 of these shapes. Is there a way to create one of these shapes with the others provided? Draw examples in your notebook with lines added, intending to create triangles from other triangles.
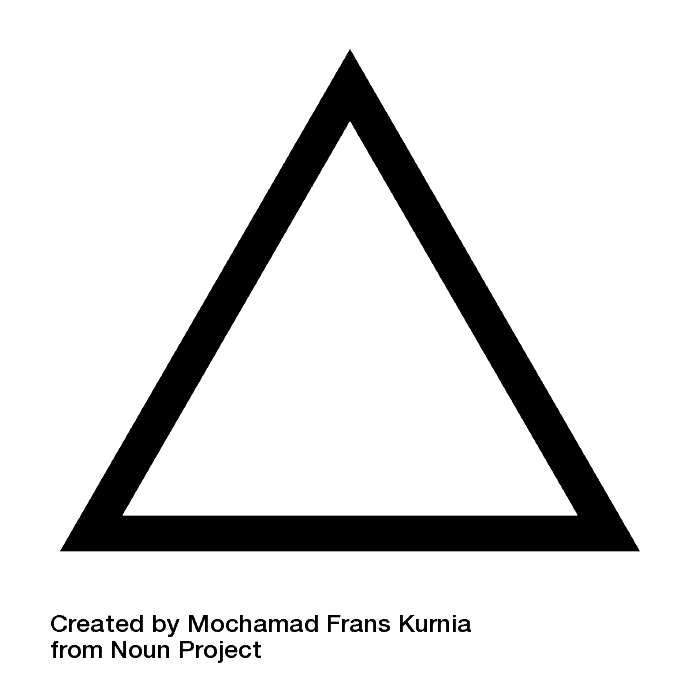
Triangle by Mochamad Frans Kurnia from the Noun Project
Triangle by Imam from the Noun Project
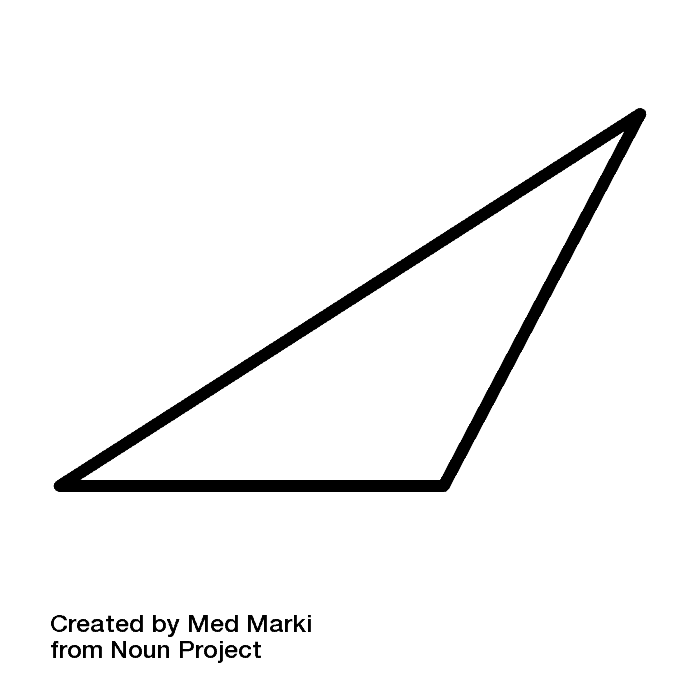
Scalene Triangle by Med Marki from the Noun Project
Lesson 2: Tools to compare triangles
Students will be asked to extend on knowledge built during the previous lesson to attempt to identify different triangles and terms in the example before. This lesson would also be taught to a geometry class anywhere from 8th-10th grade.
Image by Gerd Altmann from Pixabay
StudentTasks:
View the triangle above. Your tasks are:
-Identify how many triangles are in this picture
-Name each triangle that you find, using the letters presented in the picture
Prenez un photo de tes choses pour l’école qui sont dans ton sac. Faite une liste de ces choses avec le nombre et la couleur. Par exemple:
LE SAC À DOS D’ELLIE: -trois dossiers (un bleu, un rouge, et un jaune) -quatre crayons oranges -dix feutres multicolore -une bouteille de colle blanche -douze batons de colle bleus -vignt-quatre crayons gras multicolore -deux cahiers (un blanc et noir, un blanc et vert) -une bouteille de désinfectant pour les mains claire
[This activity is similar to one that I am doing with my sixth graders to learn colors and school supplies vocabulary. The idea is that they take a photo of what is in their backpack and create a list of their own supplies, labeling it with colors and numbers. This is great practice with gender/number agreement, false cognates, and adjective/noun word order. It also allows students to create their own product that reflects something about them and ensures they are able to communicate about things they personally have and use in the classroom.]
Faites un collage de tes aliments préférés (cinq ou plus) et écrivez une petite paragraphe pour expliquer en français. Utilisez nos mots de vocabulaire! Par exemple:
Mes aliments préférés sont le petit gâteau chocolat, l’ananas, le sandwich au beurre de cacahuète et à la confiture, les gaufres, et le hamburger avec des frites. Les petits gâteaux chocolat sont la taille parfaite est je les mange pour mon anniversaire chaque année. L’ananas c’est mon fruit préféré parce que c’est très sucre. Je prends un sandwich au beurre de cacahuète et à la confiture toujours à l’école pour le déjeuner. Je le fais avec de la confiture à la framboise. La gaufre est le meilleur petit-déjeuner car on peut ajouter les fruits, le beurre de cacahuète, et le sirop. Finalement, j’adore le hamburger (avec du fromage et du bacon) et il faut le manger avec des frites, bien sûr!
[This activity is designed to work on food-related vocabulary. In addition to the basic food words that we will all learn, I want students to be able to personalize their knowledge. The above assignment makes sure they know how to talk about their favorite foods in French and encourages additional research/learning. It’s also easy for students to connect this to real-world situations to see how this form of communication can be used. It requires them to put the new vocabulary into sentence frames to express an idea rather than just learning single words. The photos act as a recall prompt (instead of using English).]
I know the word “chemistry” often has negative connotations. However, chemistry is amazing. It is found all around us (see the images below for just a few examples). From construction to digestion to reading the words on this screen, chemistry is at play (and maybe a little physics too but we shall leave that to the physicians). Now, the subject of chemistry is too vast to cover in this mini- lesson so I will focus on one part: reactions. More specifically redox reactions (also formally known as oxidation-reduction reactions). This post will focus on the two separate, yet inextricably liked, processes: Oxidation and reduction.
Note: This lesson is intended for students in general chemistry for high school and/or college classes.
Rust is the result of a redox reaction
Plants use photosynthesis reactions for nutrients
A series of reactions allows for muscle contraction
Color is possible through reactions involving light
Before we get started, there are a couple ideas to keep in mind. One is a refresher (or very brief introduction) on subatomic particles. Neutrons (no charge) and protons (charge of +1) compose the nucleus while electrons (charge of -1) kind of hang around outside the nucleus.
The second thing that will come up is oxidation states. Oxidation states are arbitrary numbers that help keep track of electrons. Oxidation states represent the “charge”, so to speak, per atom in the molecule. To quote Principles of Chemistry: A Molecular Approach, ” the oxidation number of an atom in a compound is the ‘charge’ it would have if all shared electrons were assigned to the atom with a greater attraction for those electrons” (Tro 2016, pp. 161). This explanation brings in the concept of the electronegativity of an element and how much a given element/atom/species “wants” to get/keep an electron. The higher the electronegativity, the more the species “wants” to keep an electron. Like Gollum in Lord of the Rings so desperately desires his “precious”, highly electronegative atoms want electrons.
Of course, there are rules for assigning oxidation numbers as well. A free element (not bonded to anything else and not an ion) has an oxidation state of zero. “Free element” also includes diatomic molecules with only one element (i.e. O2). With monoatomic ions (i.e. Cu 2+), the oxidation state equals the charge. So, for Cu2+, the oxidation state would be +2. Polyatomic molecules and ions is where it gets tricky. If the polyatomic molecule does not have a charge, then the sum of the oxidation states of the atoms. For example, H2O (water) does not have an overall charge. So the sum of the oxidation states of hydrogen (H) and oxygen (O) is 0. In other words, the oxidation state of hydrogen plus two times the oxidation state of oxygen is 0. So how do we find these oxidation states? Other rules. Certain non-metals have stated oxidation states. Fluorine has an oxidation state of -1. Hydrogen is +1. Oxygen is -2 (typically). Alkaline metals (Group 1A on the periodic table) always have +1. Alkaline earth metals (Group 2A) always have +2. After that, oxidation states become more flexible.
Recap:
Electrons have a charge of -1 (AMU), protons have a charge of +1 (AMU) and neutrons have no charge.
Oxidation states are electron book-keeping. They can be thought of like “charges”.
Free elements have oxidation states of 0.
Ions have the same oxidation state as their charge.
The overall charge of a polyatomic molecule is the sum of oxidation states (accounting for number of atoms).
A few elements have specified oxidation states. The rest are more flexible.
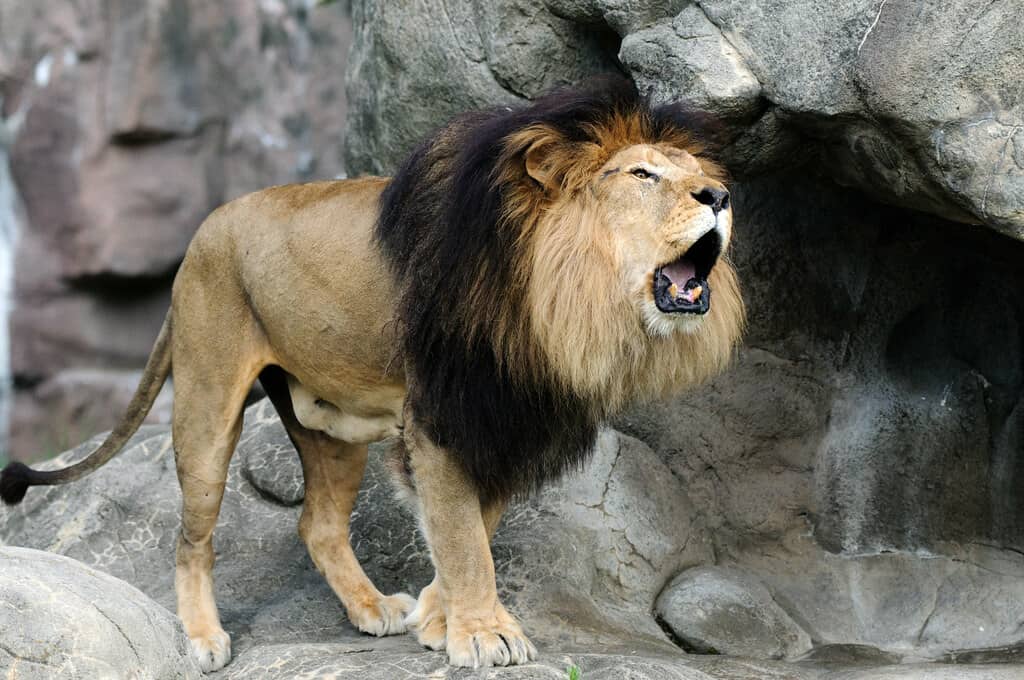
The beautiful creature pictured above will help us remember an easy mnemonic for oxidation: Lion is for LEO and LEO is Loose Electrons Oxidation. There is also “OIL” (Oxidation Is Loosing) but oil is not as cool as a lion. Oxidation is the loss of electrons. We are loosing our negativity (electrons) and becoming more positive.
In oxidation, electrons (“negativity”) are lost, making the species more positive.
One example of oxidation is the formation of nitrogen monoxide (NO), so called because it has one nitrogen atom and one oxygen atom in a molecule. This species can form from a combination of diatomic nitrogen (N2), diatomic oxygen (O2), and heat. So overall we have:
N2 + O2 + heat —> 2NO
The oxidation states of N2 and O2 are O (they are “free elements”). That leaves nitrogen monoxide. NO has a net charge of 0 so the sum of oxidation states (accounting for number of atoms) is 0. This means:
1 (oxidation state of N) + 1 (oxidation state of O)= 0
where the coefficient of 1 represents the number of atoms. I know the oxidation state of oxygen is (with a couple exceptions) -2. I do not know that of nitrogen. But, I can find it with a little algebra. Assuming N is the oxidation state of nitrogen:
1(N) + 1(-2)=0
N-2=0
N=+2
Ta-dah! I have now found all of the oxidation states in this reaction. But, how do I know where the oxidation was? The answer: compare oxidation states across the reaction arrow.
Symbols in red represent oxidation states (per atom). Green represents the change in oxidation state (per atom) across the reaction arrow. Image credit: Emma Snodgrass
Overall, the oxidation state of N became more positive, meaning there was a loss of electrons. Lion means LEO and LEO is loose electrons oxidation. So, N was oxidized! But what about oxygen? That brings us to the topic of reduction.
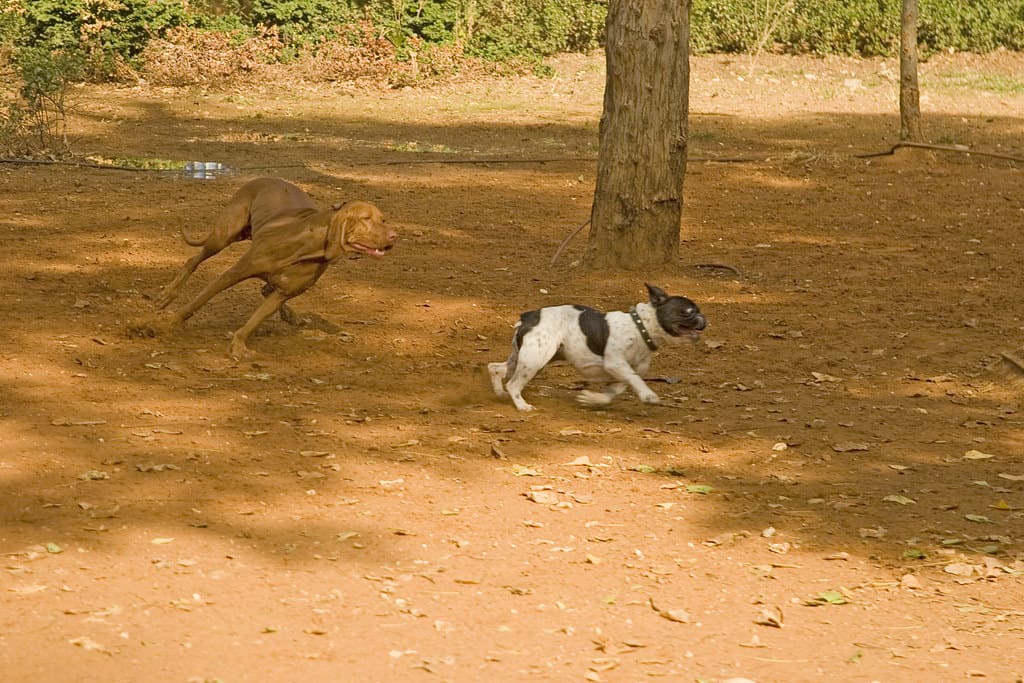
A dog will help us remember the essence of reduction. When dogs make the face in the picture, they are usually making a sound akin to “ger”. Maybe you can even hear this photo. Regardless, GER is another mnemonic. It stands for Gain Electrons Reduction. There is also “RIG” (Reduction Is Loosing) but again, I prefer the animal. We have gained electrons and thus have become more negative. Electrons could be thought of like dismissive or pessimistic comments. The more we hear these comments, the more negative outlook we take on. However, negative comments, like electrons can lead to very positive things.
Since reduction is gaining electrons, we expect to see a more negative oxidation state in the products. Let’s go back to the example of forming NO.
N2 + O2 + heat —> 2NO
We know from earlier that nitrogen (N) was oxidized. But what about oxygen (O)? Lets look at the change.
Symbols in red represent oxidation states (per atom). Blue represents the change in oxidation state (per atom) across the reaction arrow. Image credit: Emma Snodgrass
The oxidation state of oxygen become more negative, which means oxygen gained electrons and therefore was reduced. This reaction shows a fundamental aspect of redox reactions: there is both an oxidation AND a reduction happening simultaneously! Crazy, right?
Here is a challenge to you: what reactions can you find that are examples of redox chemistry? How do you know? What species is reduced and what is oxidized? Or, on the flip side, what reactions are NOT examples of redox chemistry? Why?
Congratulations! You have made it through a (brief) lesson on redox chemistry! I hope this has sparked love towards chemistry, or at least made chemistry seem a little less daunting.
Works cited:
Tro, N. J. (2016). Principles of chemistry: A molecular approach (3rd ed.). Pearson Education.
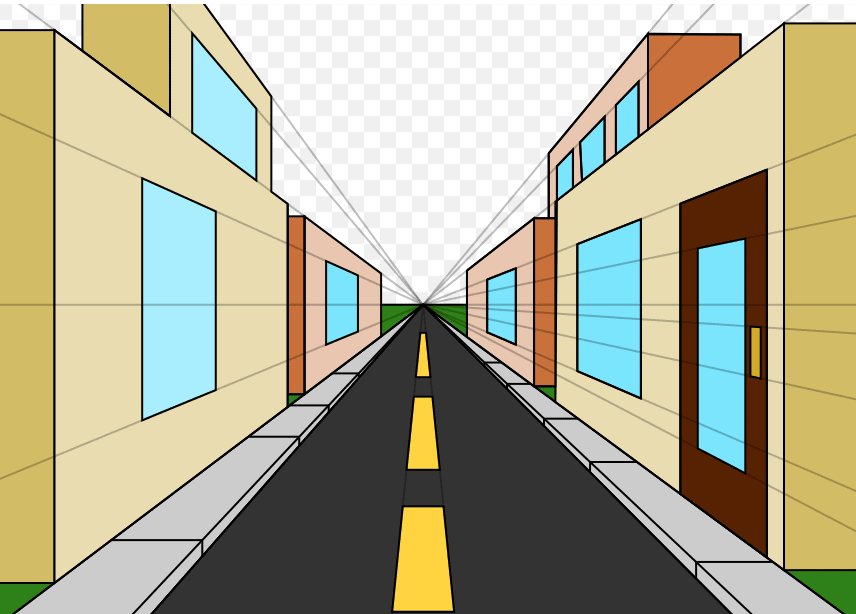
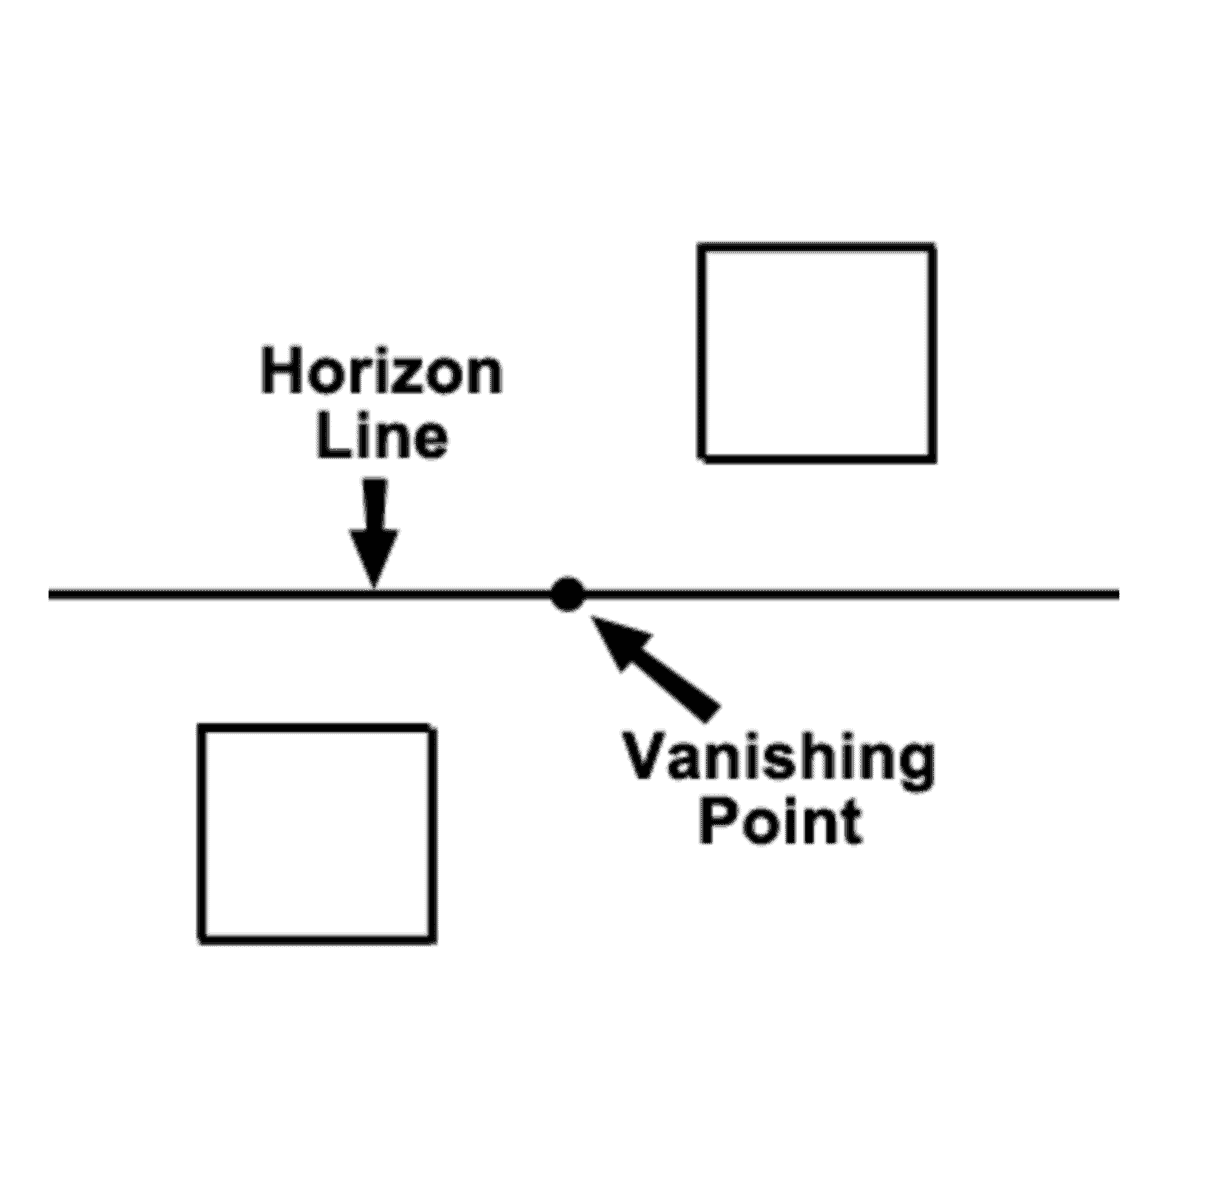
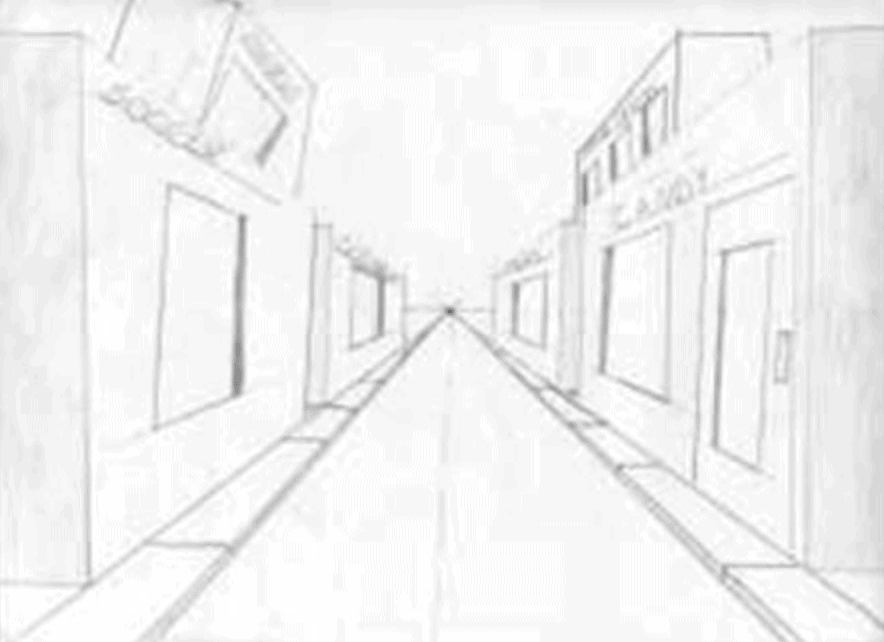
One point perspective is achieved by using a Vanishing Point and a Horizon line. The Horizon line is parallel to the top and bottom edges of the paper. This is used to define the line where the land meets the sky, at least when drawing land or cityscapes.
The Vanishing point is the point in an image or drawing on the Horizon line where everything recedes towards. When you look ahead, things that are farther away look smaller than things that are closer. Vanishing points help to preserve proper proportions when drawing things in the distance vs closer objects.
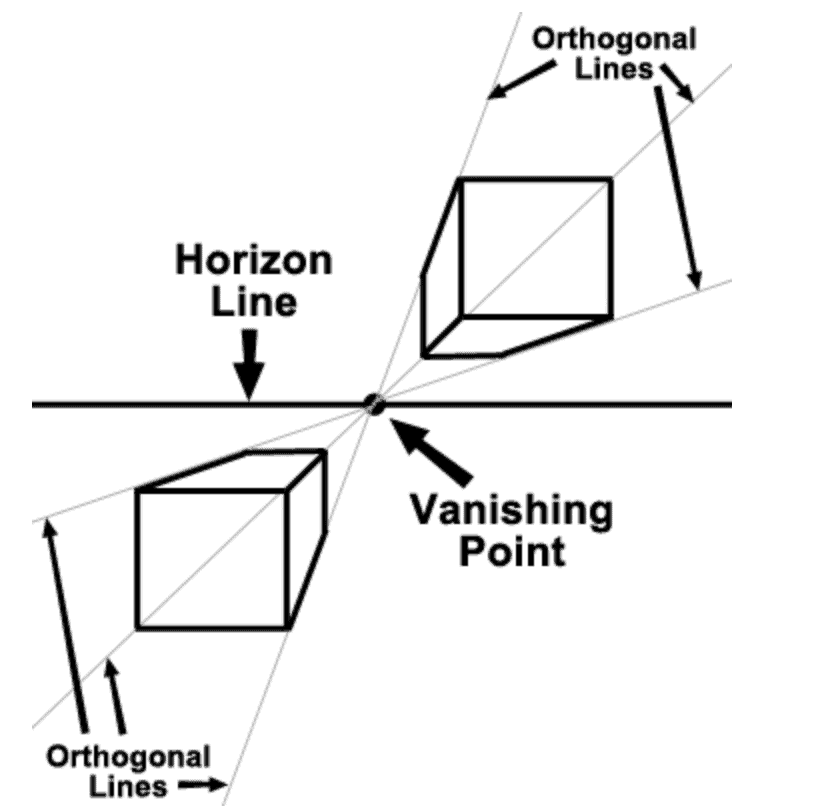
Lines are drawn from the top or bottom of objects to the Vanishing point. all lines other than the vertical and horizontal ones must go through the vanishing point to create a proportional effect. This also creates a 3D effect on whatever you are drawing. Vertical lines are used to define the edges of items and they must be parallel to the sides of the paper.
Use to slider below to see how the two 2D boxes are transformed to look 3D using a Vanishing point
One Point Perspective uses one vanishing points and results in the flat faces of objects to be shown and the sides to be receding. Use the slider below to see the transformation of a line drawing that uses one point perspective.
Image 5 : Mmroberts, CC BY 3.0 https://creativecommons.org/licenses/by/3.0, via Wikimedia Commons
Two Point Perspective utilizes two vanishing points to create an image that shows the corner view of a building or an object receding back on both sides. This is shown above (Image 5) where the artist uses points A and B on the Horizon line to draw a building.
Similarly to One Point Perspective, it creates a 3D effect that shows depth. Both vanishing points must be along the horizon line. To draw an object it is best to start by drawing a vertical line that is parallel to the sides of the page. This line marks the corner of your object. Then create two points on that line that mark the top and bottom of the object. Then connect each point back to both vanishing points. Close off an object by drawing two more vertical and parallel lines on either side.
These vanishing points can also be used to add the details like doors and windows to make them look proportional.
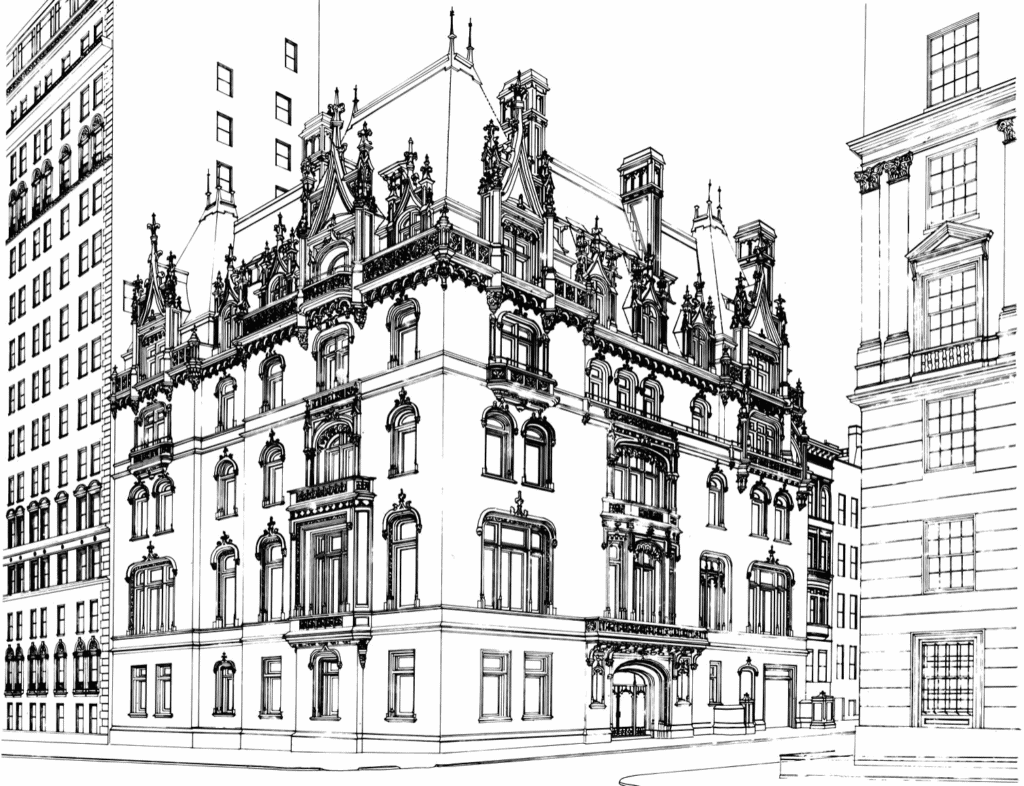
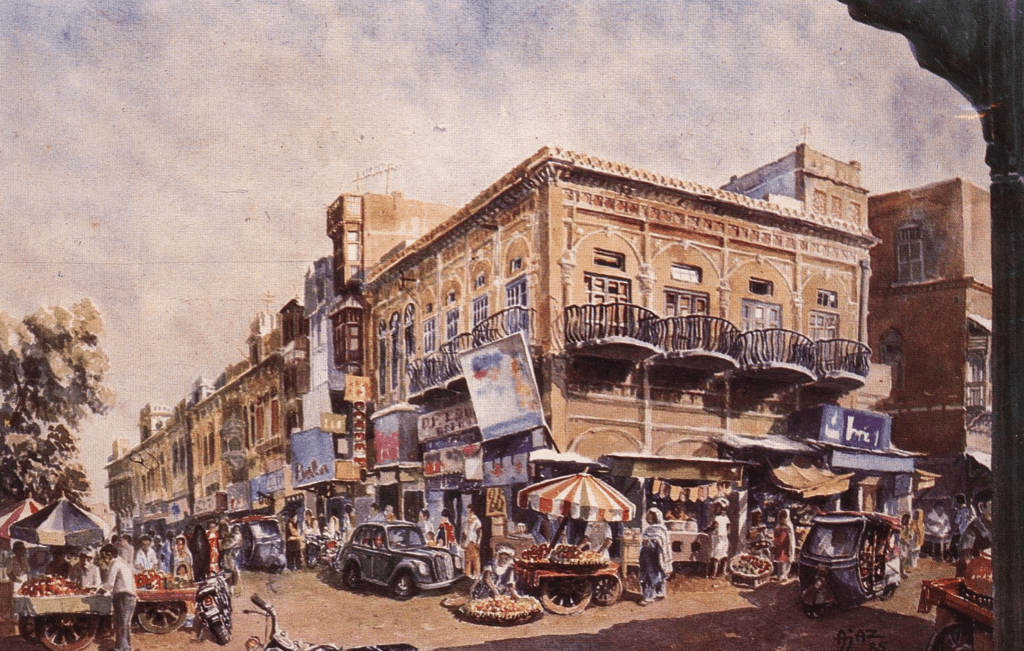
Observe the use of two-point perspective in the artwork below.
Image 6: The Jewish Museum New York, CC BY-SA 3.0 , via Wikimedia Commons
Image 7: The Apse of the Church of St Martin-sur-Renelle, Paris: The image is released free of copyrights under Creative Commons CC0. https://pxhere.com/en/photo/1469321
Image 8: Source: Dr. Ajaz Anwar the Painter 1985 : This work is licensed under the Creative Commons : https://en.wikipedia.org/wiki/File:House_of_Croweaters_by_Ajaz_Anwar.jpg#filelinks
Hi 7th grade mathematicians, in our evaluating expressions unit we will be looking into like and unlike terms. Follow through this activity to help conceptually understand what like and unlike terms are!
Look at the photos below
What is similar about these photos?
Look at the expressions below
What is similar about these terms?
The terms above are all like terms!
Look at the pictures below
What is similar about these photos? What is different about these photos?
Look at the expressions below
What is similar about these terms? What is different?
The terms above are all unlike terms!
Sometimes it can be tricky to identify like and unlike terms
Like terms: terms with the same variable or same exponent and variable. All constants are like terms.
Like terms are useful because you can group like terms together to make the expression easier to write.
When combining like terms, the operation in FRONT of the term (addition or subtraction) must stay attached to the term.
Which one doesn’t belong?
Use this review activity to practice your understanding of combining like terms.
Check your answers below by scrolling through the slideshow.
Remember, like terms are terms with the same variable or same exponent and variable. All constants are like terms.
In the following post I will outline 2 image-based lessons on the purpose of the sun and the moon which can be used for lessons in the classroom.
Sun Lesson
The sun is the largest object in our solar system and is the closest to the earth. The sun is seen as the heart of our solar system and is essentially a hot ball of glowing gases. It provides us many aspects that help our daily lives, can you think of any? Below are some examples of how important the sun is to our earth.
The moon is a natural satellite and the 5th largest moon in our solar system. The moon has a very thin atmosphere and the entire surface is cratered. Just like the sun the moon also provides us a lot to our earth, are you able to think of any examples?
The moon provides a way to help birds and other animals to know when it is time to migrate. Another example is that the moon contributes to the oceans tides. The last way the moon is important to our life on earth is that it stabilizes our wobble as a planet which stabilizes our climates.
Hopefully these two lessons can help guide a classroom lesson and help facilitate learning about the sun and moon and how important they are for us!