Introduction to the Water Cycle

Welcome third graders! Today, we’re going to go over a brief overview of the water cycle. The water cycle is something that isn’t always obvious to us, but it’s been a constant cycle that has happened on this planet since the oceans began to form, billions of years ago! That’s long before any life at all was on Earth. In fact, life itself wouldn’t even be possible without water! But before we get into that, let’s talk about the basic stages of the water cycle.

By Clker-Free-Vecotr-Images , pixabay.com

The first thing to understand is that in a cycle, there is no first step! The events in this cycle happen continuously, with no beginning or end, just like how a circle has clear beginning or end.

Photo by Noémie Cauchon on Unsplash

Evaporation

To begin, let’s talk about evaporation. Evaporation is when heat from the sun causes particles in water in the ground to heat up and move so fast, that they then transform into a vapor. The vapor then slowly rises to the sky. This process is almost always invisible while it’s happening, but it explains how puddles on the ground dissapear without you seeing them. The reason large bodies of water don’t evaporate is because the process of evaporation is slow, and bodies of water (such as lakes or oceans) have massive amounts of water in them!

Condensation

The next step is condensation. During this step, the vapor that has traveled to the air cools down and forms back into a liquid. This is actually the process that creates clouds! You can also observe this process at your own home. If you have a glass of cold water on a very hot day, you may notice the outside of the glass begin to notice water forming on the outside of the glass, even if the glass hasn’t spilled at all. The warm water molecules in the air (as a vapor) come in contact with the cold liquid in the can, causing condensation. You can also observe it in the car! If it’s cold outside but the car is very warm inside, the warmer molecules colide with the colder ones, forming condensation on the windows. That warmer air molecules come from our breath and our body heat.

Precipitation

The next step is precipitation. You may have heard this word before in weather reports. This process refers to when so much water has condensed in the clouds, that the clouds can no longer hold it anymore, and so it releases it as rain. However, it can also release the water in other ways can you think of any? (Hint: what if it is a really cold day, when the temperature is below freezing)? If you guessed snow or hail, you’re right! This is also a part of precipitation.

Photo by Karim Sakhibgareev on Unsplash

Collection

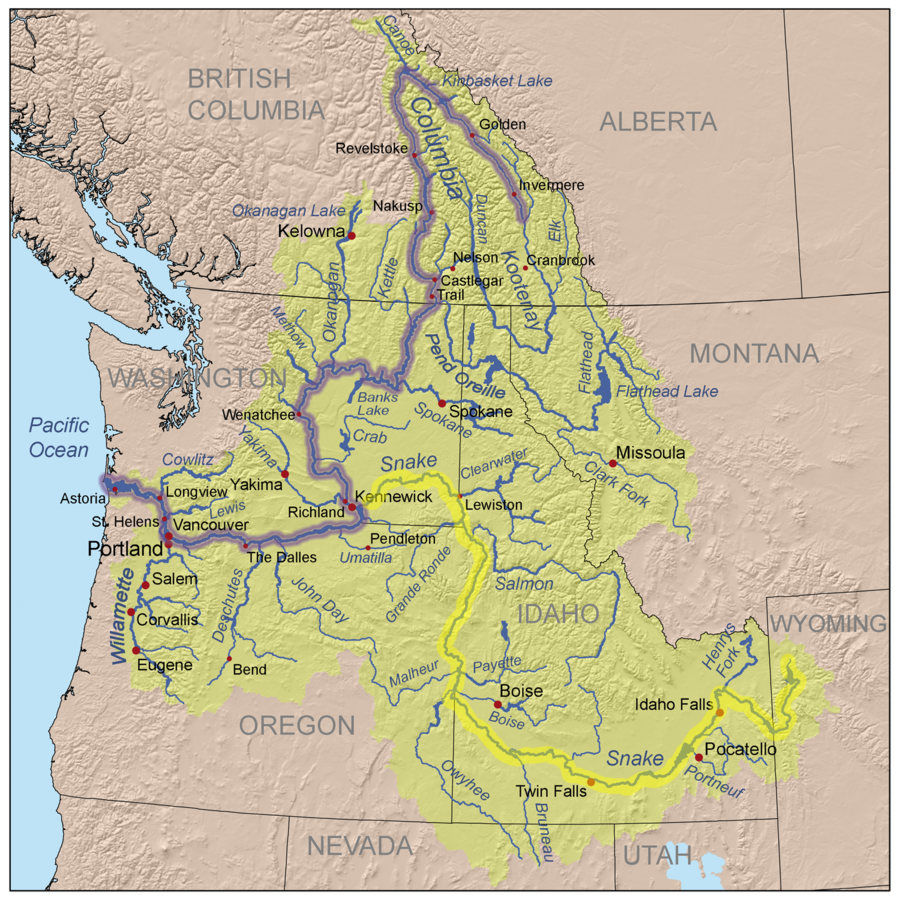
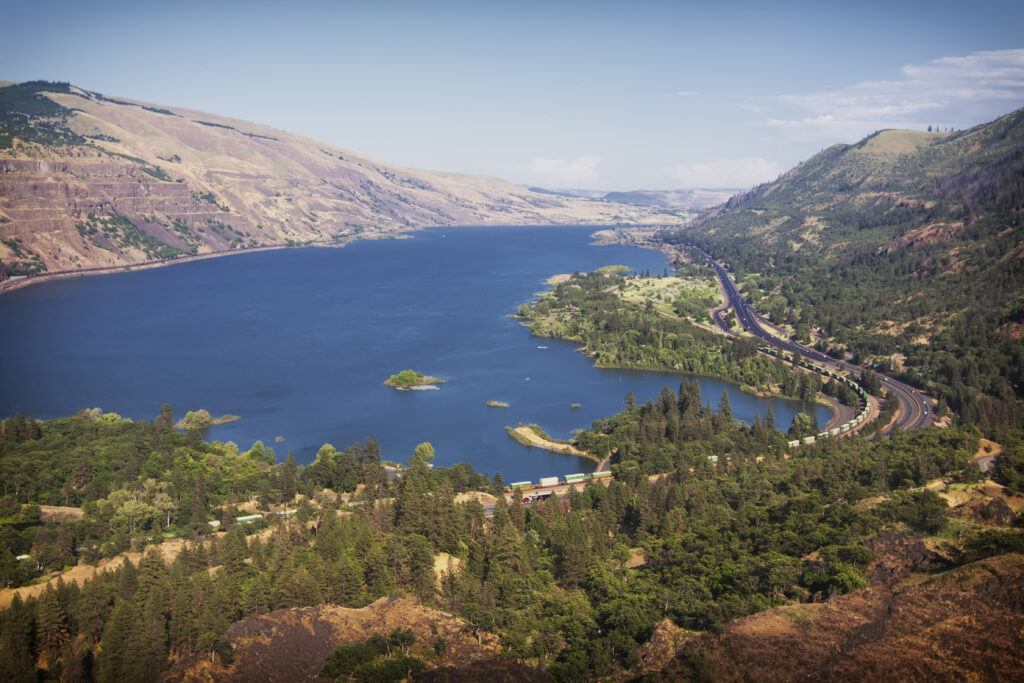
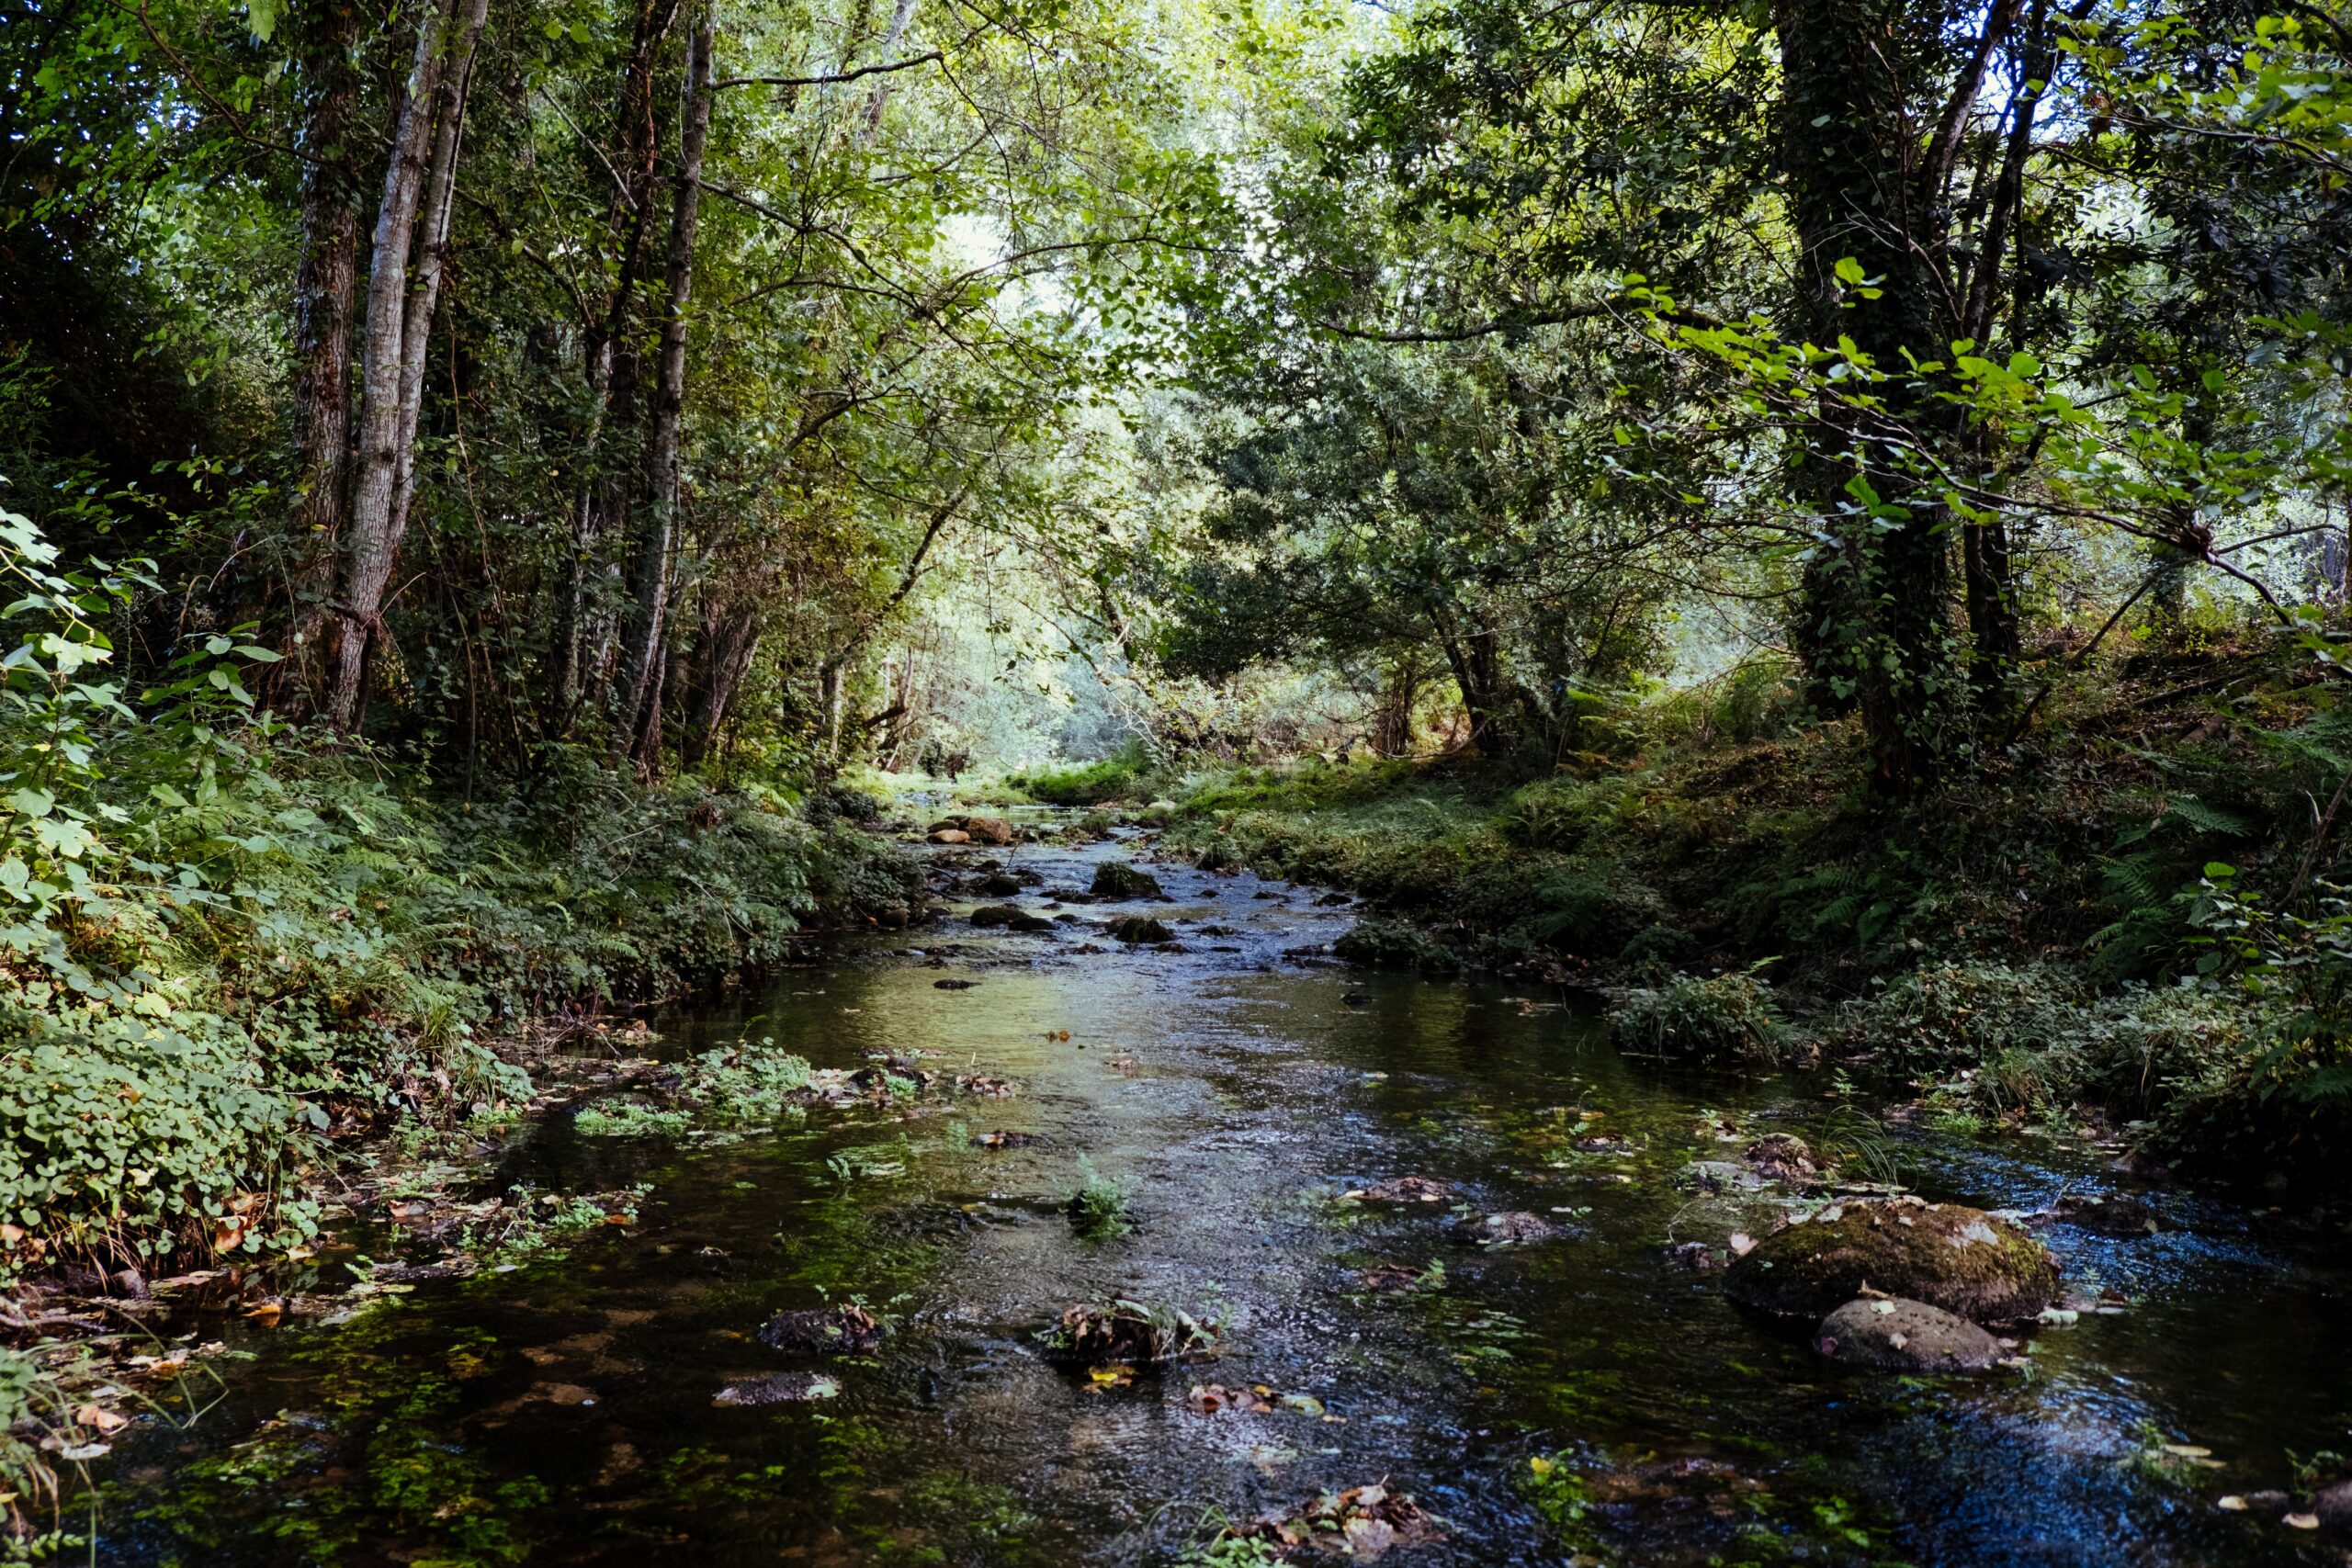
The last step we have is collection. During collection, the water falls from clouds (whether as rain, snow, hail, etc.), and collects in the Earth’s oceans, lakes, streams, rivers, and even in the ground. But remember, since this is a cycle, the process doesn’t end here! After all, once the water collects itself back on the earth, it is simply ready to begin the process of evaporation, which is the first step we talked about today! This means that the water we drink, the water we see in bodies of water, the rain we see, all of it, has been around on Earth for billions of years. There is barely any water that hasn’t been around that long, and that’s water that’s created through chemical reactions, but that will be a topic for next time. Great job today!

Put on your Boots, it’s Raining!

Clouds in the Sky Photo by Davies Designs Studio on Unsplash

What do we wear in different weathers? A Kindergarten Lesson.

Before we begin talking about what to wear in different weathers, let’s talk about what different weathers look and feel like. Using the pictures and prompts below, you’ll go through a variety of different weathers that we might see and then examine what it looks and feels like before determining what kind of outfit would go well. Keep in mind that not all students will have certain items (i.e. rain boots, rain jacket, umbrella, etc) so make sure a plethora of options are offered so no student feels left out.

First Picture – Sunny Day Photo by Sneha . on Unsplash

  1. In the first picture what do you all notice? (No clouds, really bright, etc.)
  2. How do you think it feels to be here? Are you sweaty? Would you want to drink a hot chocolate or eat shave ice in this kind of weather?
  3. What kind of clothes might we wear? (Shorts, t-shirts, hats)
  4. What kind of clothes would we maybe not be wearing? (Sweaters, layered pants)

Second Picture – Snowy Day Photo by Fabian Mardi on Unsplash

  1. What do you notice? (Can’t really see the sky, lots of snow, the roof of the cabin is covered, all the trees are white, etc.)
  2. How do you think it feels to be here? Are you shivering? Would you want to drink a hot chocolate or eat shave ice in this kind of weather?
  3. What kind of clothes might we wear? (A lot of sweaters, double pants, maybe boots, a jacket, a hat, mittens, etc.)
  4. What kind of clothes would we maybe not be wearing? (Shorts, slippers, t-shirts )

Third Picture – Rainy Day Photo by Raimond Klavins on Unsplash

  1. What do you notice? (Everything is blurry, it looks like it’s raining, the sky is grey, etc.)
  2. How do you think it feels to be here? Maybe you’re cold? Are you dry?
  3. What kind of clothes might we wear? (A sweater, a jacket, long pants, boots, maybe you’d have an umbrella?
  4. What kind of clothes would we maybe not be wearing? (Shorts, slippers, t-shirts )

Fourth Picture – Sun on Snowy Day Photo by Emmeli Sjölander on Unsplash

  1. What do you notice? (There’s snow on the ground, the sun is out, no clouds in the sky)
  2. How do you think it feels to be here? Are you cold? Does the sun feel nice?
  3. What kind of clothes might we wear? (Similar to snowy weather, maybe less layers, maybe no mittens, maybe no change)
  4. What kind of clothes would we maybe not be wearing? (Shorts, slippers, t-shirts )

Follow Up Activity

As a follow up to an assignment like this, you could send your students outside to observe the weather and then have them gather in groups and draw what they think a good outfit would be for a day like that.

Practicing Personal Hygiene

Okay class, today we are going to learn about how to properly wash your hands to keep germs away and keep each other safe! Washing your hands keeps away germs and bacteria that lead to sickness. By washing your hands regularly, you will keep yourself and the people around you healthy!

Photo by Claudia van Zyl on Upsplash and NeONBRAND on Upsplash

What supplies will you need to wash your hands properly? Just three simple materials!

Step one: You must get your hands wet with warm water in the sink and apply a pump of soap to your hands.

Step 2: You must rub your hands together fully for at least twenty seconds. Make sure to get all-around your hands and fingers! It should start to create bubbles in your hands!

Photo by Melissa Jeanty on Upsplash

Step 3: Rinse off the soap well with warm water.

Step 4: Dry your hands with a towel! Great job!

Looking Closer at Oregon’s Geography

Context: 3rd grade, geography

Goal: For students to understand Oregon’s geography more in depth. 3.8: Use geographical tools (maps, satellite images, photographs, Google Earth, and other representations) to identify multiple ways to divide Oregon into areas (such as tribal, river systems, interstate highways, county, physical, industry, agricultural).

Hello 3rd graders! Use this interactive map below to show the rivers and mountains in Oregon.

Right: https://picryl.com/media/map-of-oregon-rivers-and-lakes-1ee481 Left: https://nypl.getarchive.net/media/map-of-oregon-territory-probably-prepared-for-the-tenth-census-of-the-united-af7c07

Which River looks the longest?

2nd picture: Kmusser, CC BY-SA 3.0 https://creativecommons.org/licenses/by-sa/3.0 3rd picture: Steven Pavlov https://commons.wikimedia.org/wiki/User:Senapa

Looking at the map above picture again, answer this question:

2nd Picture: Tony Fischer https://flic.kr/p/5C4B1m 3rd Picture: Shannon https://creativecommons.org/licenses/by-sa/4.0

1st: Robert Ashworth, CC BY 2.0 https://creativecommons.org/licenses/by/2.0, via Wikimedia Commons, 2nd: Michael McCullough https://creativecommons.org/licenses/by/2.0, 3rd: Bonnie Moreland https://www.flickr.com/photos/icetsarina/48374782311

Next class we will learn more about Oregon’s beautiful geography through exploring Google Earth: https://earth.google.com/web/@45.36949114,-121.70322197,2997.55911547a,4184.37327762d,35y,39.19864856h,44.77928334t,0r

Featured Image: https://picryl.com/media/indexed-map-of-oregon-showing-the-railroads-in-the-state-and-the-express-company

Time For A [math] Popcorn Partyyyyy

“Okay Kindergarten! Today we’re going to have a math popcorn party!”

Photo by Pylz Works on Unsplash

“First things first! I need your help to set our table spots! We each need a bowl, a spoon, and a cup. Here is a bowl for each of you.” Hand each group of four, four plates. “Are there enough for all of you?”

As they answer, pull up the images of the bowls and the people and have them count each bowl and each person. “Yes! There are four bowls and four students! There are enough bowls for each student in your group. Now let’s see if we have enough spoons!” Pass each group of four, three cups. “Are there enough cups for each of you?” Flip to the image of the spoons while they think and then flip to the second image as they respond. Have them count the number of spoons and the number of people to double check their answer. Ask again “Are there enough spoons?”

“No! There are only three spoons and four students. That means there are not enough spoons. How many more spoons would we need for everyone to have a spoon?” Class: “one!” “Yes! We would need one more spoon for everyone in the group to have a spoon.”

Pass out one more spoon to each group and ask again “now are there enough spoons?” Class: “Yes!”

“That’s right! Now there are enough spoons because there are four: one spoon for each person in your group. Now, let’s see if we have enough cups.”

Hand each group five cups. “Here are your cups.”

Class: “There are too many!”

Ask the class “How many extra cups do you have?” Give them time to think and then pull up the images of cups and people and have them count each. Ask “How many more cups are there than people?”

“That’s right! There is one too many cups! If I take one away, are there enough?”

Class: “yes!”

“That’s right! If I take one away, there are JUST ENOUGH cups for your group.”

“Now that each of you has a bowl, a spoon, and a cup, let’s pass out the popcorn! I hope that I have enough… Help me count the scoops of popcorn as I give each student one scoop.”

Photo by Reza Ghasemi on Unsplash

Have students help count each scoop as you go around to each student. Once each student has one scoop, have students look at the remaining popcorn and ask “Do we think there’s enough popcorn left for every student to have another scoop?”

Take student guesses and then have them help count scoops of popcorn into a bigger bowl to see if there is enough left for everyone to have another scoop. Guide students in comparing the number of scoops it took for every student to have one and the number of scoops left over to see if there’s enough! Do the same with water as you fill their cups, have students count each cup and ask if there is enough. Have students munch on their popcorn as an afternoon snack 🙂

The Lifecycle of Butterflies

Butterfly on orange flower photo by Calvin Mano on Unsplash

A kindergarten science lesson.

To get started, draw three columns on the whiteboard or a projector device. Ask students what they know about butterflies and write the ideas on the left column on the whiteboard to activate prior knowledge. Allow all students to share. This lesson is based on students’ questions and so encourage curiosity and push students’ thinking.

Show the video below describing the phenomena of a butterfly’s lifecycle. Pause the video at 1:30 and ask students what they predict will happen next using the information generated from their prior knowledge.

A video description of a butterfly’s lifecycle.

Next, add two more columns onto the whiteboard. Next to prior knowledge write ‘Notices’ and ‘Wonderings’. Ask students what they notice and wonder from the video. Write every response down on the board- make sure that students know there is no right or wrong response.

Using students’ ideas, explain that today we are going to answer their questions regarding a butterfly’s lifecycle!

Using the images and talking points below, go through the lifecycle of butterflies with students making sure to come back to their notices and wondering as questions get answered along the way.

First Stage of a Butterfly

All butterflies go through a complete metamorphosis- they go through four life stages. A butterfly’s life starts in a small round or oval egg. The eggs are often found on the leaves of plants. It can take a few weeks for the butterflies to hatch from the egg.

Second Stage of a Butterfly

A Caterpillar’s Diet

Once a butterfly hatches, the butterfly comes out a caterpillar and they eat a ton! They start by eating their way out of their egg and then they start eating the leaf they were born on!

Photo by Sara Codair on Unsplash

Can you guess what foods from the ‘Very Hungry Caterpillar’ book, caterpillars do not eat? Caterpillars do not eat desserts like lollypops and pies. In fact, each caterpillar type only likes to eat a certain type of plant so it is important that the mother butterfly lays her eggs on the right leaves.

However, like the book, caterpillars do grow very quickly. Their food helps them grow! Caterpillars grow by shedding their molting their outgrown skin because their exoskeleton (skin) does not stretch as they get bigger. Kind of like how kids grow into new clothes as their body changes, caterpillars shed their skin through molting because they grow quickly from eating.

Third Stage of a Butterfly

Photo by Suzanne D. Williams on Unsplash

Once the caterpillar is done growing, they form into a pupa (aka chrysalis). where the caterpillar rapidly changes through a system called metamorphosis. The caterpillar stays in the pupa for one to two weeks. The shell of the pupa is the same color as the leaves or branches around it. What color leaves do you think were around the pupa above? Why do you think they are the same color? Could it be to hide from predators?

Fourth Stage of a Butterfly

Once the caterpillar finishes changing inside a pupa, it emerges as an adult butterfly! When the butterfly first comes out of the shell, it has to rest because its wings are very wet. To dry their wings, butterflies hang upside down. Once the butterfly is able to fly, it goes off to look for food and for a mate. Then the butterfly lays eggs to start the lifecycle over again!

Look at the before and after of the butterfly in the chrysalis and after it is out. What do you notice? What similarities and differences do you see?

Photos both by Joshua J. Cotten on Unsplash

Adult butterflies come in lots of different colors, what colors do you see? Have you seen butterflies in other colors? How do you think their colors and patterns help them live in their habitat?

How are YOU feeling?

Hello I’m Nik from egg image

Good morning 1st Graders! Today we will be talking about our emotions. Sometimes we have these feelings that we can’t quite describe. The main objective for today’s lesson will be focusing on our well-being and how to identity what emotion we may be feeling at a given time.

sergeitokmakov  from happy cartoon image

Photo by Ben White on Unsplash

So first graders, from looking at the 1st image in the slideshow, can you tell me what emotion you see? (Students would most likely say happy because the emoji is smiling and has raised eyebrows)

Now, by looking at the 2nd image in the slideshow, can you tell me what features the little boy has on his face that makes you know that he is happy?

Photo by Artem Nedzelskiy on Unsplash

1st graders, by looking at this picture of this little girl, can you tell me how she might be feeling? (Students will most likely respond with sad or lonely) Now students, how many of you have felt sad before? (Students raise their hand, if a couple of students are able to share their story if they are comfortable, they may do so with the class).

BEFORE: AFTER:

Surprising_Shots on Pixabay (Image before)

Photo by Mick Haupt on Unsplash (Image after)

1st Graders, please look at the before picture and can you describe what is happening in the picture? (Students will most likely say that the little boy is walking somewhere)

Now can you all look at the after picture and describe what emotion the boy has on his face? (Students will most likely respond with angry) Why do you think that the little boy is angry? (Students will be able to explain that the little boy is angry because he brought his bike to the park and then the playground was closed when he got there)

Now that we have learned what happy, sad, and angry are, we will be able to understand and describe how we are feeling at any point of the day!

Grow Plant, Grow!

Soil: Photo by Roman Synkevych on Unsplash

Alright my first grade friends, today for science we are going to be learning about the life cycle of plants. Just like people and animals, plants also have life cycles because they are alive! I am going to go over our learning targets which are, by the end of the lesson, we will be able to describe the life cycle of the plants and the nutrients plants need to survive.


Seed Photo: Photo by Gabriel Kidegho on Unsplash
Tree Photo: Photo by niko photos on Unsplash

Now, I want you all to look at the side by side photos above. Can anyone tell me what the pictures are and what they have in common? (Allow think time and call on students. Students should share that the photos are of a seed/spout and a tree and that seeds turn into plants, like trees.) Great! In order for a plant, such as a tree to form, they must begin with a seed. Now, seeds do not magically form into trees overnight. There is a process that plants must go through in order to reach their fully developed stage of life. Today we are going to learn about all the stages of life that a plant must go through in order to develop and survive.

Now we are going to take a look at a few images in order to understand the process that plants go through in order to go from a seed to a full grown plant.

Seed Photo: Photo by Joshua Lanzarini on Unsplash, Sprouting Seed Photo: Photo by Gabriel Kidegho on Unsplash, Growing Sprout Photo: Photo by Francesco Gallarotti on Unsplash, Budding Flower Photo: Photo by Andreas Haslinger on Unsplash, Flower Photo: Photo by Andrew Small on Unsplash

Begin with Gallery Photo 1: In order to begin the life cycle, plants must begin with a seed. Inside the plant is a baby plant known as an embryo. Seeds need to be planted in dirt or soil and watered in order to begin the growing process! Once the seed has all the nutrients it needs to begin growing, it will begin to plant roots and start growing.

Flip to Gallery Photo 2: Once the seed has the right nutrients such as the right temperature, water, and a good location, they can begin growing. Seeds do not grow very rapidly, but they will continue to grow their roots downward into the soil and grow upwards out of the dirt.

Flip to Gallery Photo 3: After the seed has begun to sprout, they will begin seedling as seen in this photo. A seedling is a very young plant but in this stage of life, they begin growing leaves and growing even bigger than before. During this process, the plant begins growing upward toward the sunlight. In order to continue growing, the plant still needs nutrients such as sunlight, water, and the proper air/temperature to become more mature.

Flip to Gallery Photo 4: Once the plant continues to grow, it will begin to form buds, as seen in this photo. Inside the bud, a little flower begins to grow and form, but it does not open until it is completely ready, which is why it is still in a small circle form, as seen in the photo. The flower needs to be protected by the outer layer until it is ready to blossom.

Flip to Gallery Photo 5: Finally, once the plant is fully developed, it will open and it will blossom into a beautiful flower. For this example of flowers, once the flower blooms, insects, such as bees, can begin the pollination process in order to begin the plant life cycle all over again. For plants, such as trees, the life cycle process is very similar, except instead of blooming into a flower, the tree would just continue to grow and grow as long as its needs are met.

Now, we talked about a few different necessities that plants need to grow, so I want you to turn and talk with your partner for a couple minutes in order to brainstorm all the different nutrients that a plant needs to survive!

(Give students a couple minutes to chat with a partner and roam the room to facilitate and monitor discussions. Call on a few students and ask what they discussed with their partner. Answers should be along the lines of ‘sunlight/temperature, soil, water, etc.)

Awesome! (Flip to graphic below) Just like us, plants need different nutrients to survive such as sunlight, soil, and water!

Sun Photo: Photo by Ainsley Myles on Unsplash, Water Photo: Photo by David Ballew on Unsplash, Soil Photo: Photo by Roman Synkevych on Unsplash

Wonderful job today, my first grade scientists! Now, you will be able to recognize the different stages of plant life and identify plant nutrients in your everyday life! I challenge you to find a plant today after school and determine the stage of life the plant is in and what nutrients you see around it that might have helped its growth! We will have the chance to share this tomorrow!

The Five Senses and Me!

Why are kittens soft? Why is ice cream sweet? Today we will be answering these questions as a class for science!

Hello, my lovely Kindergarteners! Today we will be talking about our five senses.

Today’s Objective:

  • Figure which sense goes with which body part.
    1. Have hands on examples to provide the students whether it is images for sight or snacks for taste and/or smell.

“Alright class, before we can answer the questions I asked, I want to teach each and every one of you the five senses!”

“Now, what is the image on the screen?”

“A BIRD!”

(Students respond to the image on display, in this example, it is a bird.)

“That’s correct! Now I ask. What is helping you SEE the bird? Can you point to what is helping you SEE?”

(Students point to their eyes.)

“Awesome job! Correct, you SEE the bird with your EYES. Next, here are some crackers to eat. Can you tell me what they TASTE like?”

“Amazing job, once again. Can you point to where you were able to taste the cracker?”

(Students point to their mouths/tongues.)

“Exactly, you TASTE ice cream and crackers with your TONGUE. Now pass around this ball and tell me what you FEEL.”

“SQUISHY!” “SMOOTH!”

“Good descriptive answers everyone! Those who said smooth, do you agree with it being squishy? Those who said squishy do you agree with it being smooth? All in agreement? Well then, can you point to what let you FEEL the ball?”

(Students point towards their hands/fingers.)

“Good job everyone! Our HANDS and FINGERS helps us FEEL objects. Okay, now I am going to play a song, can you point to the body part that helps you hear the music?”

(Music begins to play and students point to their ears.)

“That is correct, would you say you have been HEARING me the whole time using your EARS? Yeah? I do have one more experiment for you all that will end in treats! Take an OREO and tell me what it SMELLS like.”

“YUMMY!” “GOOD!”

“So it has a scent, yeah? Good! Can you point to the body part that helped you SMELL the OREO?”

(Students point to their nose.)

“Good job, your NOSE helps you SMELL different things like OREOS or crackers. Now I am going to show you some images and you tell me which sense goes with which body part.”

  • Show understanding through matching each sense with the body part shown on the screen.
    1. Have images of the body parts and ask the class to tell you what sense goes with what image.

Sources:

Five Senses by Basti Steinhauer from NounProject.com

Photo by Richard Lee on Unsplash

Photo by M Azharul Islam on Unsplash

Photo by Hayes Potter on Unsplash

Photo by Arteum.ro on Unsplash

Photo by Darrell Cassell on Unsplash

Photo by Lina Trochez on Unsplash

Photo by Dylann Hendricks | 딜란 on Unsplash

Photo by Braydon Anderson on Unsplash

Shaping the World

Picture from _Alicja_ on Pixabay

Hello Kindergartners! For today’s math lesson, we will be reviewing the names of shapes and practice finding some of those shapes in pictures from around the world!

First, lets try to name some of these shapes in the images below. Can anyone tell me what the names of each of these shapes are?

Great job naming those shapes! Some of those were pretty tricky!

Now, we are going to practice finding some in different pictures from around the world! What shape do you see in these pyramids from Egypt?

Photo by Jeremy Bezanger on Unsplash

Triangles! Correct!

How about in this picture? What kind of shapes do you notice in this mosque?

Photo by Rumman Amin on Unsplash

There are a few different shapes in here! Did you find them all?

Last one!

Photo by Andrew Neel on Unsplash

Awesome job Kindergarteners! Good job identifying your shapes! You can try this activity outside of school as well, by finding shapes anywhere you go!

The Ahupua’a System of Ancient Hawaii

Hello 4th graders! In today’s Hawaiian history class, we will be learning about the ahupua’a system. To prepare for today’s lesson, make sure you have a blank piece of paper and coloring supplies!

What is an ahupua’a?

In ancient Hawaii, the land was divided into sections that were ruled by local chiefs. These sections were shaped into thin slices that started high in the mountains and extended to the sea. These sections were called an ahupua‘a. Within each ahupua’a, there are three geographical areas: uka, kula, and kai. Watch this quick video below to learn more about the ahupua’a system!

Today we will be drawing an ahupua’a system. To start off, get your blank piece of paper and set it down in front of you in portrait style. Then divide the space on your paper into three equal sections by drawing two horizontal lines across your paper. We will start at the topmost section with uka!

Let’s draw an ahupua’a system!

Uka

As the video mentioned, the uka section of an ahupua’a was in the upland areas along the mountains. There were many important resources that uka provided:

  • Koa wood to build canoes, houses, and artistic crafts
  • Kauila hardwood to create weapons and tools
  • Stalks that were flexible enough to use for fishing net rims and for musical bows
  • Roots, vines and other plants for fishing tools, leis, and medicinal purposes

On the section at the top of your paper, start drawing the uka of your ahupua’a system. Feel free to draw some koa trees, maile vines, mamaki, and other plants you may find high in the mountains! There are also many colorful birds in this area you can draw such as the ‘Apapane, ‘I’iwi, and ‘Amakihi. And don’t forget to label “Uka” somewhere in this section so you don’t forget its name!

Kula

Kula is the next section of the ahupua’a, settled between the mountains (uka) and the sea (kai). And so you will be drawing kula in the middle section of your paper. Unlike uka, kula has flat, sloping land that was mostly used for agriculture. Some common plants that were grown here include:

  • Bananas
  • Dry-land kalo (used to make poi, which was a very important food for early Hawaiians)
  • Sweet potato
  • Ulu (breadfruit)
  • Kukui trees
  • Pili grass (used for building houses)

Use the images above as inspiration as you draw the kula of your ahupua’a in the middle section of your paper. Make sure to label this part as “Kula” and try to draw at least three different plants in this area (but feel free to draw more!).

Kai

The final part of our ahupua’a is kai, which includes the sea and land near it. Kai is an important section because it supplies the ahupua’a with fish, salt, and other seafood. There were also many medicines that come from this area, such as seawater itself. Hawaiian salt (also known as pa’akai) was particularly essential because it was used for many things: medicine, preserving food, ceremonies, and seasoning. Some other resources that came from kai include:

  • Coconut trees used to create brooms, canoes, spears and fans
  • Seashells that were made into as small bowls and knee drums
  • Noni which is a fruit used for medicine and yellow dyes
  • Algae, seaweed and limu that were used as food (limu is a sea plant that has lots of nutrients and vitamins)

To finish our ahupua’a drawing, draw your kai area at the bottom section of your paper. You can include all sorts of ocean critters here, such as the whales, fishes, and turtles in the images above. And to finish it off, label this section “Kai.”

Review

An ahupua’a was an important system in ancient Hawaii. Typically, an ahupua’a was a narrow strip of land that extended high up from the mountains, uka, to the sloped plains of kula, and finally to the ocean, kai. Each of these three areas had important resources that were traded and used for food, tools/weapons, medicine, shelters, musical instruments, and crafting/decorations. The most important thing for a successful ahupua’a was that everyone did their part. The people living here had essential jobs and responsibilities. These responsibilities were called ‘kuleana.’ When everyone did their kuleana, the land and its people could thrive. Try to brainstorm about what your kuleana may be. Some examples include taking care of siblings, doing house chores, being kind to others, and even simply staying healthy. Write down your possible kuleanas on the back of your ahupua’a drawing and be ready to share some of them with the class.

Image credit:

Photo by Pietro De Grandi on Unsplash Photo by Kevin Doran on Unsplash
Photo by David Lang on Unsplash
Photo by Studio Kealaula on Unsplash
Photo by Fallon Michael on Unsplash
Photo by Martin Zangerl on Unsplash
Photo by Sean Robertson on Unsplash
Photo by Jason Miller on Unsplash
Photo by Tristan Ramberg on UnsplashPhoto by Athena Kavis on Unsplash
Photo by Valkyrie Pierce on Unsplash
Photo by Abigail Lynn on Unsplash
Photo by Karson on Unsplash
Photo by Joe Cook on Unsplash

Some Sameness, but Special

What do we have in common with each other? What is unique about us?

Photo by Raquel Martínez on Unsplash

Hi 1st graders! Today, for our reading block we are going to focus on something called comparing and contrasting. Comparing means to notice what two things have in common. It can be seeing what is the same between two people, two pictures, or two situations. What do you notice is the same in both of these photos?

(Wait for the students to point out things like the boats, palm trees, ocean water, sand, clouds in the sky, etc.)

Now we will talk about contrasting. This means to point out what is different between two things. What is different between these two photos?

(Wait for students to point out things like the cat vs. dog, dog being asleep vs. cat being awake, dog being inside vs cat being outside, dog laying down vs. cat climbing a tree, dog is older vs kitten, etc.)

Now we are going to listen to a read aloud of a book called Same, Same But Different.

This is a book read-aloud that I was shown in my ED 400 class.

We will now be partnering up to learn more about what we have in common with our classmates. With our partners, we will also find out things that are unique to us. The best part of this is, both are great! It is very fun to find out things that you and your friends share in common. It is also good to learn about things that your friends do that you may not do yourself because you get to learn more about them and maybe find out about something new to try. Here are some questions you and your partner can ask each other to find out what is “same, same, but different” about each other:

  1. Do you have any pets? What kinds of pets do you have, what are their names, how old are they, what do they look like?
  2. What is your favorite TV show? What is your favorite book? What is your favorite movie?
  3. Do you have any siblings? How old are they? Do you like spending time with them?
  4. What are your favorite things to do after school?
  5. Where are your favorite places to visit?
  6. What is one thing that you think is super special about yourself?

Beach 1: Photo by Elizeu Dias on Unsplash

Beach 2: Photo by Colin Watts on Unsplash

Kitten: Photo by Koen Eijkelenboom on Unsplash

Dog: Photo by Irina on Unsplash

Dog and Cat: Photo by Andrew S on Unsplash

Girl Reading: Photo by Josh Applegate on Unsplash

Siblings: Photo by Zoe Graham on Unsplash

Kids Swimming: Photo by JVR X 88 on Unsplash

Kid Swinging: Photo by Myles Tan on Unsplash