Self Graded Quiz- Earth’s Place in Space Unit Quiz
In my cooperating classroom, my first graders are learning about our solar system. This quiz will help the students assess how well they know the information and help the teacher know if there are any misconceptions that the students may have. The feedback given immediately after the quiz will allow the students to reflect on their results and answers. Here is a quick quiz I made about space unit!
2. Branching Form- Choose your space adventure
This branching form would be a fun activity for students to choose their own space adventure. This would be a fun way to either begin the unit to get student’s thinking about space (in a fun, unrealistic way) or to end the unit, as a celebration! Students will have the option to go to the moon or mars and encounter many obstacles on the way!
Self Graded Quiz – How Well Do You Know Miss Kate?
I think that this would be a fun activity for students in the beginning of the year to get to know their teacher! I love the idea of teachers and students forming close relationships and bonding over real life things – not just school. Here is what I created about myself!
2. Branching Form – Design Your Dream Day!
I created a Design Your Dream Day braching form because I thought that this would be a fun brain break for students, morning opener, or could be an intro into a fun lesson on businesses or time management! I also love having students practice decision making skills, this is a great skill to learn and a fun way to practice!
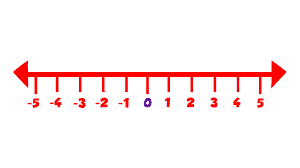
This assessment will be taken at the end of the day after students learn the properties of a number line. While taking this assessment, they will have access to a paper copy of a number line, as well as cut out circles that they can use to move along their number line back and forth. The quiz has both multiple choice and written response questions, as well as a quick review at the beginning and a question at the end that will get students thinking about topics that will be covered in the next lesson.
3-ESS2-2. Obtain and combine information to describe climates in different regions of the world. Analyzing data in 3–5 builds on K–2 experiences and progresses to introducing quantitative approaches to collecting data and conducting multiple trials of qualitative observations. When possible and feasible, digital tools should be used. Represent data in tables and various graphical displays (bar graphs and pictographs) to reveal patterns that indicate relationships. (3-ESS2-1)
“Hello 3rd Graders!
Here in Portland, we experience many different types of weather. We have high temperatures in the summer and low temperatures in the winter.
Not every place, though, has the same weather as us.
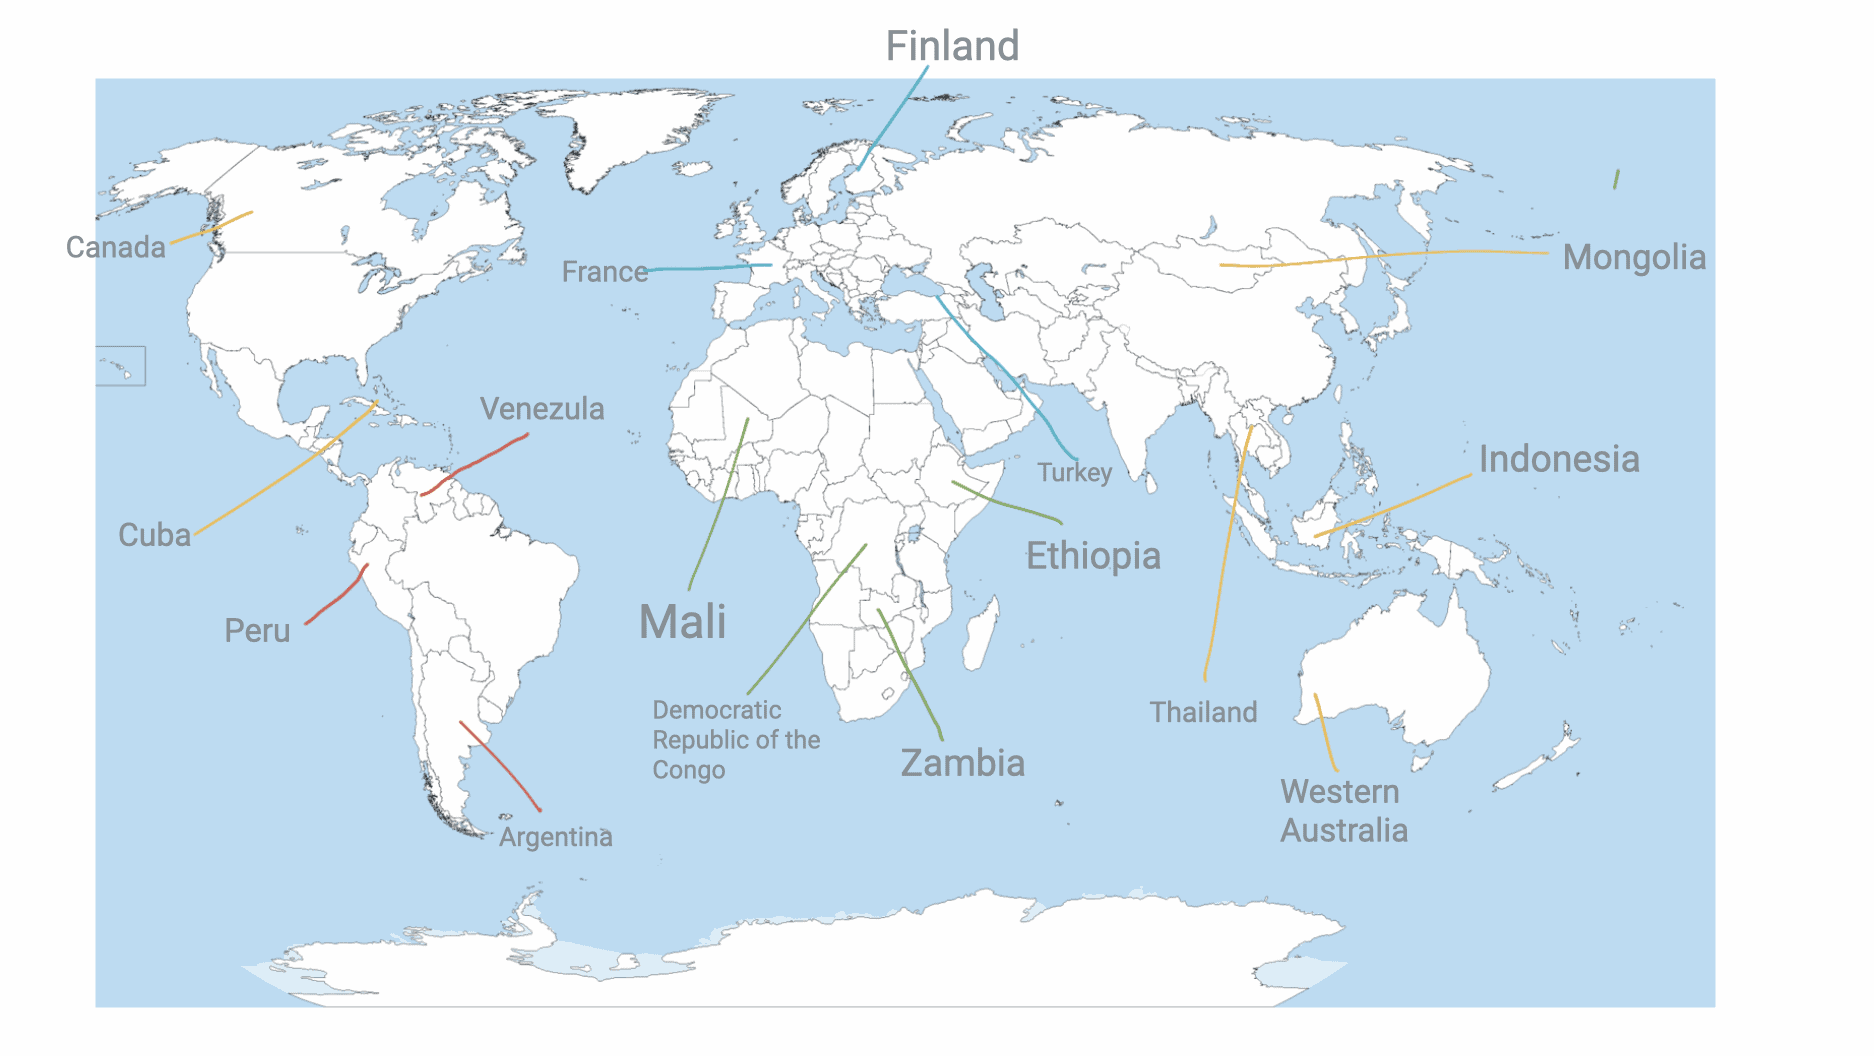
Below you will see a screenshot of today’s Jamboard. Labeled is countries around the world.
You with a partner are going to pick a country (there is a slide for each country) and find the average weather of each month.
A country can have a large range of weather depending on its size (think of Portland’s cold weather compared to Florida’s hot weather) so you will research two cities on either side of the country to compare (cities are specified on country’s slide)
You will then represent the 2 cities in a graphical display of your choice (table, bar graph, pictograph, etc)”
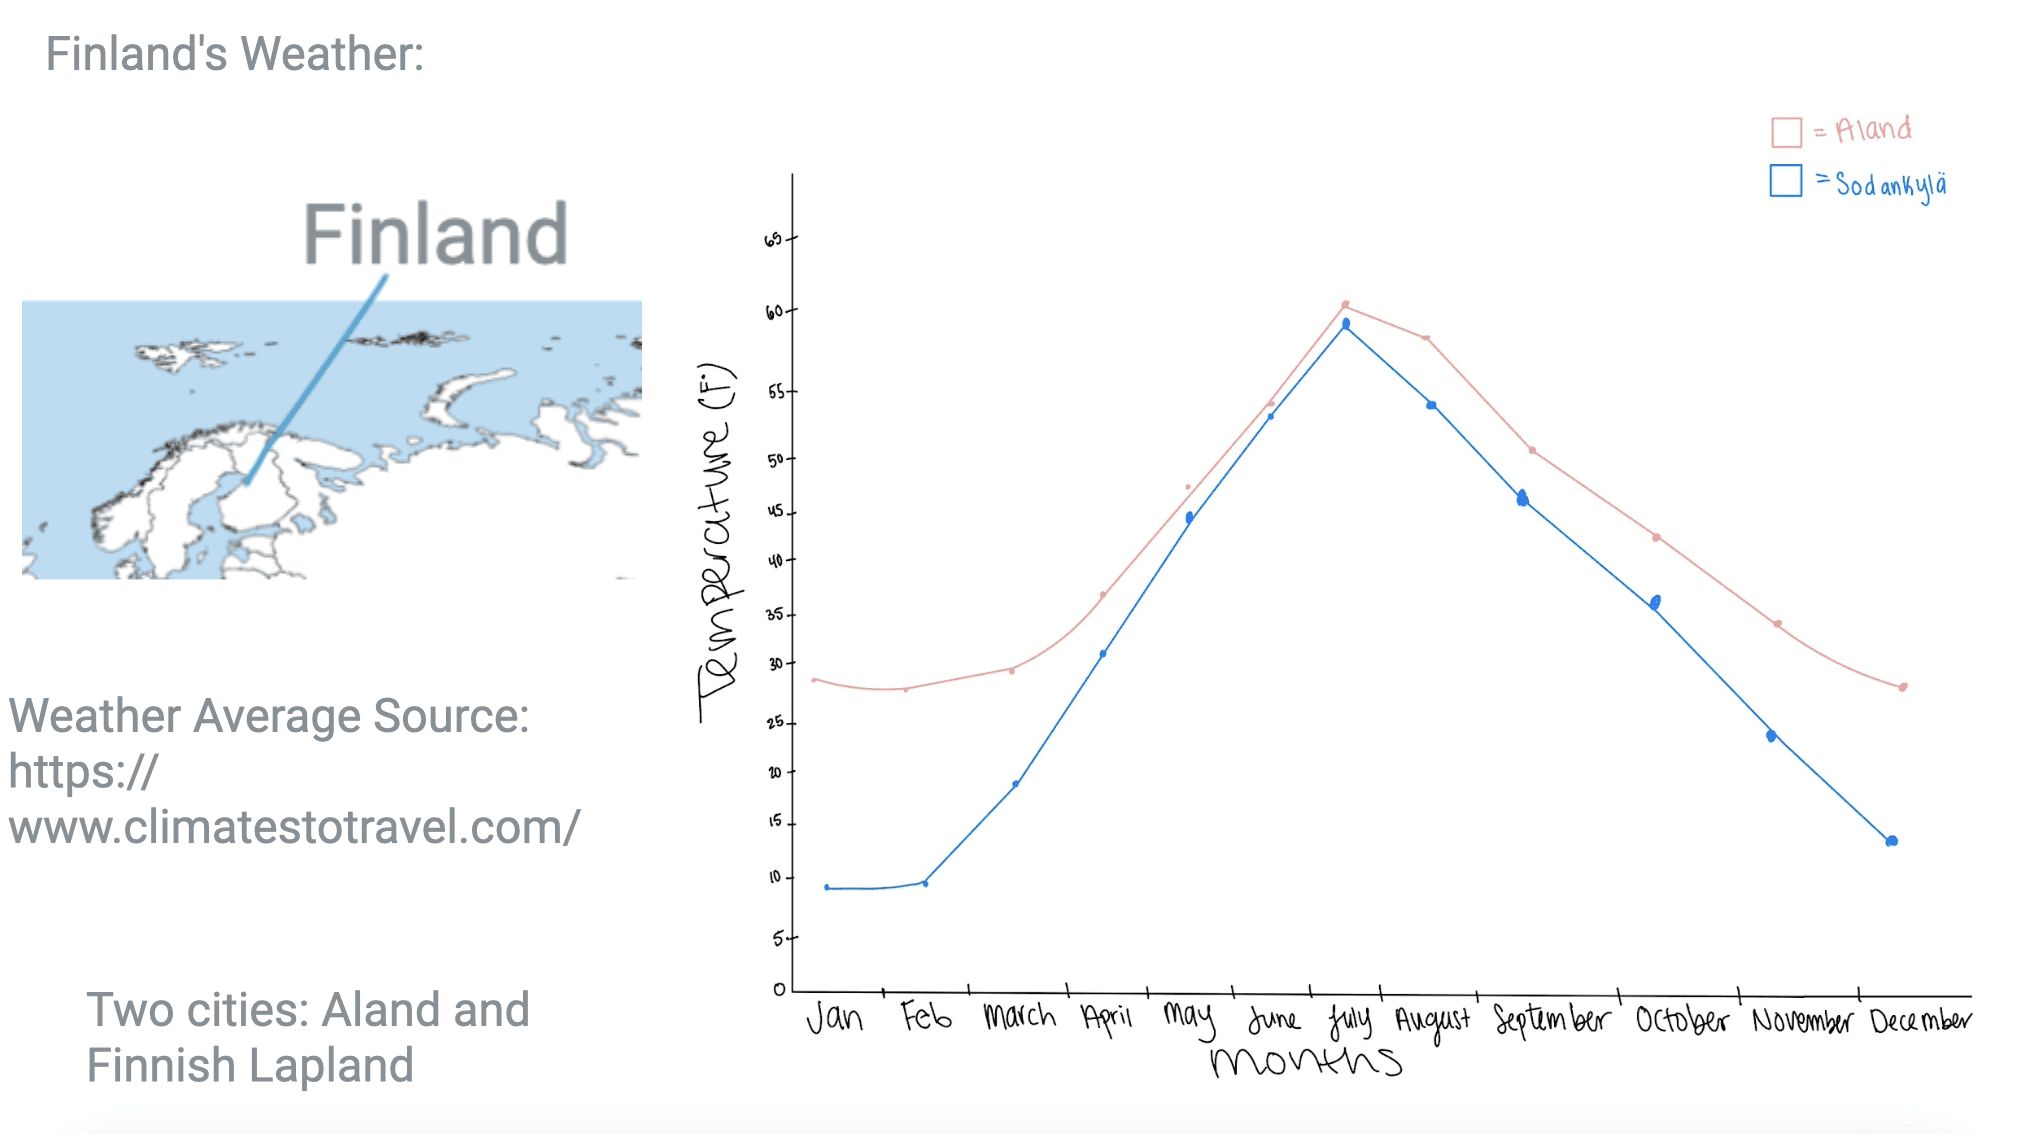
Sample of final product – My example below of Finland’s weather:
(My graph done on my iPad)
How tech resources and tools support reaching instructional goal: The state standard is to analyze data of weather from different regions and using technology gives the students the tool to find the data to analyze.
At the end of this lesson, students will be able to identify words with the starting sounds from the letters Bb, Dd, Gg, and Jj. This is based off the kindergarten common standards:
CCSS.ELA-LITERACY.RF.K.2 Demonstrate understanding of spoken words, syllables, and sounds (phonemes).
CCSS.ELA-LITERACY.RF.K.2.D Isolate and pronounce the initial, medial vowel, and final sounds (phonemes) in three-phoneme (consonant-vowel-consonant, or CVC) words.1 (This does not include CVCs ending with /l/, /r/, or /x/.)
“Hello friends! Today we are going to practice our letter sounds for the letters b, d, g, and j. I want everyone to open up their iPads to the SeeSaw app. Push that lightbulb button and you will see an assignment for today. Click on the image for the assignment and it should open up Jamboard! Once your screen looks like mine, put your pencil over your head.
Okay class, lets look at this first slide together. What letter is at the top? A, thats right! What sound does the letter A make? aaaa like apple! Nice job! What pictures do you all see on this slide?
Excellent job! Now notice how all the pictures, drawings, and words start with the aaa sound. I want you all to hit the arrow at the top and flip to the next slide. Now there are two letters! What letters do you see? Thats right! What sound does the letter Bb spell? Good and what sound does the letter Dd spell? Okay I want everyone to put on their thinking caps and think of words that start with those two sounds. Once you have an idea, you can draw it, write it, or find a picture of it and add it to a spot on the Jamboard under the letter it starts with.
Now remember, Jamboard is a learning tool, so we don’t use it to draw silly pictures or to mess with our friends ideas, we are responsible with it or we lose out on the ability to use it.
Once you’re done with Bb and Dd, hit that top arrow again and do the same thing with Gg and Jj. Put your pencil over your head when you’re all finished and we’ll look at all our classmates ideas together!”
For the teacher: If students are struggling to come up with ideas, prompt them to think about categories (“what are some foods you like? animals? etc.). Once students are finished, go through each letter section together as a class, verifying answers and showing different examples. If a student makes a mistake, frame it as a learning opportunity and have the class discover which sound that example word begins with. For example: oops, caterpillar does not begin with Dd, class can anyone fond which letter it does begin with?
This lesson utilizes individual student iPads to give every student a chance to contribute to the project. Seesaw is used as an organizational tool to make it easy for kindergarten students to access the Jam board through an app they’re already familiar with. Jamboard makes phonologic awareness fun and exciting for students, giving them a chance to draw, write, and find pictures.
Authors: Lannie Hisashima, Mykaela Onishi, Elizabeth Lyons-Best
Subject/Grade: Science/4th grade
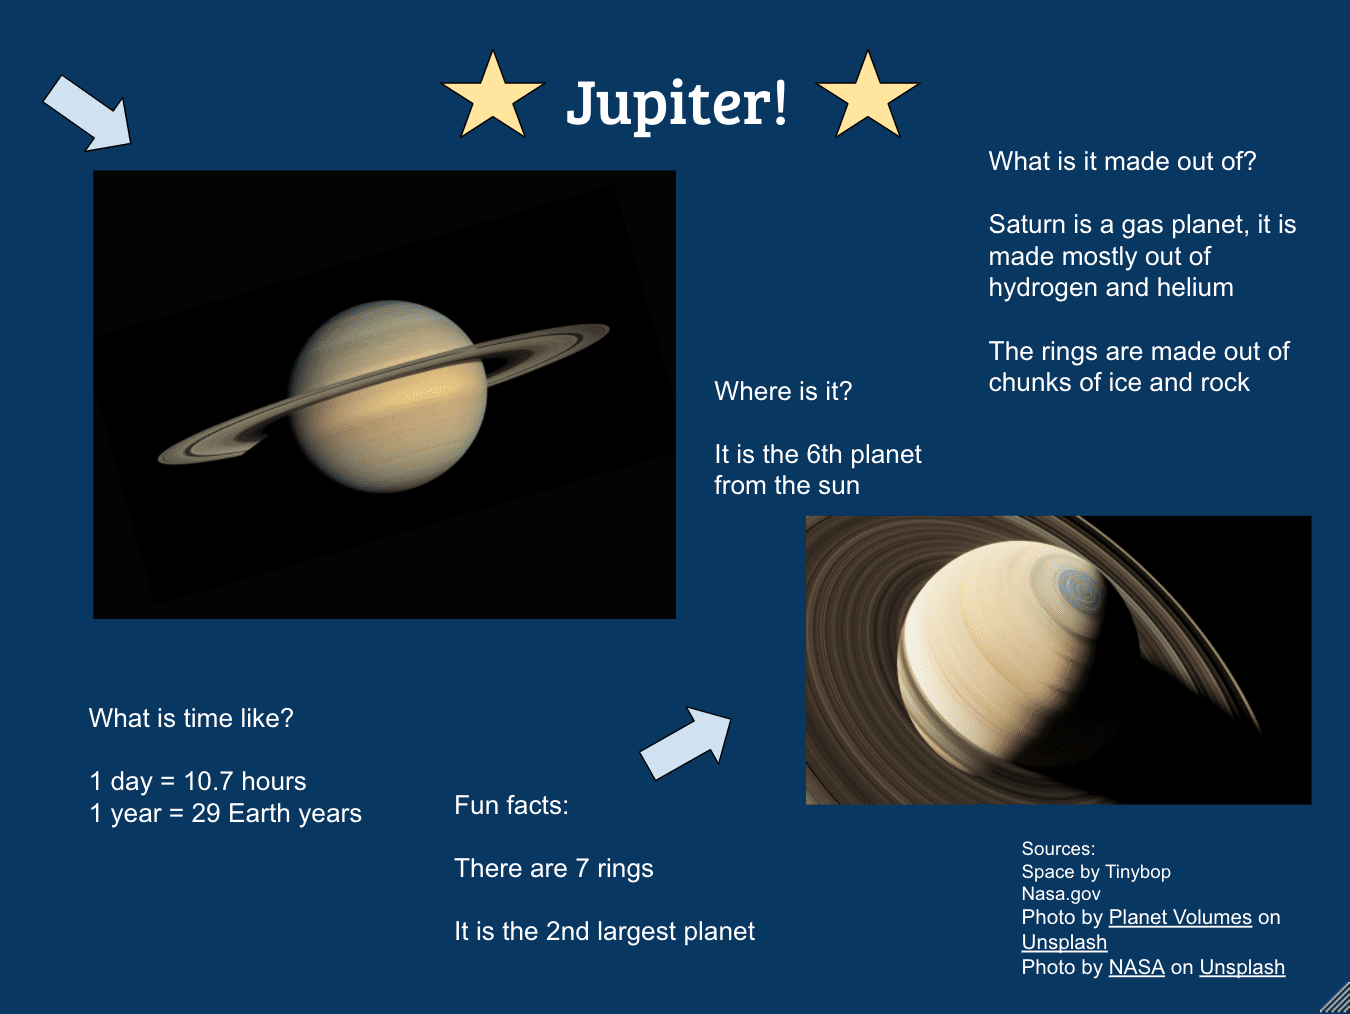
Instructional Goal: Students will learn about planets in our solar system. They will be able to research an assigned planet and synthesize the information into a poster. They will be able to use the app Space by Tinybop on their iPads to research. They will be able to use Google Drawings on their computers to make a creative poster that includes text and images.
Lesson outline:
“Alright my fourth-grade scientists, as you know for the past few days we have been learning about our solar system and the planets. Remember our planets include: Mercury, Venus, Earth, Mars, Saturn, Jupiter, Uranus, and Neptune! Now, since we have become more familiar with these planets, you all are going to be split into groups to learn more about planets. I will be assigning a specific planet to each group. Then, you and your group will create a Google Drawings poster to present to the class. Each group will be responsible for creating a poster that includes images of your planet as well as at least five interesting facts that you find about your assigned planet!
You will be working with your group to research your assigned planet. On your iPads, you will find a new app called “Space by TinyBop.” In this app, you will be able to explore your planet and find many facts about the planet that you can include in your poster.” (The teacher can project the app onto the board to give the students a virtual tour to familiarize them with the app. The teacher can also go over an example of what their poster should look like in Google Drawings.) “Now, you will be splitting off into your groups to research and create your poster!”
Teacher will then assign students into groups and let the students know what planet their group will be working on.
Students will have group work time to collect information from the app and create a poster regarding their planet. The teacher will roam the room to answer any questions and monitor student work time.
Note:
This research and poster creation may take longer than one class period. Similarly, students will be able to present their poster to the rest of the class during their next science class.
If the students do not have access to iPads/Chromebooks, they can conduct research through books within the classroom, handouts from the teacher, and other sources.
Student Tech Resources/Tools:
iPads
Chromebook
Space by Tinybop app
Google Drawings
Other research material as needed (books, websites, etc.)
How tech resources/tools help students reach their instructional goals: These tech resources help students research and learn about their assigned planet, and organize their research in a comprehensive and visually appealing way.
Instructional Goal: The learner will be able to explain or describe the life cycle of a butterfly from egg to adult butterfly.
Outline of Lesson:
Students will have basic understanding and background of the life cycle of animals of insects.
Today, we will be learning about the life cycle of a butterfly. As butterflies become adults, they go through many changes. This is known as metamorphosis.
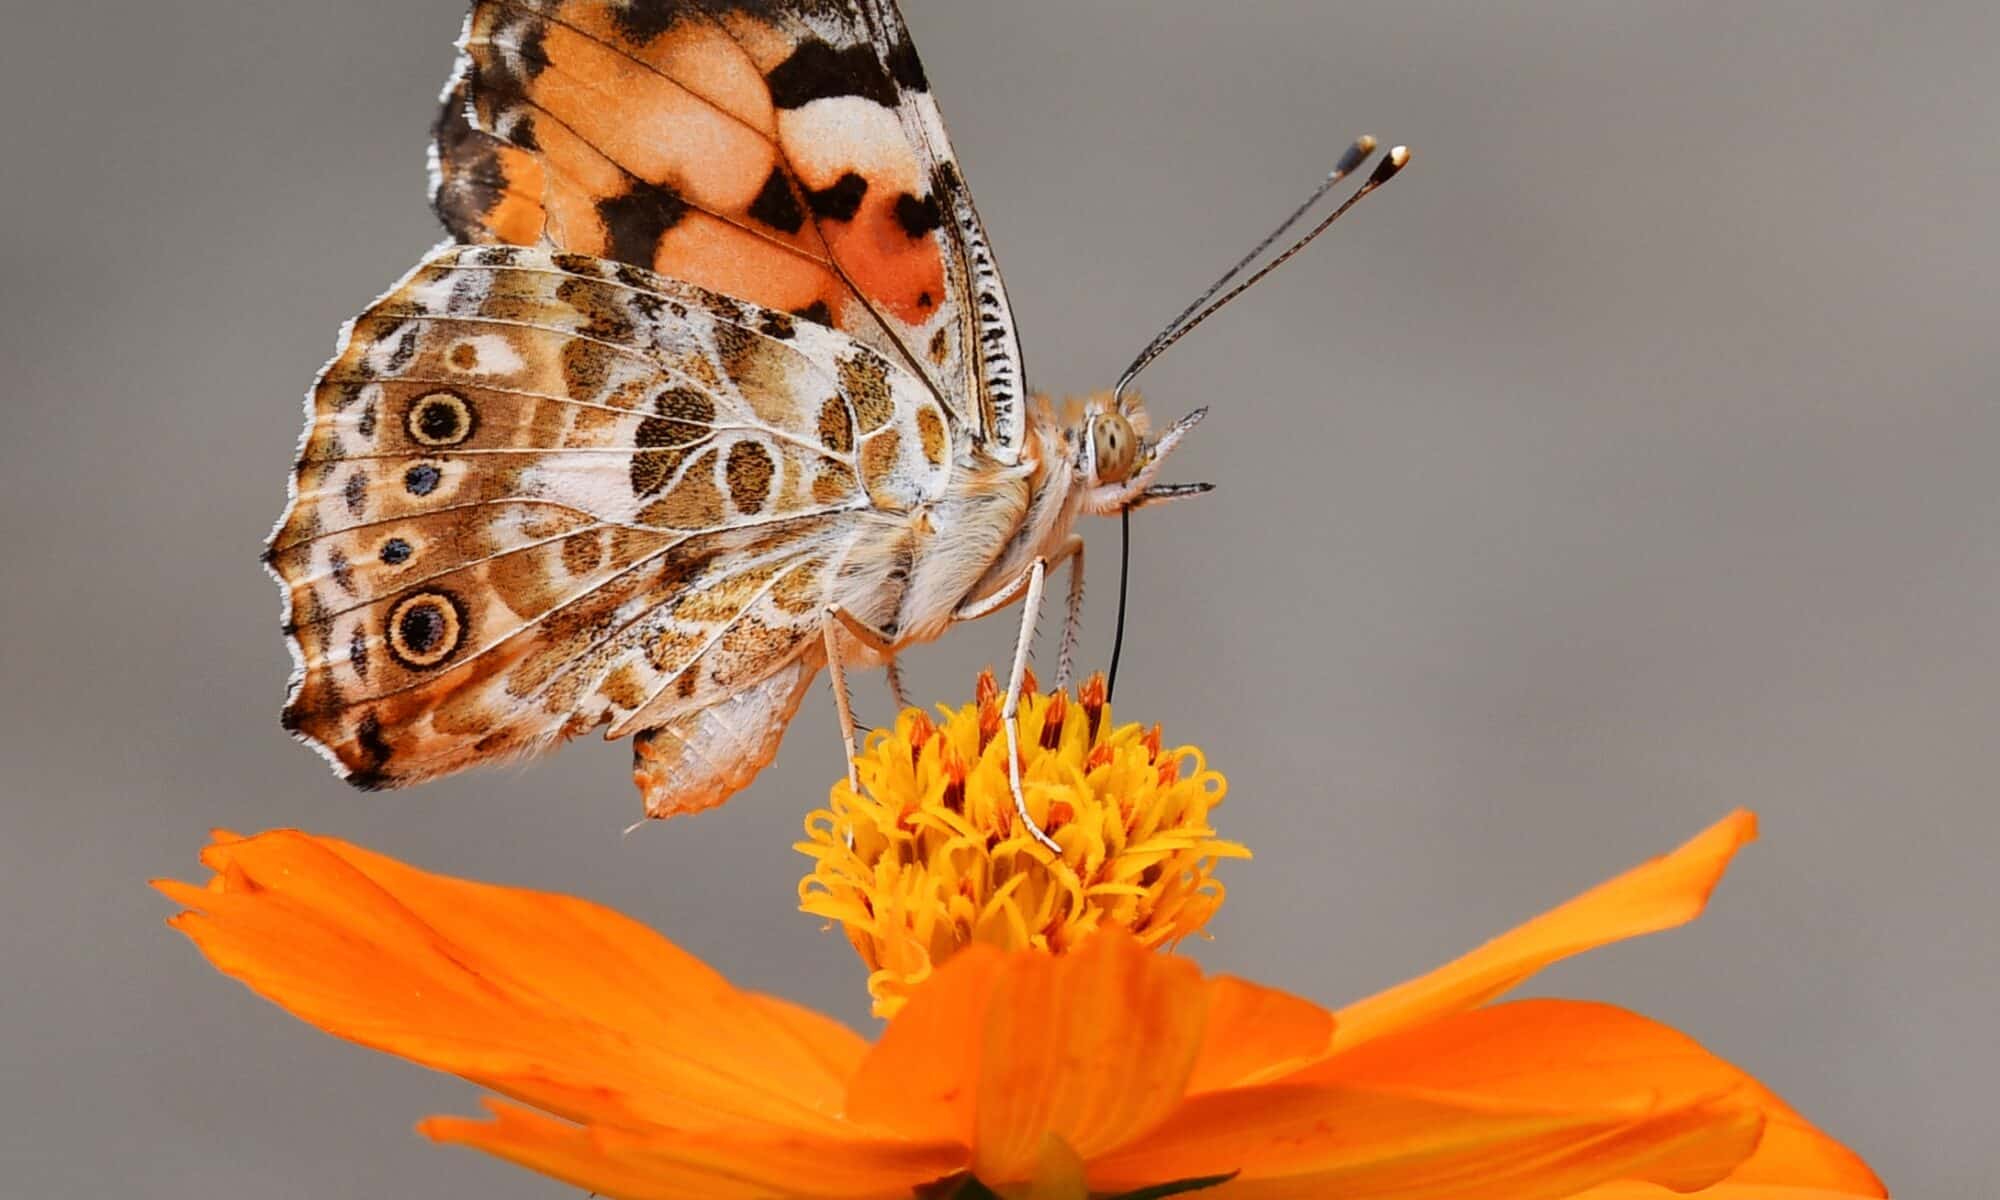
Before we dive in, we want to dive into special body parts of butterflies. Some familiar ones you also have are eyes and legs, but they have three special, unqiue parts: their wings which help them fly, their antennae to help them smell, and proboscis which helps them drink.
Now we will be drawing the proboscis after watching this video on what it does and what it looks like.
There are four stages in the life cycle of a butterfly.
The first stage of the life cycle is Eggs:The mother butterfly lays her eggs on leaves.
The second stage is the Larva stage, at this stage the animal/insect is very young and look very different from the adults. Butterflylarva are called caterpillars, when they first hatch the caterpillars are very small.
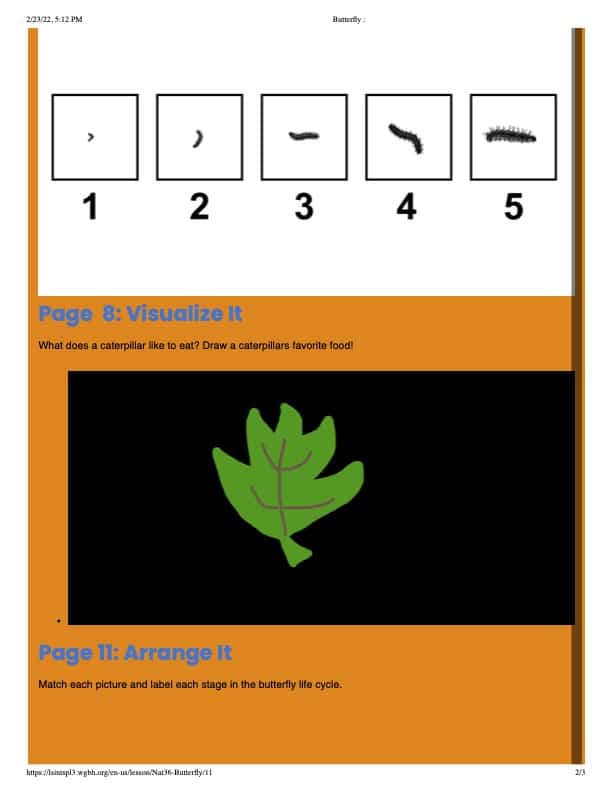
Another name for larva is catepillar. The most important part for the larva to turn into a butterfly is that they grow big so they can progress into the next step. Now I want you to arrange the catepillar from beginning to end and show how it changes over time.
Before they move on to their next stage, I want you all to follow the directions on page eight of our activity and draw what you think they eat. Eating helps catepillars grow and turn into… pupa!
The third stage is the Pupa stage: when a caterpillar reaches their last install, she stops eating and forms herself into a chrysalis, which is also known as a butterfly pupa.
The last stage is the Butterfly stage: Once the butterfly is ready, the chrysalis splits open. The cycle is complete – and ready to start all over again!
One last task, can you all please organize the life cycle of the butterfly like it asks you to do on page eleven?
Good job today second graders, now we know the life cycle of a butterfly.
This website is an interactive lesson that can work alongside the teacher, it gives them fun drawing activities to engage their scientific knowledge. The technology resource helps students grow an understanding of the specific process of butterflies and their unique growth from childhood to adulthood. The source provides a chronological sequence for students to follow from when the egg is laid to when the butterfly exits out of metamorphosis. With this chronological sequence, students are able to show their understanding along the way and provide evidence to the teacher as they move through the lesson.
Standards: Draw and identify lines and angles, and classify shapes by properties of their lines and angles.
CCSS.MATH.CONTENT.4.G.A.1 Draw points, lines, line segments, rays, angles (right, acute, obtuse), and perpendicular and parallel lines. Identify these in two-dimensional figures.
CCSS.MATH.CONTENT.4.G.A.2 Classify two-dimensional figures based on the presence or absence of parallel or perpendicular lines or the presence or absence of angles of a specified size. Recognize right triangles as a category, and identify right triangles.
Target student group: 4th-grade math
The instructional goal of the lesson: Students will be able to identify angles in the real world.
Outline:
Okay, mathematicians, please join us on the rug for math time! Today we will be reviewing our work on angles in the world. Let’s first watch this video!
Can everyone hold up your arms to show me an acute angle? Great! An acute angle is less than 90 degrees! Can you show me an obtuse angle? Yes! An obtuse is bigger than 90 degrees and smaller than 180 degrees. I am seeing lots of big arms! Finally, can you show me a 90 degree angle with your arms? Nicely done!
Not only do we see angles in math, we can also find them in the world around us!
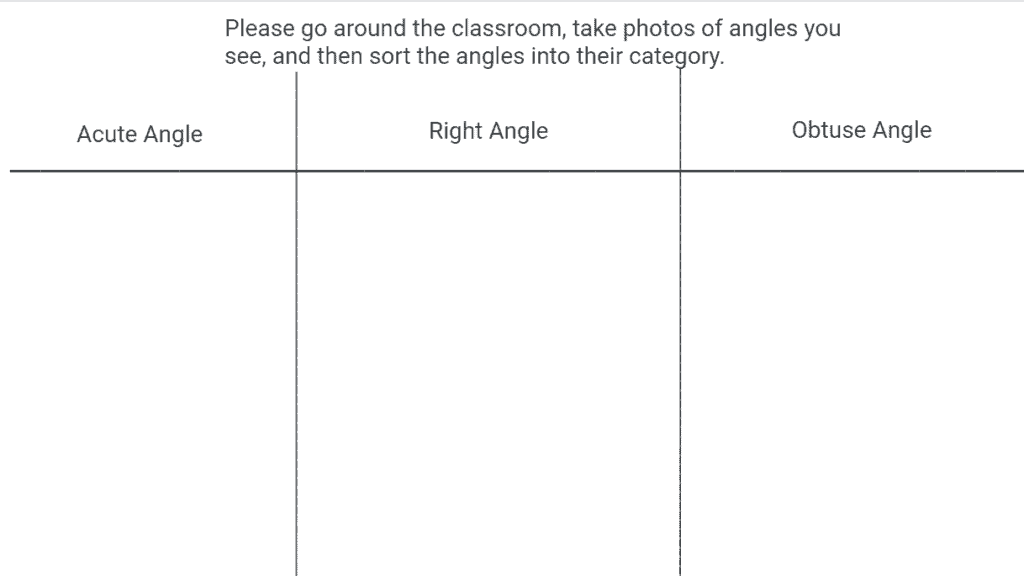
To practice, please get into pairs for a scavenger hunt! I am going to share a Jamboard with you all and I want you to work with your partner to find examples of acute, obtuse, and right angles around the classroom. When you find one, take a picture of it, put it in the Jamboard in the correct category.
Click on the image to access the Jamboard.
Great job! I challenge you to find three more angles at home today and then tell me about them tomorrow!
This activity helps students identify and compare learning to real-world objects rather than just practicing on a worksheet. If the teacher/students wanted to take learning to the next step they could practice identifying the degree of each angle.
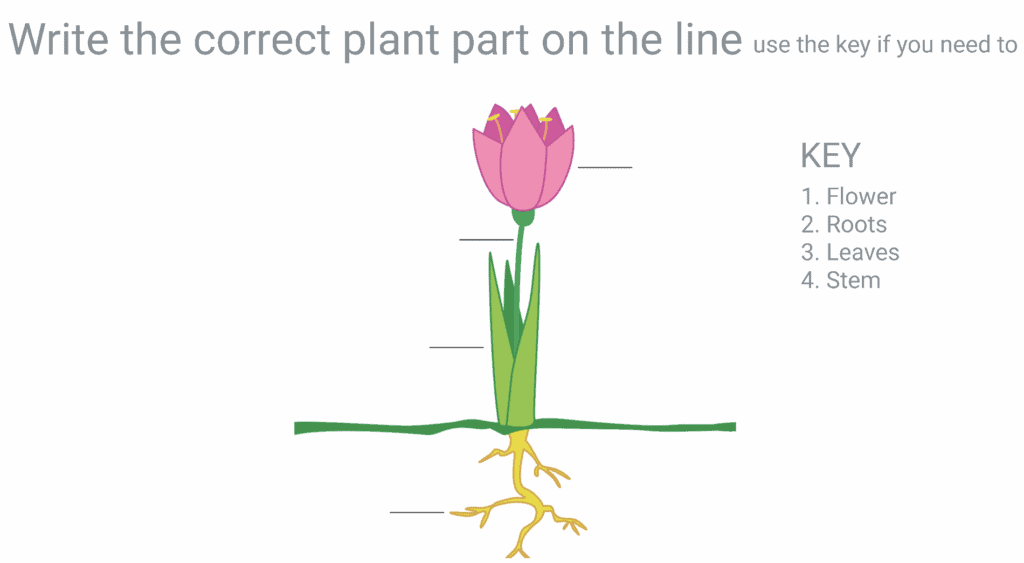
Instructional Goal: Students will learn and understand the parts of a plant and how each of them contribute to a plant’s survival.
Outline of lesson process (explanation to fellow teachers):
1. show this video to help students learn about the parts of a plant
2. have students practice labeling the parts of a flower on the first slide of the Jamboard
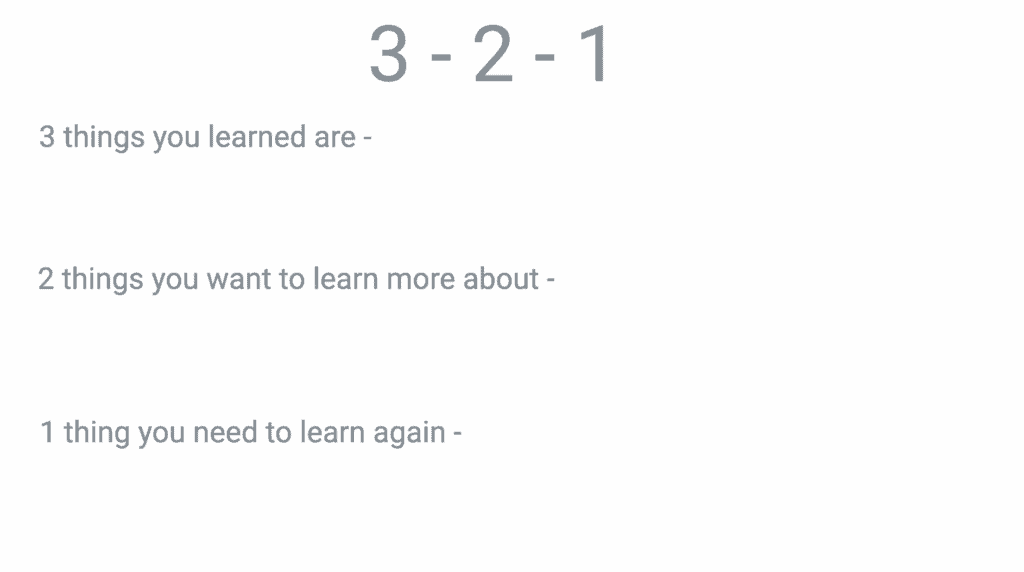
3. have students do a 3-2-1 (3 things you learned, 2 things you want to learn more about and 1 thing you need to learn again) on the second slide of the Jamboard
Tech resource for this lesson: Jamboard (activity & exit ticket)
How tech resource supports instructional goal: This tech resource supports the instructional goal of having students understand the parts of a plant because it is a way for them to test their knowledge of what they have learned. The second slide of the Jamboard will help the teacher know how well their students grasped the key concepts and will give them feedback if re-teaching is necessary.
Who have landed in the place they once dreamed they’d call home.
Happy hearts, happy minds,
I’m home in the city of spontaneous adventure in the sun.
Eager to explore and find new places,
I’m home where adventure is right outside your door.
Others say I’ll melt,
They can’t image living in the triple digits,
But there’s nowhere like the smiling faces of home,
And the comfort from the glowing rays of sun.
I used Microsoft sway because of the ease of creating a product. The images are easy to find and add and there are so many quick ways to design a document. I’m looking forward to creating different get to know me projects with this tool.
A place where board shorts are constantly worn under palm trees
Hawaii is where I was a high school grad.
Maybe home is a place where my heart feels most at peace
I’m thankful to have traveled with my family
It has built me piece by piece.
I used Adobe Express because it felt more user friendly when creating a poem. Similarly, I enjoy using the gliding picture tool in the app because it almost reminds me of a memory. When discussing different memories from different places I have lived, the gliding tool felt the most fitting. I think Microsoft Sway would be the most beneficial when presenting about a specific topic; however Adobe Express seemed the most helpful in terms of this assignment.
And despite the odds they face, they strive to win
I am from my parents, Kat and Pat
Two peas in a pod
My models for sure
When I feel sad, they’re my cure
I am from a role where I’m a big sister
I try to lead and protect
His name is Kian
He’s one of my best friends
I am in a place where I’m trying to ground my feet
At a university where I’m learning to teach
I’m excited to see
What the future holds for me
I choose to use Sway because I enjoyed how simple it was. This website is easy to understand and not hard to figure out. I think once you figure out the design aspect and how you want to present your information, it makes for a good resource to be used in the classroom (either by the students or for the students).