Creativity with Technology

Throughout high school and during my first year and a half of college I despised the idea of students using technology within the classroom on a regular basis. I was under the impression that technology took away the creativity and imagination that students should have, while at school. While I still prefer more interactive and hands-on types of lessons, I have come to the realization over the course of this class that there are numerous ways to engage technology within lessons that still allow students to showcase their knowledge, creativity, and individuality. Not only that, but there are many ways that I will now be able to implement technological resources into my own classroom that will make the learning fun and interactive for the students. Since the beginning of COVID-19, schools have needed to adjust to online platforms. While we are back to (semi) “normalcy” in the classroom setting, it is important to have these resources and it has made teachers more well rounded to keep up with the times. Instead of dreading the implementation of technology in my future classroom, I have come to embrace it and use it whenever I can. Over the course of this class, I have learned many new ways to implement technology in my future classroom. Below are a few of the lessons that I have been able to construct over the semester.

Google Forms

Whether it is to automatically grade assessments, create a choose your own adventure quiz, creating surveys, or anything in between, Google Forms is just the tool. I have used Google Forms briefly in the past; however, through this assignment, I was able to create a space assessment and an interactive choose your own adventure quiz! This lesson displays how I used Google Forms for a first grade science lesson regarding “Earth’s Place in Space.” The assessment gives the students automatic feedback for if they got the answer right or wrong, which is very helpful. Similarly, students can explore different routes in the choose your own adventure quiz to get different answers/adventures! Google Forms will be a helpful tool to use more in the future.

Adobe Express

This lesson was used as an example of how someone could use Adobe Express in the future. In my future classroom, I would love to have students create their own poem or website that showcases their “home” much like this one. Similarly, this is a unique poem that I could show my students so they have a better understanding of who I am as a person. Many times students forget that teachers are real people, too. By allowing students to see a more vulnerable side of myself, through the form of a poem, they would have a better grasp of who I am. This lesson could also be adapted for many different projects such as projects about different habitats, the plant life cycle, etc.

Book Creator

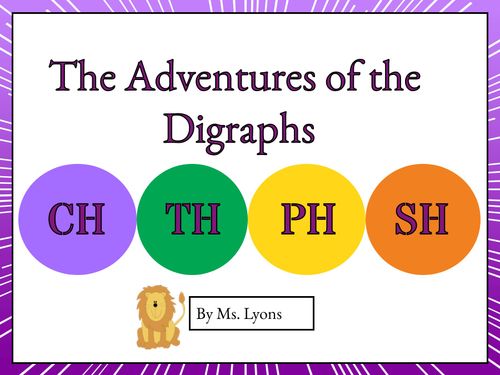
I created a book called “All about Digraphs!” which discusses the different digraphs “sh,” “ph,” “th,” and “ch” and their personality traits. Book Creator allows the designer to do voiceovers, which would be helpful for reading to the students, and in my case, recording the sounds that the digraphs make. This particular book gives students ample opportunities to practice digraphs as each digraph page primarily uses words with the respective digraph. This would be a fun and engaging way to help primary students practice reading and understanding digraphs. I would love to use Book Creator in the future as well because I feel as though students would enjoy books specifically made by their teacher. This would also be fun to have students create their own books for a project!

Google Sites

This collaborative lesson was an exciting one. Marlee and I created a website that would be useful to share with parents and students in the class. The website showcased me as the teacher and described my hobbies and interests. This also serves as an example of what the students page on the website might look like. The website also includes multiple resources regarding where the school is, classroom materials, classroom technology, etc. Google Sites can be used to create subject based lessons or classroom materials, such as mine! I look forward to creating more sites in the future.

Conclusion

Overall, I have come to the realization of how helpful technology is within the classroom setting. I plan to incorporate all of these tools into my own classroom in the future and I look forward to having my students make projects on these platforms, as well. Instead of discouraging technology in the classroom, there are so many ways that it can be useful, creative, and interactive, all at the same time.

All About Shapes Pre/Post Assessment

Target Group: First Grade

Instructions For Students: Students will be given the shape attributes Google Form Assessment at the beginning of a unit regarding shapes and their attributes (number of sides, angles, open/closed, etc.) Students will take the pre assessment on their iPads or laptops. This assessment will be given so the teacher can gauge any prior knowledge that the students may have regarding the content and adjust the unit accordingly. Similarly, the students will take the same Google Forms assessment at the end of the unit, to serve as a post assessment. The teacher will be able to compare the pre and post assessment data to determine how the students improved over the course of the unit and determine if the learning targets were met. At the end of the shapes unit, the students will not only complete the Google Forms, but they will also work on a Google Drawing in order to apply their knowledge of shapes in order to construct a flower that has specific shapes as each part of the flower (i.e., rectangle stem, rhombus petals, etc.) This additional part of the post assessment for the unit will allow students to not only demonstrate their knowledge on shapes and their attributes but also apply this knowledge in order to construct a picture. The students will only complete the Google Drawings for the post assessment, not the pre assessment. Students will have creative freedom with their Google Drawing because they will be able to chose the colors of their flower, the rotation of the triangle petals, etc.

Instructional Goals: The goal of the pre assessment is to determine how much prior knowledge the students have regarding shapes and their attributes. The goal of the post assessment is to determine whether or not the learning goals of the unit were met and if students can apply their knowledge regarding shapes to construct a model with specific shapes.

Explanation for Using Google Forms/Google Drawings: Google forms allows students to receive immediate feedback and gives students immediate answers to address common misconceptions. Google Forms also gives the teacher immediate results which allows the teacher to compare results from the pre and post assessment easily. Google Forms can also allow the teacher to create different types of questions such as multiple chose, selecting all the applicable answers, rating scales, short answers, and more, which are great features for giving assessments. Google Drawings allows students to have creative freedom to either draw or use provided shapes to create their own flower. Sometimes, drawing shapes by hand might be difficult for the students; therefore, by allowing students the option to use the shapes given by Google drawings, the teacher will be able to tell exactly whether or not the students are aware of which shapes to use for which part of the flower. Google Drawings also allows students to chose their own colors and sizes of shapes which would be interactive for the students because they can make the flower their own, while still presenting the needed material. Students will be able to reach a higher level in Bloom’s taxonomy with this drawings element of the post assessment because they will be creating and applying their knowledge, rather than just demonstrating their retained knowledge from remembering and understanding in the form of a pencil/paper test on Google Forms.

Below is the Pre/Post Assessment regarding shapes and their attributes.

Below is the Google Drawings with the instructions and answer key. In order to incorporate this into the classroom, the students would be given the Google Drawings with the instructions and a blank form.

The Adventures of the Digraphs!

Audience: First Grade

Topic: ELA, Digraphs

Purpose: The purpose of this story is to give students practice with reading and decoding the digraphs “CH,” “SH,” “TH,” and “PH.” This book introduces the students to the four different digraph characters and the characters tell stories or talk about themselves, using primarily words that begin with or have their digraph letters within the word. This will help students recognize when digraphs are at the beginning of and within a variety of words. This book will help students with their alliteration as well, as many of the sounds on the respective digraph page is the same.

May Day is Lei Day in Hawai’i!

Target Group: 4nd Grade, Social Studies

Context of Lesson: Students have been learning about different states and their history, travel destinations, and unique attributes. The students have learned about the other states and now are beginning their last state lesson on Hawai’i, since it is the 50th and last state to join the United States. The target date for this lesson is May 1st, because May Day is a tradition that is very popular on the islands of Hawai’i, which takes place on May 1st. The teacher will introduce the lesson to the class and explain that over the course of the last few weeks, we have been learning about the various states within the country and today is the last lesson! The class will begin with a short video explaining different facts about Hawaii.

After the video, the teacher will explain that today is a great day to explore Hawai’i, as it is May Day which is celebrated on the islands of Hawai’i with beautiful parades, hula, and lei giving/making. The class will go through the Google Maps as a whole group and explore five different locations around the Island of O’ahu. The teacher will begin at the first location and go through the map to show the students all the locations, pictures, and brief history of the location marks.

After exploring the map as a whole group, the teacher will allow students to go on their own devices to further explore the different islands through books and MyMaps and make a poster of facts about Hawai’i. Student posters can include facts, maps, etc. Students will have 30 minutes to create their posters and then can present their findings to a small group.

Goal for the Lesson: Students have been researching different states and their history over the course of the last few weeks. After this lesson, students will complete their unit regarding the different states because Hawaii is the last state that they are exploring. After this specific lesson, students will have a greater idea of the state of Hawai’i’s history, facts, and traditions. The video, map, and poster will allow students to see, explore, and apply their knowledge of the 50th state.

Needs VS Wants

Grade Level: First Grade

Activity: This is a first grade Economics Social Studies lesson. Students will be watching a video on EdPuzzle that discusses the differences between “Needs” (Shelter, Food, Air, Etc.) versus “Wants” (Cupcakes, Cars, Toys, Etc.) While the students watch the video there will be multiple points in which they have the opportunity to answer both open ended and multiple choice questions. After hearing about needs, students will be able to either write or say something that is a “need” in their lives. In addition, students will be able to name a “want” in their lives after wants are described. Then, the video will show different examples and there will be a section in which students are able to chose whether something is a need or a want. After the video is watched, the students will complete a “Needs vs Wants” sorting activity in which they cut out different pictures and glue the pictures under either the “Need” section or “Want” section.

Instructions:

  1. The teacher will open the lesson with a review on the previous economics lesson and then discuss the new topic of “Needs” versus “Wants”
  2. After the lesson begins, the students will be able to watch the EdPuzzle on “Needs VS Wants” on their school provided electronic devices (Chromebooks, iPads, etc.)
  3. Students will watch the video and answer the questions, as they are prompted throughout the video. Within EdPuzzle, the students will not be able to continue through the video until the questions are answered.
  4. After the video is watched and the students answer the questions on the video, they will be able to complete a sorting activity on needs vs wants in which they cut out pictures and glue them on the correct section.

View “Needs vs Wants” video below!

If the embedded video does not work, click on the EdPuzzle link here.

To infinity and beyond!

  1. Self Graded Quiz- Earth’s Place in Space Unit Quiz

In my cooperating classroom, my first graders are learning about our solar system. This quiz will help the students assess how well they know the information and help the teacher know if there are any misconceptions that the students may have. The feedback given immediately after the quiz will allow the students to reflect on their results and answers. Here is a quick quiz I made about space unit!

2. Branching Form- Choose your space adventure

This branching form would be a fun activity for students to choose their own space adventure. This would be a fun way to either begin the unit to get student’s thinking about space (in a fun, unrealistic way) or to end the unit, as a celebration! Students will have the option to go to the moon or mars and encounter many obstacles on the way!

Let’s Make Planet Posters!

Authors: Lannie Hisashima, Mykaela Onishi, Elizabeth Lyons-Best

Subject/Grade: Science/4th grade

Instructional Goal: Students will learn about planets in our solar system. They will be able to research an assigned planet and synthesize the information into a poster. They will be able to use the app Space by Tinybop on their iPads to research. They will be able to use Google Drawings on their computers to make a creative poster that includes text and images. 

Lesson outline:

“Alright my fourth-grade scientists, as you know for the past few days we have been learning about our solar system and the planets. Remember our planets include: Mercury, Venus, Earth, Mars, Saturn, Jupiter, Uranus, and Neptune! Now, since we have become more familiar with these planets, you all are going to be split into groups to learn more about planets. I will be assigning a specific planet to each group. Then, you and your group will create a Google Drawings poster to present to the class. Each group will be responsible for creating a poster that includes images of your planet as well as at least five interesting facts that you find about your assigned planet! 

You will be working with your group to research your assigned planet. On your iPads, you will find a new app called “Space by TinyBop.” In this app, you will be able to explore your planet and find many facts about the planet that you can include in your poster.” (The teacher can project the app onto the board to give the students a virtual tour to familiarize them with the app. The teacher can also go over an example of what their poster should look like in Google Drawings.) “Now, you will be splitting off into your groups to research and create your poster!” 

  • Teacher will then assign students into groups and let the students know what planet their group will be working on.
  • Students will have group work time to collect information from the app and create a poster regarding their planet. The teacher will roam the room to answer any questions and monitor student work time.

Note:

  • This research and poster creation may take longer than one class period. Similarly, students will be able to present their poster to the rest of the class during their next science class.
  • If the students do not have access to iPads/Chromebooks, they can conduct research through books within the classroom, handouts from the teacher, and other sources.

Student Tech Resources/Tools:

  • iPads
  • Chromebook
  • Space by Tinybop app
  • Google Drawings
  • Other research material as needed (books, websites, etc.)

How tech resources/tools help students reach their instructional goals: These tech resources help students research and learn about their assigned planet, and organize their research in a comprehensive and visually appealing way.

Sample of a student poster:

Photo Credit: Photo by Guillermo Ferla on Unsplash

Where is Home?

https://express.adobe.com/page-embed.jsWhere is Home?

My family is in the military

Where goodbyes are the norm

Where the meaning of home is a mystery

Because it is not where I was born.

I am from evergreens and roses

A hipster sort of haven

Where bridges span the town

Oregon is where I built my foundation.

I am from cornfields and yellow brick roads

Where you see sunflowers and tornadoes

A click of the heel will take you home

Kansas is where my family grows.

I am from peach trees and bumblebees

From red dirt and hay rides

A place where back roads free the soul

Georgia is where my family still resides.

I am from sunshine and rainbows

Where the swell is always rad

A place where board shorts are constantly worn under palm trees

Hawaii is where I was a high school grad.

Maybe home is a place where my heart feels most at peace

I’m thankful to have traveled with my family

It has built me piece by piece.

I used Adobe Express because it felt more user friendly when creating a poem. Similarly, I enjoy using the gliding picture tool in the app because it almost reminds me of a memory. When discussing different memories from different places I have lived, the gliding tool felt the most fitting. I think Microsoft Sway would be the most beneficial when presenting about a specific topic; however Adobe Express seemed the most helpful in terms of this assignment.

Telling Time!

Context of Lesson: First Grade, Mathematics, Telling Time

State Standard: Tell and write time. CCSS.MATH.CONTENT.1.MD.B.3 Tell and write time in hours and half-hours using analog and digital clocks.

Hello my first grade mathematicians! This week, we have been learning about how to tell time on both digital and analog clocks. Today, we will be focusing on reading an analog clock. As a reminder, when reading an analog clock the short hand is the hour hand. This means that whatever the number the little hand is pointing to is the hour of the day. In contrast, long hand is the minute hand and tells us the minutes of the hour! When looking at the clock, we count by 5’s! So if the minute hand is pointing toward the 1 then the time would five minutes past the hour and if it was pointing toward the 2 it would be ten minutes past the hour. By the end of today, we will be able to determine the hour and the minutes within the hour in order to tell time on an analog clock!

Now, we are going to be using a Google Drawing of a clock. I will be projecting the clock on the board and you will each get a white board and marker. I will rotate the hour hand (the short hand) and the minute hand (the long hand) and I want you all to write down the time on the white board. When prompted, you will hold up the whiteboard and we will compare answers!

(Teacher passes out the individual white boards and markers. Teacher displays the Google Drawing on the board and rotates the minute and hour hand to display different times. The hands are moveable; therefore, it will be simple for the teacher to rotate the arrows to the different times quickly. The teacher will instruct the students not to hold the board up until instructed. The teacher will go over the answer and count by 5’s each time depending on where the minute hand is to show the students the pattern. Do this 7-10 times depending on how well students seem to grasp the concept. This will act as an informal formative assessment because the teacher will be able to notice if students are struggling and will be able to see if students need more explanations and another lesson how how to read an analog clock.)

https://docs.google.com/drawings/d/e/2PACX-1vSyMfO9Tprg3u061M-t2ONgqXBoYg9ARfPOfCkDUdQi545WVnt9j6P6ih35SM-MJZBdDJlpmIwb4QHj/pub?w=960&h=720

Long Ago vs Today

Grade: 3rd Grade

Subject: History Topic: Placing Events on a Timeline

Hello my third grade friends! Today we will be beginning a new history unit about comparing events that happened long ago versus events that have happened within the last few months. Timelines are a good way to show time passing and to show the order in which events have occurred! By the end of today, we will be able to place events on a timeline, in the order they occurred, through the use of a Jamboard, in order to show time passing.

Today, we will be using Jamboard to place events that happened earlier in the school year as well as events that happened today. By doing this, we will be able to show that we can organize events based on the order they happened. You will have access from your iPads to write your answers on a sticky note on the Jamboard. I want you to think back to something memorable that happened this year in school. What month did this happen in? Now, I want you to open Jamboard, write your answer on a sticky note, and place the event under/above the month that it happened

(The teacher will then allow the students to open up the Jamboard link. The students will write their event on the Jamboard under/above the month in which it happened. After allowing the students a few minutes to think of an event and write it on the Jamboard, the teacher will go through the timeline to double check all of the events to make sure they are in the correct order. If the school does not have access for all students to have their own device, they can either work with a partner or in groups. Similarly, if there is only technology offered for the teacher, the teacher can call on students and place the events on the timeline for the students on the Jamboard.)

A few minutes go by and edits stop on the Jamboard.

Alright my friends, we are going to go through the timeline together to remember the events that took place over the year! (Teacher goes through the Jamboard to make sure all the events are in the correct order and so students can reflect on their work) Great work today, historians! Next time, we will be looking at different events from the past and we will be able to place the events on a timeline so that we can remember when events took place and order them from long ago to today!

Link to Jamboard: https://jamboard.google.com/d/1ZcKsjSgbiLGomDGi0KrIMAS4T24ZanWmTYKAhvsbggU/edit?usp=sharing

Filling the Void

Imagine: It’s 9:00 AM on a Sunday morning. You sit on your couch, drinking coffee, pondering the positive and negative effects that technology has on your life. While sitting, waiting, and trying to compile a mental list of ways technology has made the world a better and worse place, your phone digs. A Snapchat comes through. You must open it right away because that seems like a much better way to spend your time than doing homework. After replying to the Snapchat, you get distracted by a TikTok notification which in turn wraps you into the never-ending “For You Page.”

Tik-Tok, Tik-Tok. An hour passes.

You still can not manage to finish your assignments because you have become completely engulfed in the different cat memes, recipe videos, and makeup tutorials that have now taken over the amount of time that you could have been spending on your homework.

It seems almost ironic for me to sit here and try to discuss the negativities that technology has had on the world and my life, when, in full transparency, I have allowed it to control many aspects of my life, including my last hour of time that I should have been working on assignments. I feel like we can all agree that technology is not going anywhere, so we may as well embrace different parts of it and allow it to benefit us, while also understanding that there are negatives that we need to be cautious of.

To begin on a lighter note, there are many ways in which technology has personally benefitted me. I have grown up in a military family, which has caused me to move from state to state, leaving my friends from different cities behind every few years. While sending letters in the mail is always an option, technology such as texting and social media has allowed me to keep in touch with so many different people that I have met throughout my moving experiences. The distance does not seem so negative when I can call my friends who live 2,000 miles away to catch up or see what they are doing through their Instagram posts. Similarly, my family and partner both live on the opposite sides of the United States. By having devices that allow us to communicate via FaceTime, the months in between when I see the most important people in my life does not seem like as much of a struggle.

Not only has technology benefitted my life on a personal level, but also a professional level. By having ample experience with different technology, I have been hired for multiple job positions. I worked as a photographer and video producer which allowed me to develop passions for photo/video editing which is now one of my favorite hobbies. On top of this, I have been assigned to create the TikToks for marketing for my job as a bridal stylist. Through these TikToks, our business has grown and many people are discovering the shop because of this platform (one of my videos actually received 1.2 million views!) Not only has technology helped my part time jobs, but I know it will help my teaching career as well. In my student teaching classroom, we use technology on a daily basis. I have found engaging and fun lessons from other teachers on Instagram and TikTok that I have tried in my own classroom. Similarly, we use technology for the students to be able to follow along by teaching with the iPad/projector. Students have been able to use exciting subject specific applications that allow them to learn different material in a way that benefits and interests them. We also use technology to allow the students to get up and dance through brain-breaks and mindfulness exercises. Technology in a professional setting has allowed created opportunities that did not previously exist.

Photo by Rami Al-zayat on Unsplash

With this being said, it is important to recognize the negative effects that technology can have on our lives because it is important to be able to create a balance between the real world and the virtual world. So many aspects of the world we live in is controlled by the technology at our finger-tips. As I was discussing earlier, we have become so dependent on technology and the distractions that it causes. Instead of using my time this morning to focus, I was enthralled by random, almost-meaningless videos. Instead of using my time to brainstorm by going on a walk or going outside, I spent my time negatively. Technology has become a crutch to fill the void. In social situations, when we run out of topics to talk about, most of us could admit that we take out our phone to fill the awkward silences. There have been countless times when my family is hanging out in the same room and we are all silent and on our phones instead of enjoying each others company. The first thing I do in the morning is check my phone and the last thing I do at night is scroll on my social medias one last time before setting my phone on my night stand. Why have we become so obsessed with the people on our screens instead of the life right in front of us? This obsession has caused us to develop a toxic mentality of the “perfect image” and deteriorated our personal skills. What are we trying to prove? Social media has actually enabled us to become less social people in the real world.

It is important to understand both the benefits and downfalls that technology has had on our everyday life. Technology seems as though it is around to stay; therefore, by understanding how we can better ourselves and our lives, we must understand how we can use technology in a meaningful way without allowing it to completely take over our ability to be a social and functioning society.