Rocks Rock!

Introduction to a week of fun geology themed learning activities for 1st-3rd graders.

Goal of the lesson

Students will be participating in a week of geology themed learning activities including three field trips. This would be something they do on the first day to introduce them to what the week is going to be like and to get them thinking about geology and its history. The goal of the lesson would be for students to navigate an interactive map and gather information from online sources about a specific topic. Hopefully they’ll be able to find something interesting that they can remember as we go throughout the week and share with friends or family!

Student facing instructions:

Hi Geologists! To start our week off, we’re going to look at a map of all the cool field trips we have planned. We’ll be going to OMSI, the Rice Museum, and Circuit Bouldering! Each of these places (including our school) are on the map and your job is to work with a friend to find find each place and learn some interesting facts by clicking on the links on each place. Let me know if you need any help!

Directions:

1. Find our school!

2. Find OMSI and learn something new about dinosaurs! Tell your friend what you learned and draw a picture.

3. Find the Rice Museum. What can you use labradorite for? Draw a picture of your favorite crystal.

4. Find the Circuit Bouldering Gym. What is the 5th highest mountain in the world?

Featured image: Photo by Oliver Paaske on Unsplash.

My Neighborhood & Me

Teaching a Kindergarten lesson on neighborhoods can be an excellent way to help children gain a sense of direction, distance, and familiarity within their own neighborhoods. Also, this presents a great opportunity in supporting children learning their own home address(es), as this is an important safety skill all children should have mastered by the end of Kindergarten.

This MyMaps activity requires previous class discussions on neighborhoods: what they are, who live in them, and other important features that make up the neighborhoods we live in. Serving more as a summative project, teachers can direct their students in using this tool to showcase important places in their neighborhood that are special to them.

Activity Instructions

  1. Using MyMaps, students will create maps of their neighborhoods by pinning four locations: one location MUST be their school and another MUST be their general neighborhood. For example, I live in University Park, so I added that marker as where I live. Some friends may need help with knowing what their general neighborhood is! (After maps have been shared with the class, encourage students and families to add their home addresses for further exploration and more precise locations).
  2. The last two locations can be anything students choose! A favorite place to eat, a toy store, or perhaps a friend’s neighborhood. Think of two places that you visit often or just really enjoy visiting that you think are important to you and your neighborhood. In my example, I chose my favorite restaurant and the grocery store I go shopping at every week.
  3. For all four locations, have students add pictures and one sentence stating what that place is.
  4. Lastly, have students choose any two destinations and pin the route from one to the other so that they may explore the different possibilities for travel. For my example, I chose to do from my neighborhood to school because that is the route I take most often. Allow students to choose their own two locations, or they can create routes for multiple! This will help them see the journeys they take to get to some of their favorite places.

Direct link to map: https://www.google.com/maps/d/edit?mid=1MG1iIdL4sVQMwbZhyey_S4VbMcugi04&usp=sharing

Aside from the directional skills students will gain from this lesson, it can serve as a great community-building activity. Having students share their maps (whole class or small groups) gives them the opportunity to share with their peers, places that are important to them and may encourage others to visit them too, ultimately expanding everyone’s neighborhood!

Featured image by Prawny from Pixabay

National Parks

Image by David Mark from Pixabay

This lesson is for 4th graders. For this lesson, students will be writing a persuasive piece on why the government should open and protect more national parks. Students will be given time to research what makes a national park and how many we already have in the US. Students will have to pick a park as their example and explain why we need more places like it.

https://map.proxi.co/r/GYpR7AZhGeIDu0-du0cN

powered by Proxi

What do you see? Do we have a lot of National Parks?

Today you will be doing research on the national parks and why they were created. You can look and choose from the map. if you click on the makers, you can see pictures from the actual park. You will choose one park and do research on it. You need to find at least 5 facts about the park. When you have written down the 5 facts, you will write a paragraph on why this park is important and special.

Travel Budget Project

The project I designed is a travel planning/budgeting project and is ideal for fourth or fifth grade. Students will be tasked to pretend they are a travel agent and plan a multi-day trip given a budget of $1,000 and plan an itinerary via Google My Maps. An important requirement is that the students must explore a culture or cultures outside of their own through planning this imaginary trip. This could be done through sight seeing, activities, dining, etc.

The above is an example map the teacher would show to students to help them gather inspiration. The example has a mix of free and priced activities, as well as different costing dining options. Students have the freedom to include accommodations, routes for a road trip, and more. The goal is for students to explore different cultures, stay within budget, and plan an exciting and fun trip for a potential customer.

Cover photo by Tae Fuller: https://www.pexels.com/photo/golden-gate-bridge-san-francisco-california-1141853/

Civil War Map Adventure

Targeted Students – This lesson could be used for middle or high school students who are studying United States History.

Instructions

Choose three of these locations to learn more about! Use the historical landmarks to help guide your research. Make a compare and contrast bubble chart of all three of the civil war battles to be able to highlight the similarities and differences. Use the map as background information on how where these battles have taken place influence their impact on the war.

Goal

The goal for this lesson is for students to get a better understanding of the major civil war battles and how their locations impacted their final outcomes. This map works towards the goal because it helps giving the students understand how these locations changed their impact of the war.

Exploring National and State Parks in the PNW

This is a lesson for 4th/5th graders that starts off a research and comparative writing project. In this project students will research a state and national park in the PNW and then compare and contrast them in a creative essay. The map allows students to explore several state parks and national parks all at once in order to get an idea of which ones they may want to research.Below are instructions for the students to follow:

Take a look at this map! What do you notice?

You may notice that the Map marks locations with two different symbols. The locations marked with the tree symbol are all State Parks. The locations marked with the mountain symbol are all National Parks. Do a quick write in your writers notebook: what do you know about state parks? what do you know about national parks.

You are going to be researching a State and a National Park in the PNW and writing a creative essay comparing and contrasting them.

Today your task is to:

1.Explore the map (look at the pictures for each location!)

2.Choose one State Park and one National Park from the map that you are interested in writing about.

3.Using your laptop, research the parks that you chose and find 5 interesting facts about each of them.

4.Record the 5 facts in your writers notebook. Make sure to include your sources!

Sources:

Map: Proxi

Featured image: Image by Art Bromage from Pixabay 

Tourist Spots in Portland

Introduction

This lesson is planned for students in a high school Spanish class. The focus of this lesson is to practice vocabulary in Spanish, and have conversations about their homeland. By this point, students would have practiced sentences structures to describe where they live and have conversations with other students to answer to those sentences and questions. This activity is meant for students to get more practice in speaking Spanish with other students, while also allowing them a chance to get to know more about their homeland.

Instructions

Students will create a map of their hometown, homeland, or someone special for them, and mark tourist sights, meaningful/historical places to visit, good restaurants even if they would like to. After marking places students think people should visit, they will form groups and work as “tour guides” to their groups, as they take them around their place speaking and practicing vocabulary in Spanish. Students will also look up information about their sights, so if questions come up, they are ready to respond to them in Spanish, as most tour guides can.

Example

I am from Portland, so I marked a few places on a map for people to visit. These are more tourist locations that I think people should visit at least once. After making the map, I will then form up in a group and then guide them through Portland, telling them some of the history behind some of the locations, and why I chose them.

Credits:

Image by David Mark from Pixabay

Image by Silviu on the street from Pixabay

Exploring Geometry with Google My Maps

Introduction

This lesson is designed for middle school students to apply their area formulas to real life locations. Ideally, students would have learned and had some practice already with the different area formulas. This activity would give them some more practice with the formulas and also let the students see how these formulas can be applied in real life situations.

Instructions

For this lesson, students will have the freedom to choose a location that they find interesting. Students could pick their school, a city, a country, or have a more general theme, such as landmarks. Students will work in groups to find the area of at least five items on their map. For example, students could find the area of a local park in their neighborhood, the area of a city block, or the area of a body of water.

Each group will create a custom map and label the five places they found the area of. Students will be able to use the measure feature on My Maps, but they will need to use those measurements to find the entire area of the location.

Example

In my example below, I found the area of three locations on the University of Portland campus. I used the area of a circle to find the area of Chiles Center, the area of a rectangle to find the area of Merlo Field, and the area of a triangle to find the area of small patch of grass in the Academic Quad. Students will be expected to label the location with the area and the formula(s) they used.

Featured Image: Image by piviso from Pixabay

Let’s Explore the Outdoors!

Hello 4th Grade Families!

Thank you for volunteering to come with us to Hoyt Arboretum this Thursday. The class is so excited to visit and see the nature they’ve been researching.

Here’s an outline of our time there (times are approximated):

  • 9:30am: Please plan to meet us at the Visitor Center around 9:00am. You may meet us at the school first but you will need to drive on your own and meet us there. We will be listening to a Nature Educator tell us a little about the trail we’re going on as well as the safety protocols before hiking.
  • 10:00am: We will begin our hike, which starts near the Stevens Pavilion. We will be dropping off students’ bags — make sure they take water bottles — before starting the fir trail (marked with triangles on the map). This will take about 45 minutes to an hour as the Nature Educator will be pointing out things along the way. Students will have a worksheet to take notes with — please make sure those around you are filling them out, and assist with any spelling/repeat questions when you can.
  • 11:00am: We will be finishing the hike back at the Stevens Pavilion. Students will be asked to share some of their thoughts about the hike as well as some of the notes they took. Afterward, we will be eating lunch at the pavilion.
  • 12:00pm: We will be returning to the Visitor Center after lunch to do a little recap with the Nature Educator.
  • 12:30pm: We will plan to leave the Hoyt Arboretum around this time, 1:00pm at the latest. All students must return back to school to do another recap in the classroom and finish part two of their worksheets before turning them in. We welcome you to join us in the room if you’d like. Students will then be excused at the usual time.

If you have any questions, please do not hesitate to reach out. We cannot wait to see you on Thursday — thank you again for volunteering!

Citations:

Photo by Engin Yapici on Unsplash

Oregon Trail

Hello 5th graders! Today we will be expanding our knowledge of the Oregon Trail. I know we started to talk about where the Oregon Trail began and ended, but we have yet to look at a map to get a clearer picture of how long this journey was. For today’s assignment, we will be using Google maps to follow their journey by going through each state they went through and seeing how long it took them to get through that state.

Goal

  • Students will be able to use Google maps correctly and by themselves to view the Oregon trail
  • Students will go through each state and see how long it would take to walk through it.

Materials

  • Google My Maps Account
  • Electronic device
  • list of states the Oregon Trail went through
  • Paper and pencil

Instructions

  • Students will log into their Google My Maps account and make their own map of the Oregon Trail based on the list of states they went through from the previous class.
  • Once the first map is finished of the full trail they will then do a map of the individual states on the trail.
  • They will then check to see how long it takes to walk across that state using the directions buttons and the walk feature.
  • Once they finish the individual states they will add up the amount of time it takes to walk each state to get the total time of the Oregon trial journey.

Image by Davgood Kirshot from Pixabay

West Region US Capitals by Map

Introduction

This lesson is aimed at 4th-grade students to help them learn about the different US capitals. For this lesson, I chose to focus on the US capitals in the western region, and you could make a similar lesson when focusing on the other regions within the US.

Instructions

For this lesson, students will look at the different state capitals in the Western region. Students will fill out a worksheet while they look at the map, where they write down the capital and match it to the state, as well as identify a specific geographic feature of that area (ie. mountains, lakes, rivers, etc.).

Goals/Objectives

This will allow students to learn the state capitals as well as practice identifying and recognizing different geographic features of regions. This also allows students to get a visual idea of where each state and its capital is located, creating a hands-on interactive activity rather than simply having students memorize the information.

Map

Worksheet

Featured Image: Image by Clker-Free-Vector-Images from Pixabay

Hop Along the Oregon Trail

Feature Image by Artodidact from Pixabay

Welcome 4th Grade!
Today, we will be starting our Oregon Trail unit!
We will:
– Set the historical context for the Oregon Trail and
– Understand the geography of the Oregon Trail

Historical Context
Let’s look at the history of the Oregon Trail using our journalist questions:
What was the Oregon Trail?
The Oregon Trail was a wagon trail that spanned about 2,000 miles.

Where was the trail?
The Oregon trail started in Independence, MO, and ended in Oregon City, OR. Along the way, travelers made stops at landmarks, or notable locations, such as forts, rock formations, and settlements. Many landmarks can still be visited today, such as Courthouse and Jailhouse Rock in Nebraska or Whitman Mission in Washington.

When was the Oregon Trail used?
While the trail was formed between the 1810s and 1840s, the largest wave of pioneers traveled along the Oregon Trail between 1846 and 1869.

Who traveled along the Oregon Trail?
Over 400,000 pioneers made their way along the trail. Amongst the pioneers on the trail were adults and children, families and single folk, slaves, and free persons looking for a better life.

Why did people travel the Oregon Trail?
Manifest Destiny was an American belief that pushed westward expansion. This belief in addition to the chance of owning land and finding gold caused many to make the 2,000-mile journey from Missouri to Oregon.

How did people travel the Oregon Trail?
Pioneers traveled in groups called wagon trains. Each wagon train consisted of 30 or more wagons, or prairie schooners, that were pulled by teams of horses or oxen. Additionally, because the pioneers had packed all their belongings in the wagons along with food and medicine for the journey, there was little room for traveling in the wagons. Because of this, many pioneers traveled on foot alongside the wagons and any livestock they had brought with them.
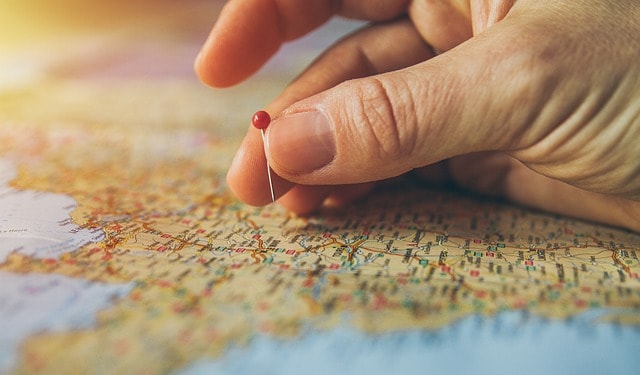
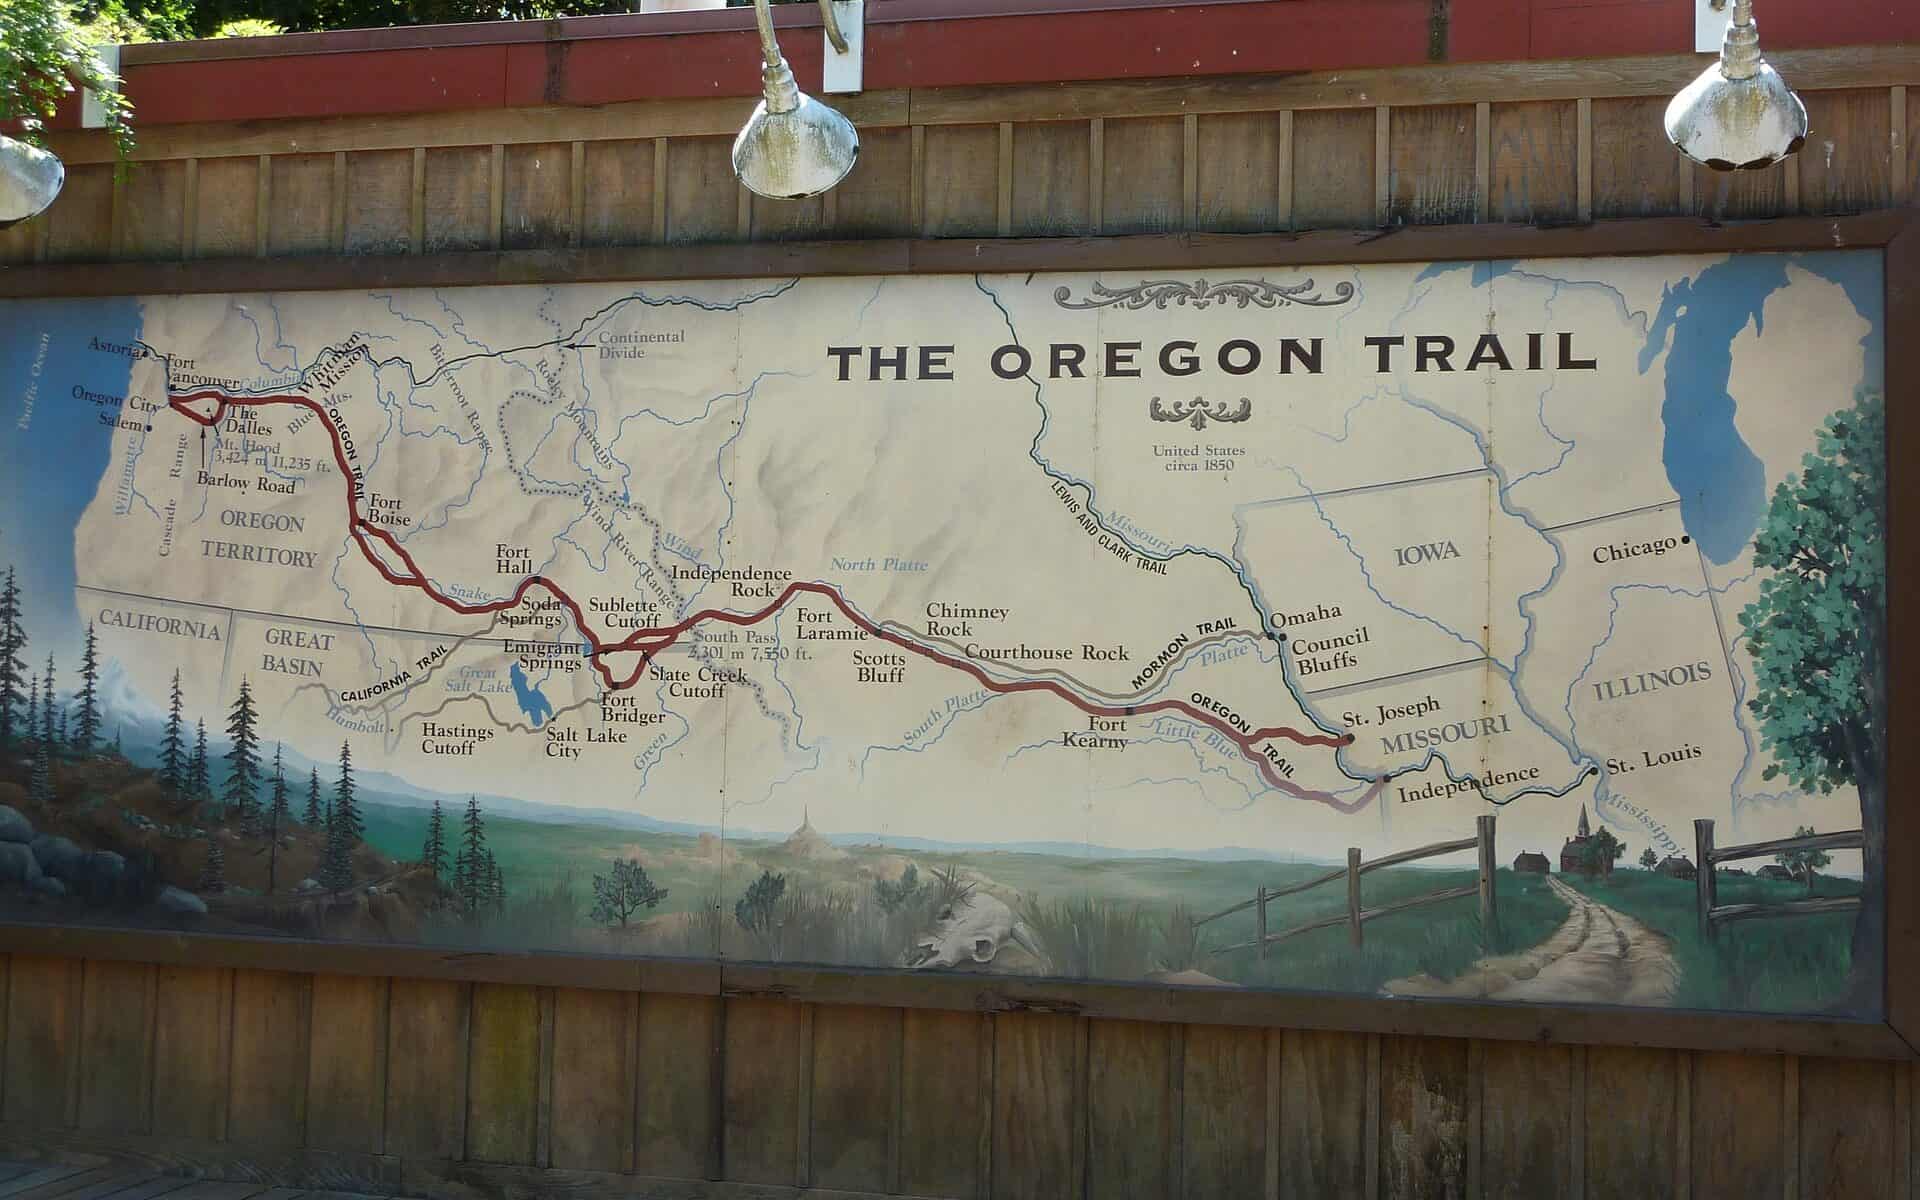
Map Analysis

Below is a map of the Oregon Trail. Take a couple minutes to examine it before we discuss it as a class.

Discussion Questions
-What is do you notice about the map as the trail moves westward? What happens to the terrain, or land?
-What landforms do you see on the map along the trail in Colorado, Wyoming, and Idaho?
-Recall our lesson on geographic features in the US. Which notable geographic features would the pioneers on the Oregon Trail have passed through?
-Using what you know about how the pioneers traveled along the trail, which parts of the trail do you think would have been the toughest? How do you think the pioneers overcame these obstacles?

Coming Attractions
Next class, we will look at:
-Life on the Oregon Trail and
-Interactions between pioneers and indigenous peoples along the Trail

Lesson Vocabulary
Landmark: a notable feature or object of a landscape that is easily recognizable
Manifest Destiny: an American belief that fueled westward expansion efforts in North America
Wagon Trains: a group of wagons that travels together
Prairie Schooner: another name for a covered wagon that comes from the bonnet shape of the wagon’s canvas cover
Terrain: a synonym for land
Landform: a feature of the land such as a mountain, plain, plateau, peninsula, etc.