
Featured image by Free-Photos from Pixabay
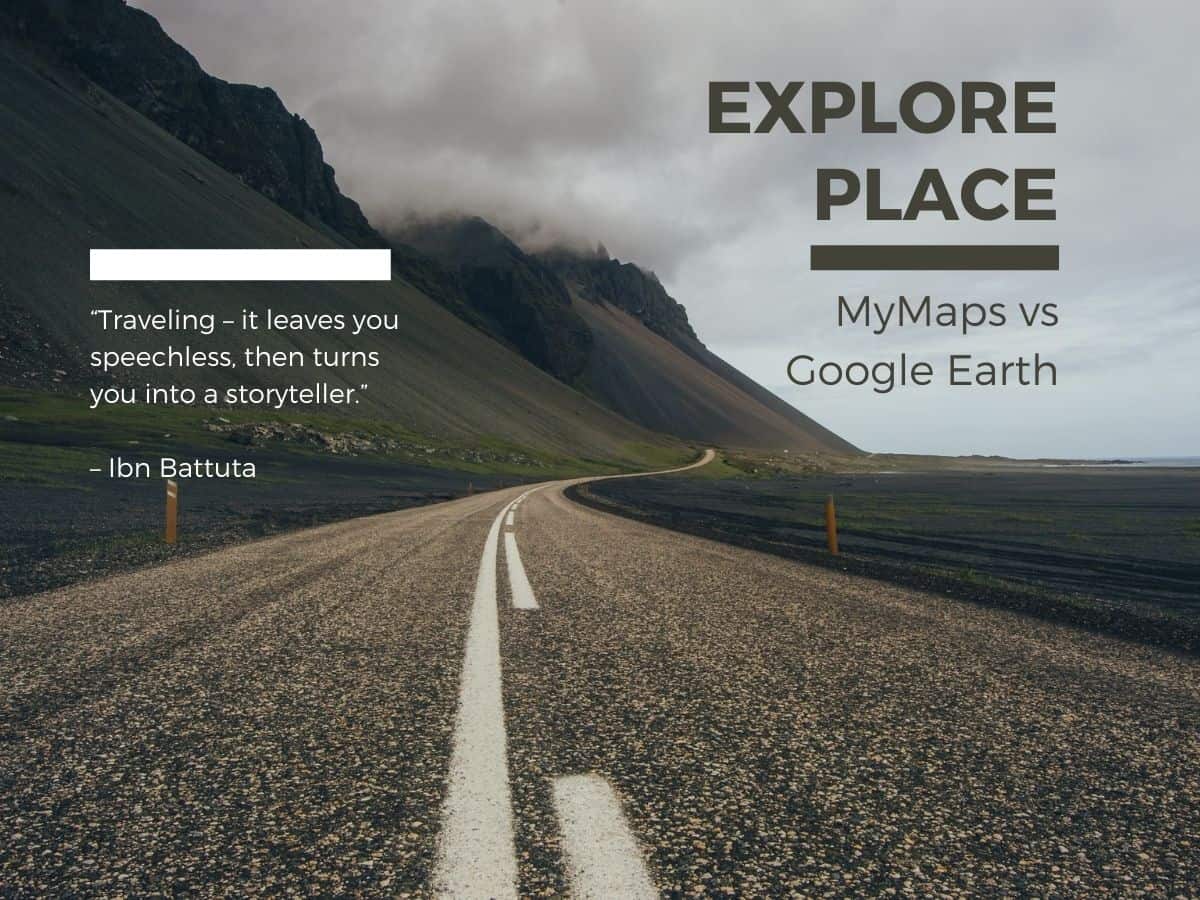
“Places are locations having distinctive features that give them meaning and character that differs from other locations. Therefore, places are human creations, and people’s lives are grounded in particular places. We come from a place, we live in a place, and we preserve and exhibit fierce pride over places.” ~ National Geography Standard 4: Place
Today’s class will explore interactive images with Google MyMaps and Google Earth. Both apps provide tools for teachers and students to create and share interactive maps that tell a story of place.
Google MyMaps is a great tool for visualizing place with a variety of content and locational tools. You can easily add photos, video, text, routes and shapes. You can collaborate and share your maps via email. It can be easily embedded in WordPress. MyMaps gets saved in your Google Drive account for easy cataloging.
Google Earth is now a web-based tool that can easily create engaging stories maps that tell a story. With creation tools, you can draw on the map, add your photos and videos, customize your view, and share and collaborate with others. You cannot embed in WordPress. Use a screenshot of you map as a hyperlink from your WordPress post to your map project.
Sample Project: Jane Goodall story
Google Earth “How To” in text and images
Students will work in teams during class time to explore both apps, compare instructional use and brainstorm ideas for use. Specific task:
- Design a map using MyMaps.
- Create a project in Google Earth (begin by searching for place then add to a “new” project)
- Be prepared to share your impressions of both apps.
- Share a few ideas for classroom use (and which app you would choose).
Assignment 7: Design a Map-based Lesson | Map lesson 22-A10
Students will create a MyMap or Google Earth Project to support a learning activity. Be sure to have multiple locations and some text or visual content at each location. Try these prompts:
- A community tour around school.
- A real or fictional journey.
- Explore the setting of a story.
- Plot locations of habitats / geographic features.
- Share an interactive map of a field trip with parents.
- Make a map of authors you’ve read
- Any other good idea
Your post should include:
- Title and featured image
- Target student group for lesson – grade level or subject
- Instructions for students
- Goal for lesson and how the map helps you meet the goal.
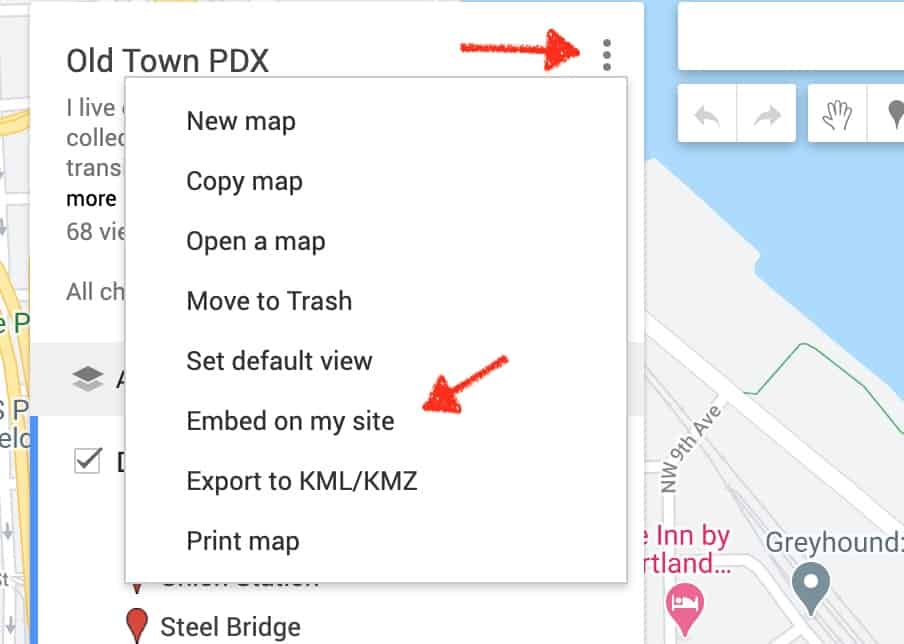
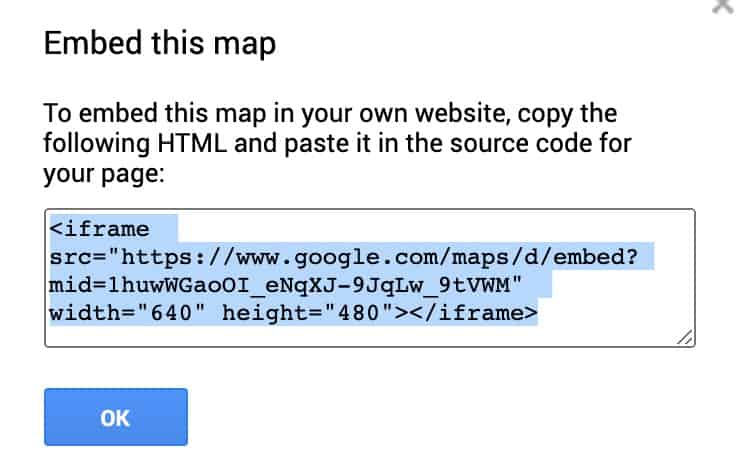
- MyMaps can be embedded in WordPress. Get an embed code and use with Custom HTML block Also include a direct link to your MyMap in your post.
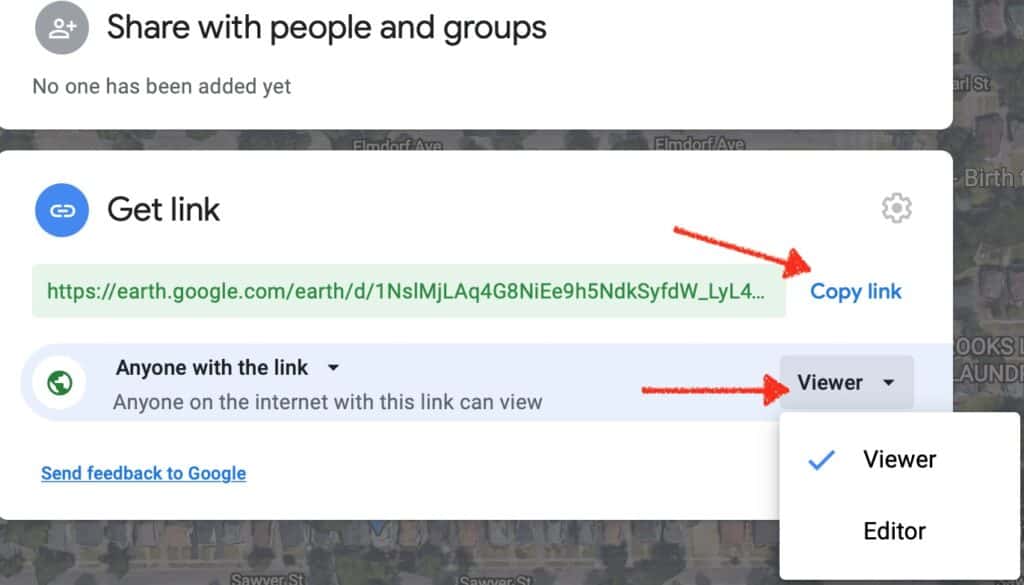
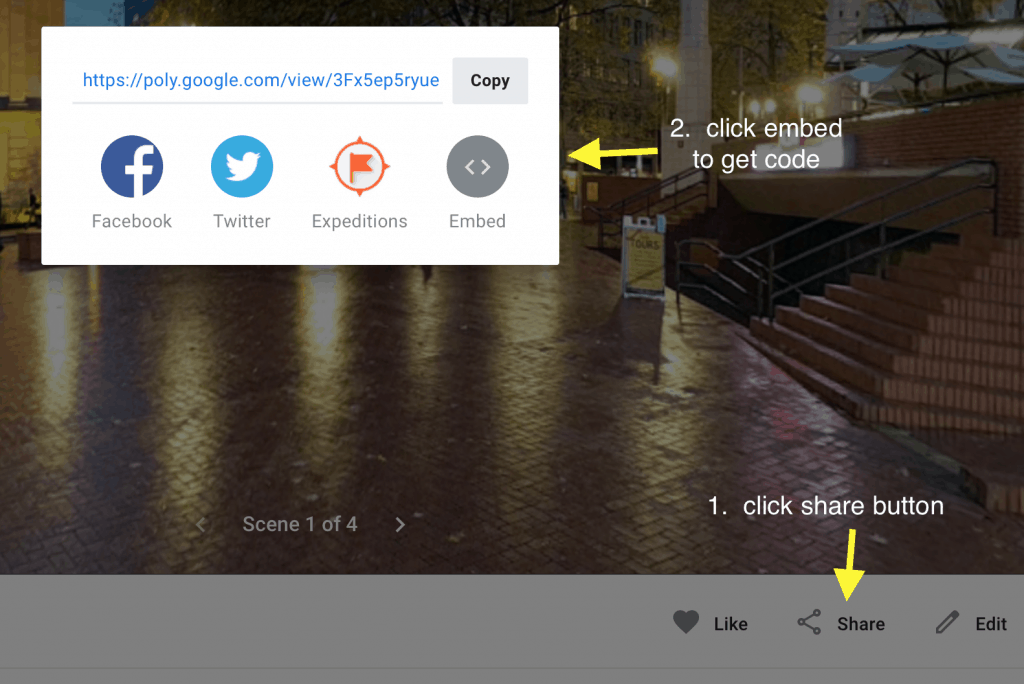
- Google Earth cannot be embedded. But you can take a screenshot and add a hyperlink to your map project.
Resources
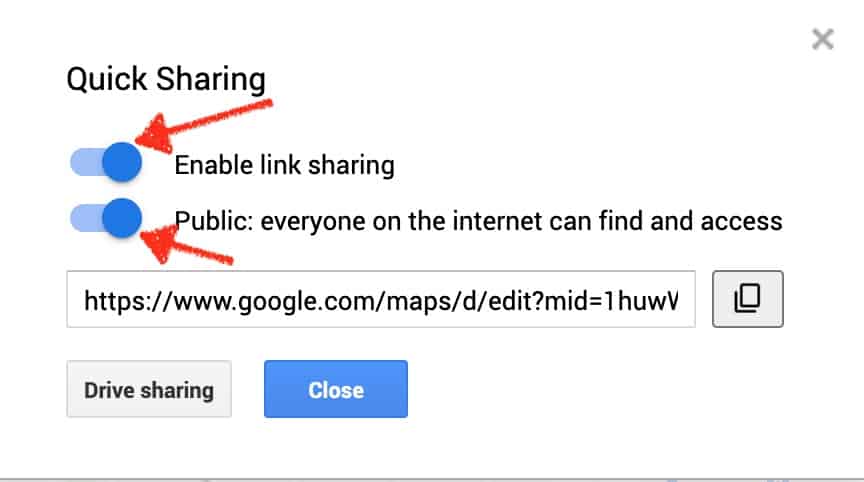
How to set sharing and get embed code from MyMaps
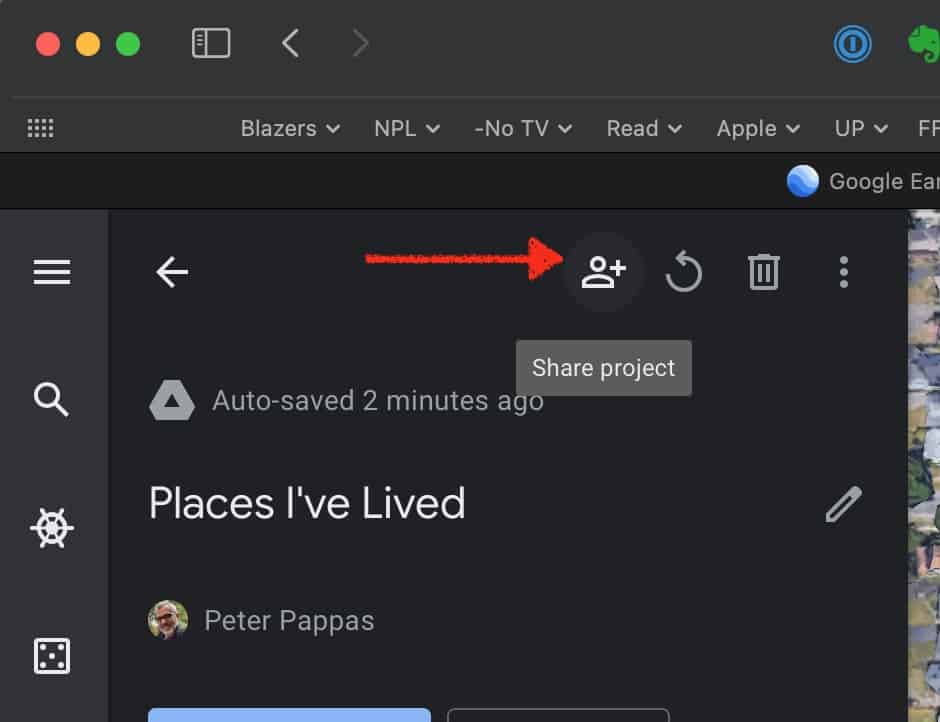
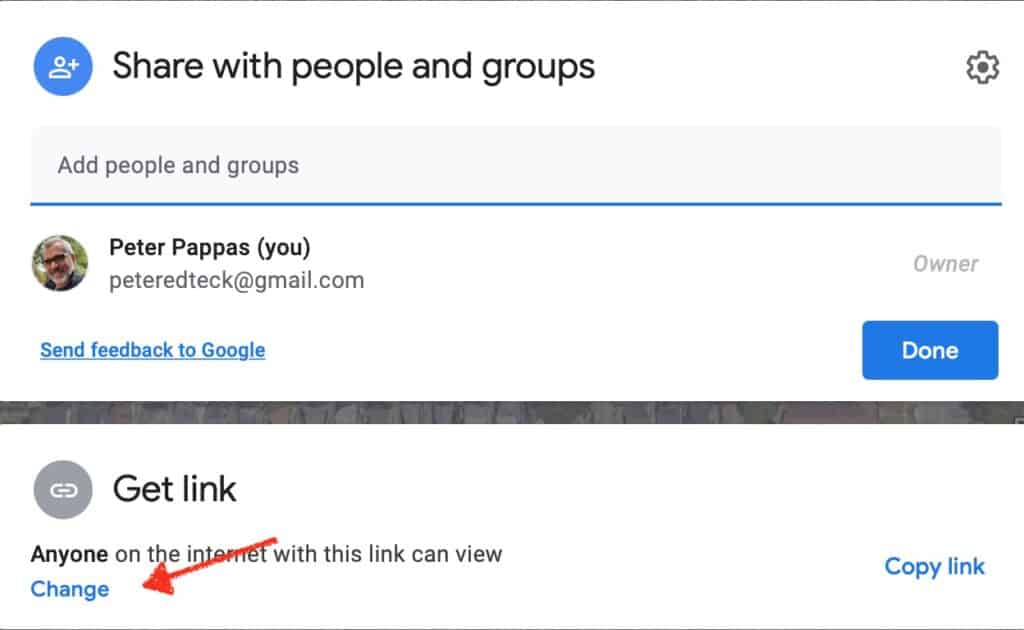
How to set Sharing in Google Earth – use a Screenshot of a portion of your map with a hyperlink in WordPress


